
KEY TAKEAWAYS
What You’ll Learn:
- How to make incredibly fluffy gluten-free American pancakes with just 6 simple ingredients
- The secret to getting that perfect thick, cloud-like texture without gluten
- Multiple dietary variations (dairy-free, vegan, and refined sugar-free options)
- Exactly how to store and freeze pancakes for quick weekday breakfasts
- Professional tips for achieving diner-quality pancakes at home
- Creative topping combinations from classic American favourites to British twists
Introduction
Right, let’s talk about pancakes. Not the thin, delicate crêpes we flip on Pancake Day here in the UK, but proper American-style pancakes. The thick, fluffy, stackable kind that my kids beg for every Saturday morning. You know, the ones that are more like little pillowy clouds than actual food?
As a Mom from Boston now living in the UK with my husband and four kiddos, I’ll admit I was a bit homesick for proper American breakfast food when we first moved. And whilst I’ve embraced so many brilliant British foods (hello, proper tea and custard!), there’s something about a tall stack of American pancakes drenched in maple syrup that just hits differently on a lazy Sunday morning.
But here’s the thing. Going gluten-free doesn’t mean you have to give up these breakfast beauties. In fact, I’d argue that these gluten-free American pancakes are just as good as traditional ones. Maybe even better. My kids can’t tell the difference, and neither can their friends when they come for sleepovers!
In this post, I’m going to show you exactly how to make the fluffiest, most delicious gluten-free American pancakes that’ll have your whole family asking for seconds. Whether you’re coeliac, gluten intolerant, or just trying to reduce gluten in your diet, this recipe is an absolute game-changer.
And the best part? You only need 6 basic ingredients and about 20 minutes from start to finish. No complicated techniques, no fancy equipment, just simple, delicious pancakes that actually work.
What Makes American Pancakes Different?
Before we dive into the recipe, let me explain what we’re making here, especially for my UK readers who might be more familiar with thin pancakes or drop scones.
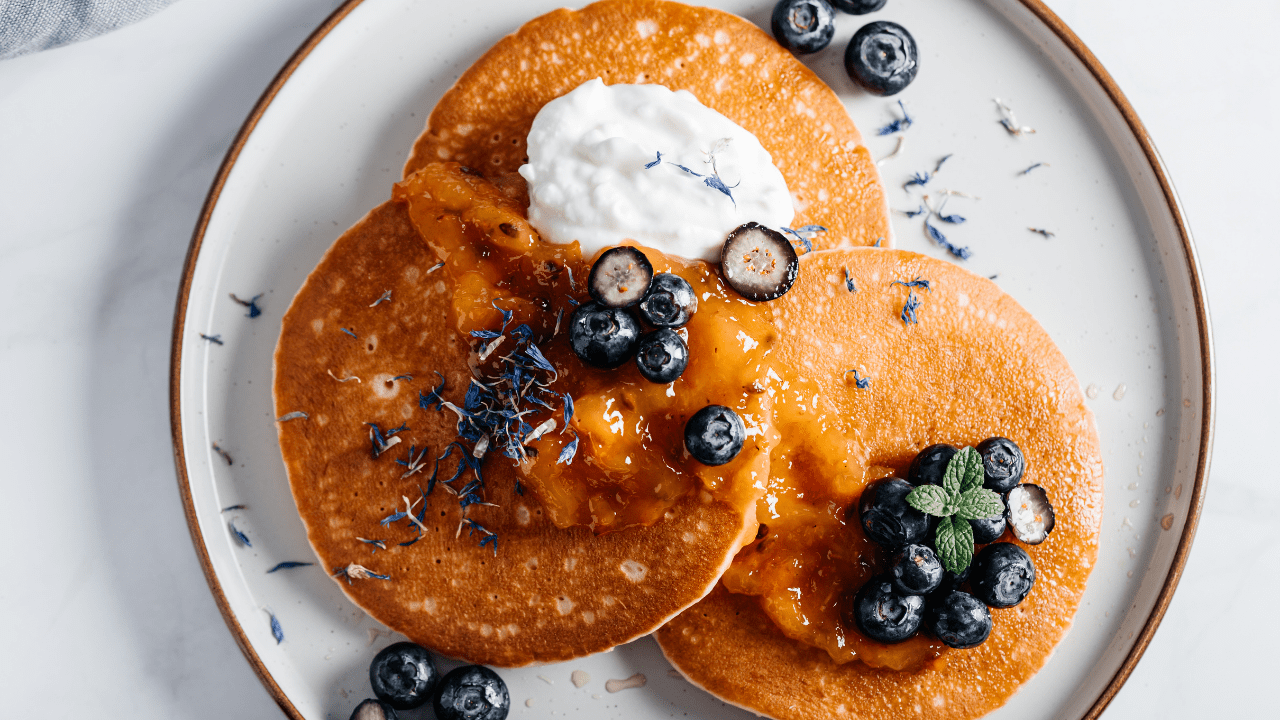
American pancakes (sometimes called flapjacks in the US, though that means something entirely different here in Britain!) are thick, fluffy, and about 1.5cm tall. They’re made with a raising agent (baking powder) that creates all those gorgeous air bubbles, giving them their signature light, cake-like texture.
Unlike British pancakes, which are thin and often rolled or folded, American pancakes are meant to be stacked. Back in the States, we’d pile them three or four high, drizzle them with maple syrup, and add a pat of butter on top. It’s proper comfort food, perfect for weekend brunches or special occasions like Pancake Day (which we call Mardi Gras or Fat Tuesday back home).
The thickness also means they’re incredibly filling. One or two American pancakes can be a proper breakfast on their own, especially if you add some protein like bacon or sausage on the side.
Why This Gluten Free American Pancake Recipe Works
I’ve tested dozens of gluten free pancake recipes over the years. Some turned out dense and gummy, others fell apart, and a few tasted distinctly cardboard-like. But this recipe? This one’s a keeper for several reasons:
Simple Ingredients: You only need 6 pantry staples. No weird flours or hard-to-find binding agents.
Actually Fluffy: The secret is in the ratio of baking powder to flour, plus not overmixing the batter. Trust me on this!
Versatile: This recipe works brilliantly whether you’re dairy-free, vegan, or need to accommodate other dietary needs.
Freezer-Friendly: Make a big batch on Sunday and have quick breakfasts sorted for the week.
Kid-Approved: My four kids devour these, and they’re proper critics when it comes to food!
Budget-Friendly: Much cheaper than buying gluten free pancake mix, and you probably have most ingredients already.
Ingredients You’ll Need
Let’s talk about what you’ll need to make these beauties. I’ve included both UK and US measurements because I know the struggle of converting recipes!
The Essential Six:
Gluten Free Self-Raising Flour (200g / 1⅔ cups)
- I use whichever brand is on offer at Tesco or Sainsbury’s. Doves Farm, FREEE, and Tesco’s own all work brilliantly
- If you only have plain gluten free flour, add 2 teaspoons of baking powder and ¼ teaspoon xanthan gum
Baking Powder (2 teaspoons)
- Make sure it’s gluten free! Not all brands are
- This is what gives us that gorgeous fluffy texture
Caster Sugar (2 tablespoons / 25g)
- Just enough sweetness without making them dessert-like
- Can substitute with granulated sugar or coconut sugar
Milk (250ml / 1 cup)
- Whole milk gives the richest flavor, but semi-skimmed works fine
- For dairy-free, use almond, oat, or soya milk (I’ll chat more about this below)
Large Eggs (2)
- At room temperature works best
- Check my vegan substitutions section if you need egg-free
Vegetable Oil (2 tablespoons)
- For frying plus a bit in the batter
- Can use melted butter, coconut oil, or any neutral oil
Optional Add-ins:
- Vanilla extract (1 teaspoon) for extra flavour
- Pinch of cinnamon for warmth
- Blueberries or chocolate chips (because why not?)
How to Make Perfect Gluten-Free American Pancakes
Step 1: Mix Your Dry Ingredients
In a large bowl, whisk together your gluten-free self-raising flour, baking powder, and caster sugar. This is important because it helps distribute the baking powder evenly, which means evenly fluffy pancakes!
Top Tip: Don’t skip the whisking. Gluten-free flours can be a bit lumpy, and you want everything properly combined before adding the wet ingredients.
Step 2: Combine the Wet Ingredients
In a separate jug or bowl, beat your eggs with the milk and 1 tablespoon of the oil. Give it a good whisk until everything’s well combined and slightly frothy.
Mom Hack: I let my 8-year-old do this bit. Kids love whisking, and it gets them involved in cooking. Plus, it tires them out before breakfast, which is always a win!
Step 3: Bring It All Together
Make a well in the center of your dry ingredients and pour in the wet mixture. Now here’s the crucial bit: don’t overmix! Just fold everything together gently until you have a lumpy batter. A few lumps are absolutely fine and actually desirable.
The batter should be thick but pourable. Think somewhere between single and double cream consistency. If it’s too thick, add a splash more milk. Too thin? A tablespoon more flour will sort it.
Let It Rest: This is the secret weapon. Let your batter sit for 5-10 minutes before cooking. This allows the flour to fully hydrate and the baking powder to start working its magic. Pop the kettle on for your morning cuppa whilst you wait!
Step 4: Cook Your Pancakes
Heat a non-stick frying pan or griddle over medium heat. Add a small knob of butter or a drizzle of oil and let it get nice and hot (but not smoking).
Pour about ¼ cup (4 tablespoons) of batter per pancake into the pan. Don’t spread it out! Just let it spread naturally. You want these pancakes nice and thick.
Watch for Bubbles: This is how you know it’s time to flip. When you see bubbles forming on the surface and the edges looking slightly set (after about 2-3 minutes), it’s showtime. Slide a spatula underneath and flip confidently.
Cook for another 1-2 minutes on the second side until golden brown.
Temperature Tip: If your pancakes are browning too quickly but staying raw in the middle, your pan’s too hot. Lower the heat and be patient. Good things come to those who wait (as my nan always says).
Step 5: Keep Them Warm
As you cook the pancakes, keep them warm on a plate covered with foil in a low oven (about 100°C / 200°F). This way, everyone gets to eat hot pancakes together rather than watching you flip whilst theirs go cold!
Dietary Variations
One of the brilliant things about this recipe is how adaptable it is. Here’s how to modify it for different dietary needs:
Dairy-Free Gluten-Free American Pancakes
Simply swap the milk for your favourite plant-based alternative. I’ve tried this with:
- Oat milk: Creates the closest texture to dairy milk
- Almond milk: Works well but makes slightly thinner pancakes
- Soya milk: Great for protein content
- Coconut milk: Adds a subtle tropical flavor (surprisingly lovely!)
Important: Use unsweetened milk alternatives unless you want very sweet pancakes. And give the carton a good shake before measuring as they can separate.
Vegan Gluten-Free American Pancakes
Replace the eggs with:
- 2 flax eggs: Mix 2 tablespoons ground flaxseed with 6 tablespoons water, let sit for 5 minutes
- 2 chia eggs: Same method as flax eggs
- Shop-bought egg replacer: Follow packet instructions for 2 eggs
- 60ml (¼ cup) apple sauce: Makes them slightly denser but still delicious
Use dairy-free milk as above, and you’re sorted!
Refined Sugar-Free
Swap the caster sugar for:
- Coconut sugar (use the same amount)
- Maple syrup (2 tablespoons, but reduce milk by 1 tablespoon)
- Honey (same as maple syrup)
The Secret to Extra Fluffy Pancakes
Want to know what makes these gluten free American pancakes extra special? Here are my top tips:
- Don’t Overmix: I know I said this already, but it’s so important. Overmixing develops gluten in regular flour, but with gluten free flour, it just makes them dense.
- Let the Batter Rest: Those 5-10 minutes make a massive difference.
- Medium Heat is Your Friend: High heat = burnt outsides and raw middles. Medium heat = golden perfection.
- Don’t Press Down: I see people do this all the time! Resist the urge to press your pancakes with the spatula. You’ll squeeze out all that lovely air.
- Fresh Baking Powder: Check the date on your baking powder. Old baking powder won’t create those gorgeous bubbles.
- Room Temperature Ingredients: Cold ingredients from the fridge don’t mix as well. Take your eggs and milk out 30 minutes before making pancakes.
Serving Suggestions: From Boston to Britain
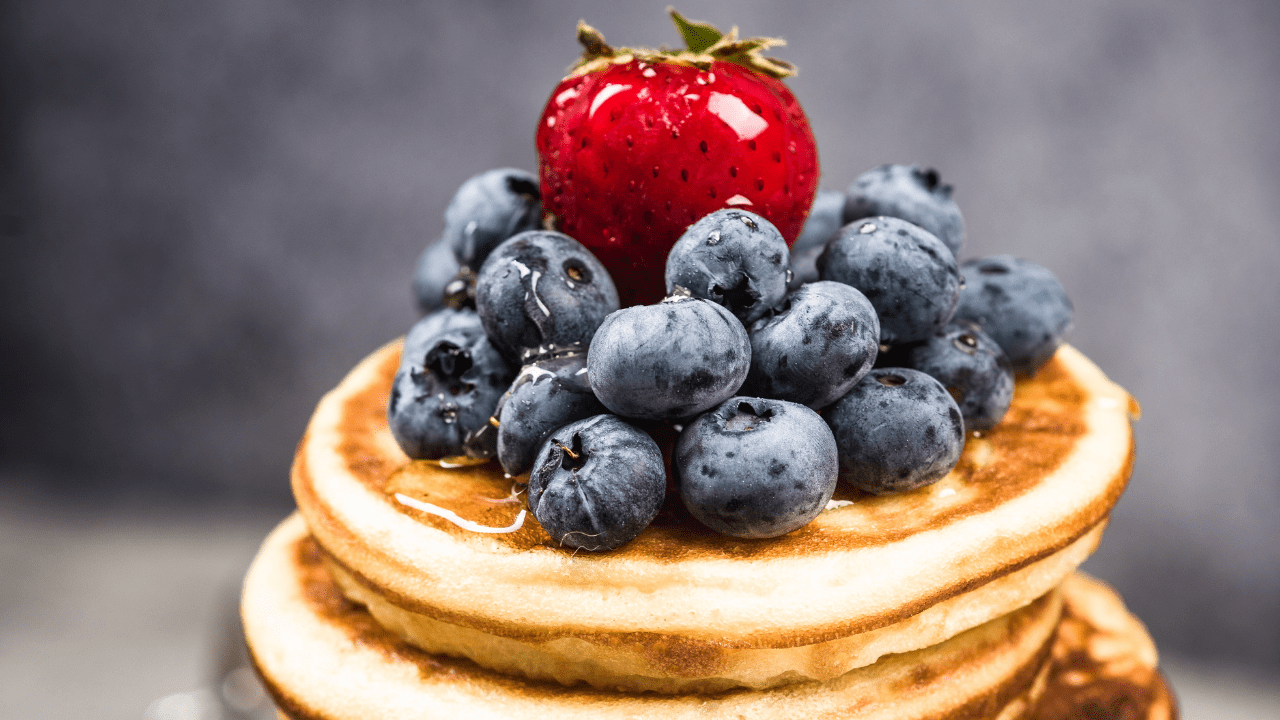
Now for the fun part! Here are some of my favourite ways to serve these gluten free American pancakes:
Classic American Style:
- The Full Stack: Three pancakes topped with butter and proper maple syrup (none of that imitation stuff!)
- Bacon & Maple: Crispy streaky bacon with maple syrup drizzled over everything (trust me, it’s life-changing)
- Berry Beautiful: Fresh blueberries, strawberries, or raspberries with a dusting of icing sugar
- Peanut Butter Banana: Warm peanut butter and sliced banana (my kids’ favourite)
British Twists:
- Lemon & Sugar: Because we’re in Britain and this just works
- Golden Syrup: A proper British classic that my American relatives find fascinating
- Clotted Cream & Jam: Turning pancakes into something gloriously indulgent
- Chocolate Spread: Nutella-style spread with sliced strawberries
Healthy Options:
- Greek Yogurt & Honey: High protein and naturally sweet
- Apple Compote: Stewed apples with cinnamon
- Almond Butter: With a drizzle of honey
- Mixed Seeds: Pumpkin and sunflower seeds for crunch
Breakfast for Dinner:
Sometimes we have “breakfast for dinner” (which confused the kids’ British friends at first!). Serve these pancakes with:
- Scrambled eggs
- Sausages (veggie or meat)
- Grilled tomatoes
- Mushrooms
Storage & Meal Prep
These pancakes are brilliant for meal prep, which is essential when you’re feeding four kids on busy school mornings!
Storing Leftovers:
In the Fridge: Store cooled pancakes in an airtight container separated by greaseproof paper. They’ll keep for 3-4 days.
Reheating: Pop them in the toaster for a minute (yes, really!), or microwave for 20-30 seconds. The toaster gives them a lovely crispy edge.
Freezing for Later:
To Freeze: Let pancakes cool completely on a wire rack. Stack them with greaseproof paper between each one, then pop into a freezer bag. They’ll keep for up to 3 months.
From Frozen: Either defrost overnight in the fridge then reheat, or toast straight from frozen for 2-3 minutes.
Batch Cooking: On Sundays, I often make a triple batch. My crew devours half, and the rest go in the freezer for those chaotic Wednesday mornings!
Troubleshooting Common Problems
Even with a foolproof recipe, sometimes things go a bit wonky. Here’s how to fix common issues:
Dense, Heavy Pancakes:
- You’ve probably overmixed the batter
- Your baking powder might be old
- Try adding an extra ½ teaspoon of baking powder next time
Pancakes Won’t Flip:
- Your pan isn’t hot enough or isn’t non-stick enough
- Wait for more bubbles to form before flipping
- Use a thin, flexible spatula
Burning on the Outside, Raw in the Middle:
- Heat’s too high! Turn it down
- Make your pancakes slightly thinner
- Be patient and cook them longer on lower heat
Batter Too Thick:
- Add milk a tablespoon at a time until you reach the right consistency
- Gluten free flours vary in absorption, so this is normal
Pancakes Taste “Gritty”:
- Some gluten free flours have this texture
- Try a different brand (I recommend Doves Farm or FREEE)
- Let the batter rest for longer (15 minutes instead of 5)
Not Sweet Enough:
- Add an extra tablespoon of sugar to the batter
- Use sweetened milk alternatives
- Don’t forget the toppings!
Frequently Asked Questions
Q: Can I make these without eggs? A: Absolutely! Use flax eggs, chia eggs, or commercial egg replacer. The texture will be slightly different but still delicious.
Q: What’s the best gluten free flour for pancakes? A: I’ve had success with most UK supermarket blends. Doves Farm, FREEE, Tesco, and Sainsbury’s own brands all work well. Avoid single-ingredient flours like coconut or almond flour alone.
Q: Can I add chocolate chips or blueberries? A: Yes! Add them after pouring the batter into the pan, not in the bowl. This way they distribute evenly without sinking.
Q: How many pancakes does this recipe make? A: About 8-10 medium-sized pancakes (roughly 10cm / 4 inches each). Perfect for feeding 2-3 people generously, or 4 kids with small appetites.
Q: Can I double the recipe? A: Definitely! I often make double or triple batches for our family of six. The recipe scales beautifully.
Q: Why are my pancakes flat and not fluffy? A: Check your baking powder is fresh and gluten free. Also, make sure not to overmix the batter, and let it rest before cooking.
Q: Can I use buttermilk? A: Yes! Buttermilk makes them extra fluffy. If using buttermilk, reduce the baking powder to 1½ teaspoons as buttermilk is acidic and reacts with baking powder.
Q: Are American pancakes the same as Scotch pancakes? A: They’re similar! Scotch pancakes (drop scones) are slightly smaller and often less sweet, but the method is nearly identical.
Q: Can children help make these? A: Absolutely! Mine love measuring ingredients and whisking the wet mixture. The actual cooking should be supervised, obviously, but they can help flip once they’re older.
Q: What’s the difference between American and British pancakes? A: American pancakes are thick and fluffy (about 1.5cm tall) made with raising agents. British pancakes are thin like crêpes. Both are delicious but completely different!
Nutritional Information
Per pancake (without toppings):
- Calories: ~120
- Protein: 3g
- Carbohydrates: 20g
- Fat: 3g
- Fibre: 1g
Note: This varies depending on flour brand and milk type used. Adding protein-rich toppings like Greek yogurt or nut butter increases the nutritional value.
Quick Recipe Guide
Gluten-Free American Pancakes
Prep Time: 10 minutes
Cook Time: 15 minutes
Total Time: 25 minutes
Servings: 8-10 pancakes
Ingredients:
- 200g (1⅔ cups) gluten-free self-raising flour
- 2 teaspoons gluten-free baking powder
- 2 tablespoons (25g) caster sugar
- 250ml (1 cup) milk (dairy or non-dairy)
- 2 large eggs
- 2 tablespoons vegetable oil (plus extra for frying)
- 1 teaspoon vanilla extract (optional)
Instructions:
- In a large bowl, whisk together the flour, baking powder, and sugar until well combined.
- In a separate jug, beat the eggs with the milk and 1 tablespoon of oil until frothy.
- Pour the wet ingredients into the dry ingredients and fold gently until just combined. The batter should be lumpy—don’t overmix!
- Let the batter rest for 5-10 minutes while you heat your pan.
- Heat a non-stick frying pan over medium heat and add a small knob of butter or drizzle of oil.
- Pour about ¼ cup of batter per pancake into the pan. Cook for 2-3 minutes until bubbles form on the surface and the edges look set.
- Flip carefully and cook for another 1-2 minutes until golden brown.
- Keep warm in a low oven whilst you cook the remaining pancakes.
- Serve immediately with your favourite toppings!
External Links for Further Reading:
- Coeliac UK – Understanding Gluten Free Diets – Essential information about coeliac disease and gluten intolerance
- NHS – Healthy Eating Guidelines – Balanced nutrition advice for families
- BBC Good Food – Pancake Tips – Professional cooking techniques
Final Thoughts
There you have it! The ultimate guide to making absolutely gorgeous gluten free American pancakes that’ll have your family thinking you’ve opened a breakfast diner in your kitchen.
These pancakes have become a weekend tradition in our house, and I hope they become one in yours too. Whether you’re newly diagnosed with coeliac disease, reducing gluten for health reasons, or just fancy trying something different, these pancakes prove that gluten free food can be just as delicious as the traditional version.
My kids genuinely prefer these to the gluten-filled pancakes I used to make back in Boston. And honestly? So do I. They’re lighter, fluffier, and disappear off the plate faster than I can make them!
Have you tried this recipe? I’d absolutely love to hear how it turned out! Drop a comment below and let me know your favourite toppings. And if you’ve got any questions, I’m always happy to help troubleshoot.
Don’t forget to pin this recipe for later, and share it with anyone who might be struggling to find a decent gluten free pancake recipe.
See more of my Breakfast posts here!
Other Pancakes posts:
Delia Smith Pancakes
Pancake Puffs
Other Gluten Free Recipes:
Gluten Free Rocky Road

Becky is the voice behind Life in Velvet, an organised, intentional living blog focused on practical food, calm homes, thoughtful projects, and everyday systems that make real life feel easier. A mum of 3 living in the UK, Becky writes from lived experience, sharing what works, what doesn’t, and the decisions that make family life run more smoothly.
With a background in marketing and content writing, and over a decade of blogging experience, she brings a thoughtful, structured approach to everything from baking and home projects to routines and decision-making. Life in Velvet is where planning meets creativity, with ideas designed for real homes and real life.