Key Takeaways
- No-bake treat ready in under 30 minutes (plus chilling time)
- Infinitely customisable – use any combination of biscuits, sweets, and mix-ins
- Perfect for coeliac-safe baking when you carefully check labels for “may contain” warnings
- Kid-friendly recipe that gets everyone involved in the kitchen
- Budget-friendly way to use up leftover biscuits and treats from the cupboard
- Stores brilliantly – keeps for up to 2 weeks in the fridge
Right, let me tell you about my absolute favourite no-bake treat that’s saved me on countless occasions when I’ve needed something sweet, impressive, and ridiculously easy to throw together. Gluten free rocky road has become my go-to whenever the kids are clamouring for a treat, when I need something for the school bake sale, or honestly, when I just fancy something chocolatey that doesn’t involve switching on the oven.
Living in the UK now, I’ve discovered that rocky road is practically a national treasure here. Back in Boston? Not so much. We had rocky road ice cream, sure, but this gorgeous no-bake chocolate traybake situation? That was new to me when I moved across the pond, and let me tell you, I’m utterly converted.
The best part about making gluten free rocky road is that it’s genuinely one of those recipes where you can’t really mess it up. I mean, it’s basically melted chocolate mixed with delicious things. How wrong can that go? (Spoiler: it can’t, unless you forget to put it in the fridge, and even then, you’ve just got yourself a lovely chocolate fondue situation.)
What Exactly IS Rocky Road?
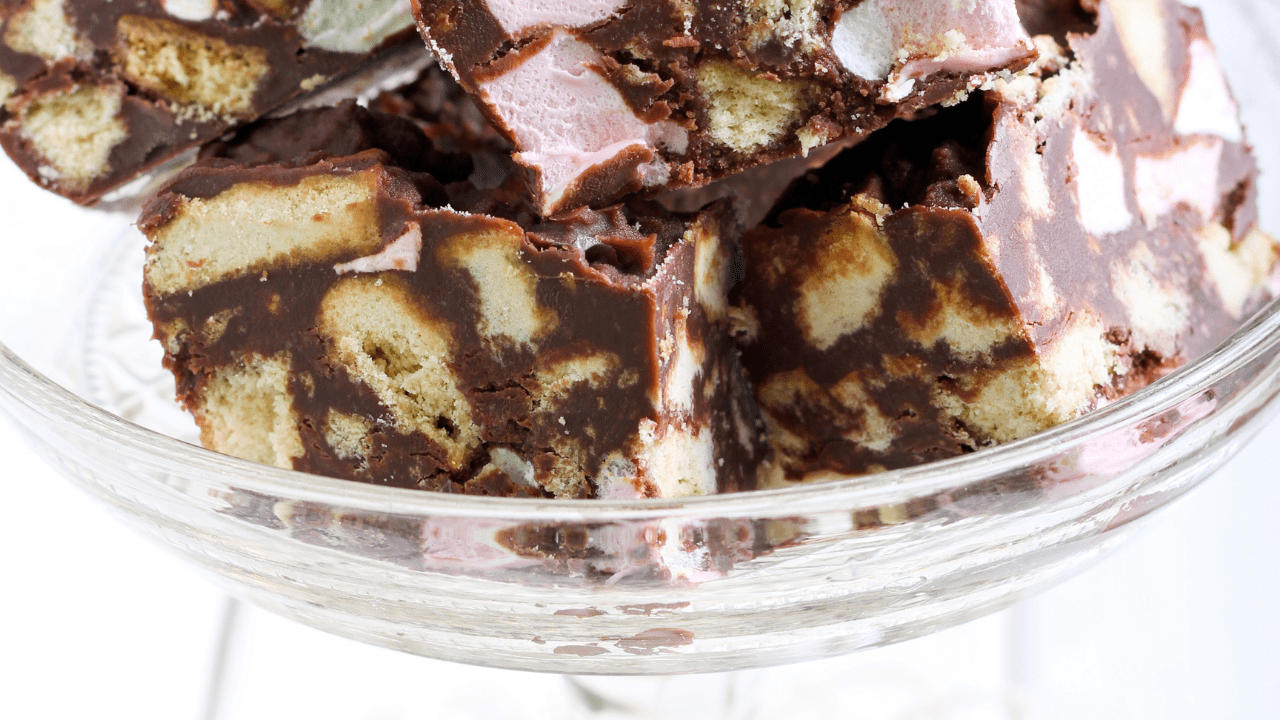
Before we dive into the recipe, let’s talk about what we’re actually making here. Rocky road is a no-bake chocolate traybake that gets its name from its bumpy, “rocky” appearance. It’s traditionally made by melting chocolate with butter and golden syrup (that beautiful British ingredient I’d never heard of until I moved here!), then mixing it with crushed biscuits, marshmallows, and whatever other goodies you fancy.
The texture is absolutely divine. You’ve got the smooth, rich chocolate base, the crunch from the biscuits, the squidgy softness of the marshmallows, and then whatever else you decide to throw in. It’s a proper textural adventure in every bite.

Rocky Road vs Tiffin: What’s the Difference?
Here’s something that confused me when I first moved to the UK. You’ll hear people use “rocky road” and “tiffin” almost interchangeably, but they’re actually slightly different things.
Rocky road typically includes marshmallows as a must-have ingredient. It’s a bit more American-influenced and tends to be on the sweeter side.
Tiffin is the more traditional British version and usually skips the marshmallows in favour of dried fruit (raisins, sultanas, glacé cherries) and nuts. It’s named after the light meal or snack traditionally served in the afternoon.
These days, the lines have blurred quite a bit, and you’ll find British recipes calling it “rocky road” even with dried fruit, and American recipes including both marshmallows AND fruit. For this recipe, I’m firmly in the marshmallow camp because, well, my kids would stage a revolt otherwise, but I’ll give you loads of ideas for customizing it however you like.
Why You’ll Love This Gluten Free Rocky Road Recipe
Look, I know I’m biased because I make this at least twice a month, but this recipe is genuinely brilliant for so many reasons:
It’s ridiculously easy. Like, we’re talking melt-mix-set level of easy. If you can use a microwave or a saucepan, you can make this. There’s no fancy technique, no tempering chocolate, no worrying about oven temperatures.
It’s naturally gluten free. Once you swap in gluten free biscuits (which are everywhere now, thank goodness), everything else is naturally gluten free anyway. Chocolate? Check. Marshmallows? Usually check (though always read labels). Butter and golden syrup? Check and check.
The kids can actually help. I’ve got four little ones, and they all love making this because there’s something for everyone to do. Breaking up the biscuits is always a hit (bit therapeutic, that), and stirring in the mix-ins makes them feel like proper little bakers.
It’s a brilliant cupboard raid recipe. Got some broken biscuits at the bottom of a packet? Chuck them in. Found a bag of marshmallows left over from hot chocolate season? Perfect. Random sweets lurking in the back of the cupboard? In they go.
It makes a gorgeous gift. Wrap up a few squares in cellophane with a ribbon, and you’ve got yourself a lovely homemade present that people actually want to receive.
The Essential Ingredients for Gluten Free Rocky Road
Let’s break down what you’ll need for this recipe. The beauty of rocky road is that whilst there are some essential base ingredients, the “rocky” part (all the mix-ins) is entirely up to you.
The Base (Non-Negotiable Bits)
Chocolate – This is the star of the show, so choose wisely! I usually go for a combination of dark and milk chocolate (about 3:1 ratio) because the mix-ins are quite sweet, and I find the darker chocolate balances everything beautifully. However, if you’ve got a proper sweet tooth or you’re making this for kids who pull faces at anything dark, go ahead and use all milk chocolate.
In the UK, my go-to is Dr Oetker cooking chocolate because it’s reliable, clearly labelled gluten free, and melts like a dream. If I’m feeling fancy or making these for a gift, I’ll splash out on Callebaut chocolate, which is absolutely gorgeous but a bit pricier. Always, ALWAYS check the label for both gluten content and “may contain” warnings. As someone who’s coeliac (like me), those warnings aren’t just being cautious, they’re real risks of cross-contamination.
Butter – Unsalted is best because it gives you more control over the overall flavour. The butter does two crucial jobs: it makes the mixture set softer so you don’t chip a tooth biting into your rocky road, and it adds a lovely creamy richness that stops it tasting like pure chocolate (though would that be so bad?).
For the Americans reading this (hi, Mom!), UK butter is quite different from what we grew up with. It tends to be slightly higher in butterfat, so if you’re visiting from the States and fancy making this, just use what you’ve got. It’ll be fine.
Golden Syrup – This is such a British thing, and honestly? It’s genius. Golden syrup is like a light treacle with gorgeous caramel notes that add warmth and depth to the chocolate. It also helps prevent the chocolate from crystallizing and going grainy, which is a proper baking win.
If you’re in the US and can’t find golden syrup (or it’s extortionately expensive), light corn syrup works in a pinch. Honey or maple syrup might work too, though I haven’t tried them personally, and they’ll definitely change the flavour profile.
The Rocky Bits (Where the Fun Begins)
Gluten Free Biscuits – You absolutely need some biscuits in here for that essential crunch. My favourites are gluten free digestives because they’ve got a lovely plain, slightly sweet flavour that doesn’t compete with everything else. But honestly? Use whatever gluten free biscuits you’ve got knocking about.
Here are some brilliant options:
- Digestive biscuits (the classic choice)
- Rich Tea biscuits (a bit lighter and more delicate)
- Shortbread (adds a gorgeous buttery flavour)
- Chocolate chip cookies (I mean, more chocolate is never wrong)
- Ginger biscuits (for a warming, spicy kick)
- Bourbon biscuits (the cream filling adds extra interest)
In the UK, most major supermarkets do their own gluten free biscuit ranges, and brands like Schar are widely available too. Just bash them up into a mix of sizes, from dust to chunks about the size of a 20p piece.
Marshmallows – The key is using mini marshmallows rather than the big ones. Trust me on this. Mini marshmallows distribute evenly throughout the mixture and give you perfect little pockets of squidgy sweetness in every bite. With big marshmallows, you end up with massive gaps and uneven distribution.
Most marshmallows in the UK are gluten free, but always check because manufacturing processes change. M&S do lovely pink and white ones that my kids adore.

The Extras (Make It Your Own) – This is where you can genuinely go wild. Here are some of my favourite additions:
- Dried fruit – Cranberries, raisins, sultanas, or chopped apricots add a lovely tangy sweetness
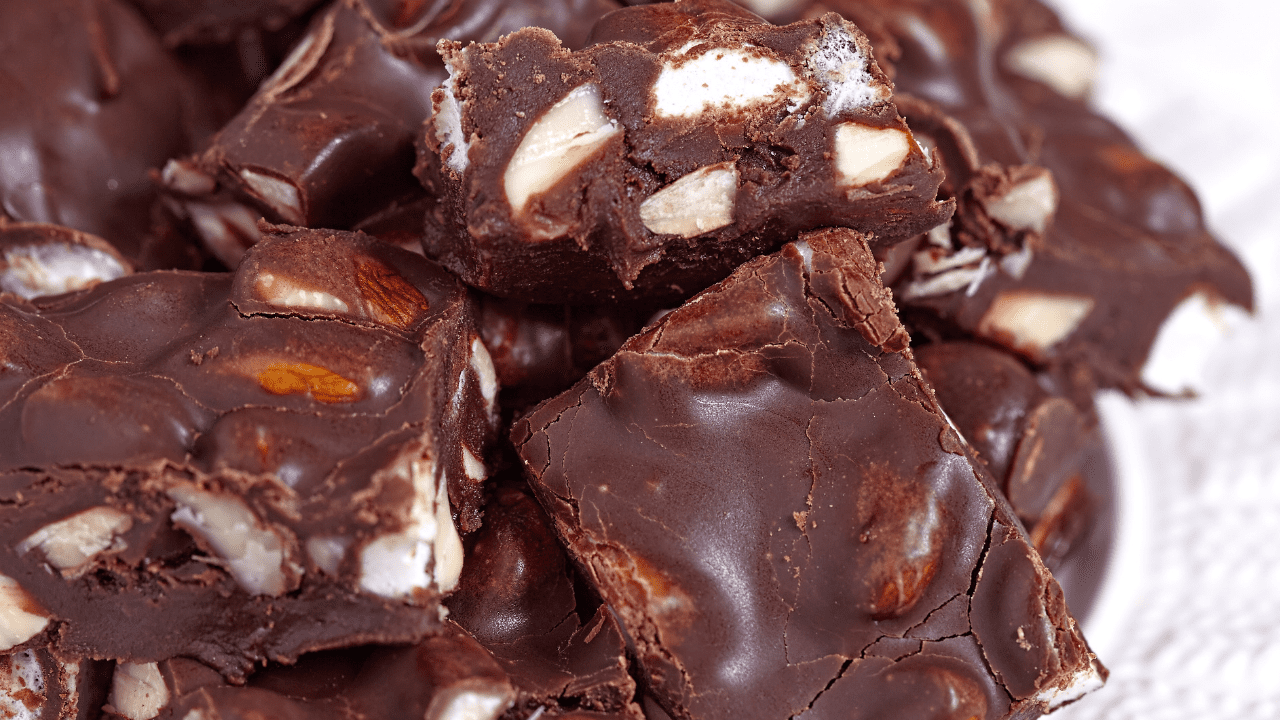
- Nuts – Pistachios look gorgeous (that green!), almonds add crunch, or go posh with pecans
- Cadbury Crunchie bars – These are gluten free in the UK and add the most incredible honeycomb crunch
- Glacé cherries – Very traditional British addition and quite pretty
- Mini eggs (at Easter) – Self-explanatory and utterly delicious
- Jelly sweets – Cut them up small so they don’t get too chewy
- Chocolate chips – Because more chocolate
- Fudge pieces – For extra decadence
- Popcorn – Sounds mad, but it works brilliantly for a salty-sweet contrast
How to Make Gluten Free Rocky Road (The Proper Way)
Right, shall we make this? I promise it’s dead easy, but there are a few tips I’ve learned over the years that make the difference between “nice rocky road” and “OMG where has this been all my life rocky road.”
Ingredients (for a 20cm/8-inch square tin)
For the base:
- 300g dark chocolate (about 60% cocoa), chopped (10.5 oz)
- 100g milk chocolate, chopped (3.5 oz)
- 150g unsalted butter, cubed (5.3 oz / about 10 tablespoons)
- 50g golden syrup (1.75 oz / about 2 tablespoons)
For the rocky bits:
- 200g gluten free digestive biscuits, broken up (7 oz)
- 100g mini marshmallows (3.5 oz)
- 80g pistachios or your choice of nuts, roughly chopped (2.8 oz)
- 80g dried cranberries or other dried fruit (2.8 oz)
Optional decoration:
- 60g white chocolate, for drizzling (2.1 oz)
Method
Step 1: Get Your Tin Ready
First things first: line your baking tin completely with baking parchment. And I mean completely – bottom and sides. This is crucial because rocky road has a tendency to stick like nobody’s business, and you’ll thank yourself later when it lifts out beautifully.
Here’s my trick: lay out a piece of parchment bigger than your tin, put the tin in the middle, and draw around the base lightly. Fold along those lines, then cut diagonal lines from each corner of the paper to the corner of your drawn square. Pop the paper in the tin, and the cut bits will fold over each other neatly at the corners. Trim any massive excess. Done!
Step 2: Melt the Chocolate Base
Put your dark chocolate, butter, and golden syrup in a large microwaveable bowl. Microwave on MEDIUM power (this is important – not high!) in 30-second bursts, stirring between each burst, until everything’s melted and smooth.
Alternatively, if you’re not a microwave person, use a large non-stick saucepan over LOW heat on the hob. Keep stirring and take your time. Patience is key here.
Once the dark chocolate mixture is completely smooth, remove it from the heat, add your milk chocolate pieces, and stir through. The residual heat will melt it. If you’ve still got lumps after a minute or two, give it a very gentle reheat (just seconds!).
Why bother with this two-step chocolate melting? Dark chocolate is much more forgiving to melt, whilst milk chocolate can go grainy and weird if you overheat it. Doing it this way virtually guarantees success.
Set this aside to cool for about 10 minutes. You want it cool enough that it won’t instantly melt your marshmallows when you mix them in, but not so cool that it starts setting.
Step 3: Prep Your Mix-ins
While your chocolate is cooling, sort out your mix-ins. Break or bash your biscuits into varied sizes. I usually put mine in a sandwich bag and give them a good whack with a rolling pin, which is genuinely therapeutic after a long day of Mum duties.
Chop any large mix-ins (nuts, Crunchie bars, glacé cherries) into bite-sized pieces. Kids love this job, though supervision required unless you fancy picking cherry bits off the kitchen walls. Ask me how I know.
Step 4: Mix It All Together
In a really large bowl, combine your cooled chocolate mixture with all your mix-ins. Stir gently but thoroughly until everything’s coated in chocolate. This can take a bit of muscle, especially if your chocolate has cooled quite a bit, but persevere!
Step 5: Into the Tin
Tip the whole glorious mess into your prepared tin and spread it out evenly. Use the back of a spoon or a spatula to push it into the corners and smooth the top. It’ll look quite bumpy and rough – that’s exactly what you want! It’s called rocky road, not smooth motorway.
Step 6: Chill Out
Pop the tin in the fridge for at least 2 hours, or ideally overnight. I know waiting is hard, but trust me, you need it properly set before you try to cut it, or you’ll end up with a chocolatey mess.
Step 7: Optional Fancy Drizzle
If you’re feeling fancy (or making these as a gift), melt your white chocolate very gently – I do mine in a bowl set over a mug of just-boiled water, stirring until smooth. Drizzle it over the set rocky road in whatever pattern takes your fancy. Let it set again (about 20 minutes in the fridge), then you’re ready to cut.
Step 8: Cut and Devour
Remove your rocky road from the tin (see how easy that is with the parchment?), place it on a cutting board, and cut into squares. I usually get about 16 good-sized pieces from this recipe, but you can cut them bigger or smaller depending on your needs.
For the cleanest cuts, use a large, sharp knife that you’ve run under hot water and dried. The warm blade cuts through the chocolate like butter.
Storage Tips (If It Lasts That Long!)
Rocky road keeps brilliantly, which makes it perfect for making ahead for parties or gifts.
At room temperature: If you’re planning to eat it within 3-4 days and you’ve got a cool house (or it’s not summer), you can keep it in an airtight container at room temperature. This is actually my preferred way to store it because the texture stays softer and more moreish.
In the fridge: For longer storage (up to 2 weeks), keep it in an airtight container in the fridge. It’ll harden up quite a bit when cold, so take it out about 30 minutes before you want to eat it to let it soften slightly.
In the freezer: Yes, you can freeze rocky road! Layer the pieces between sheets of baking parchment, pop them in a freezer bag or container, and freeze for up to 3 months. Defrost at room temperature when needed.
Top tip: If you’re keeping it in the fridge and want to maintain that perfect chewy texture, bring it to room temperature before serving. The cold hardens everything, and whilst it’s still delicious, it’s even better when it’s had a chance to soften up a bit.
Troubleshooting Your Gluten Free Rocky Road
Even though this is basically a foolproof recipe, sometimes things don’t go quite to plan. Here’s how to fix the most common issues:
My rocky road is too hard/sets like concrete – This usually means there’s too much chocolate in proportion to everything else, or you’ve used chocolate with too high a cocoa percentage. Next time, add a bit more butter or golden syrup, or use a chocolate with slightly lower cocoa content. You can also try letting it sit at room temperature longer before eating.
It’s too soft and won’t set properly – Opposite problem! Either you didn’t chill it long enough (patience, grasshopper), or you’ve got too many mix-ins for the amount of chocolate. Make sure you’re using the ratios I’ve suggested, and give it a good 4-6 hours in the fridge, or overnight.
The mixture is crumbly and won’t hold together – Too many mix-ins! The chocolate needs to coat everything and act as the glue. If you’re a “more is more” person with the add-ins (guilty!), increase your chocolate base proportionally.
It tastes too sweet – Use more dark chocolate and less milk chocolate in your base. You could go 100% dark if you prefer, though your kids might not be thrilled. Adding something tangy (like cranberries or sour cherries) can also balance the sweetness.
My marshmallows melted into goo – Your chocolate mixture was too hot when you added them. Make sure to let it cool for a good 10 minutes, stirring occasionally, before mixing in temperature-sensitive ingredients like marshmallows.
Seasonal Variations to Try
One of my favourite things about rocky road is how easily you can adapt it for different occasions. Here are some of my go-to variations:
Easter Rocky Road
- Add chopped Mini Eggs (gluten free!)
- Mix in some pastel-coloured mini marshmallows
- Drizzle with white and milk chocolate
- Decorate the top with whole Mini Eggs before chilling
Christmas Rocky Road
- Add chopped glacé cherries (red and green for festive vibes)
- Mix in crushed candy canes (check they’re gluten free)
- Use a combination of dark and white chocolate for a snow-dusted effect
- Add a pinch of ground ginger or cinnamon to the chocolate base
Halloween Rocky Road
- Add orange-coloured sweets or sprinkles
- Mix in chopped Reese’s Pieces (check UK availability and gluten free status)
- Drizzle with orange-coloured white chocolate
- Add some edible eyeball decorations on top for a spooky touch
Birthday Party Rocky Road
- Use your birthday person’s favourite sweets
- Add sprinkles or hundreds and thousands to the mix
- Drizzle with coloured chocolate to match the party theme
- Cut into fancy shapes with cookie cutters if you’re feeling ambitious
Making Rocky Road with Kids: A Mom’s Survival Guide
Look, making rocky road with four kids can either be a lovely bonding experience or absolute chaos, depending on how you approach it. Here’s what I’ve learned:
Job delegation is everything. Little ones can break up biscuits (in a sealed bag to contain the crumbs). Older kids can measure ingredients and do the stirring. Teenagers might actually deign to help if you promise them first dibs on the finished product.
Prep everything first. Mise en place isn’t just for professional chefs, it’s for harassed Moms trying to bake with “helpers.” Get all your ingredients measured and ready before you start, or you’ll be running around the kitchen with chocolate-covered hands trying to find the marshmallows.
Embrace the mess. There will be chocolate on the worktop, biscuit crumbs on the floor, and probably marshmallows in weird places for days. It’s fine. It washes off. Probably.
Set clear boundaries. If one of your children is coeliac (like my youngest), this is a great teaching opportunity about why we check labels and don’t cross-contaminate. But you’ve got to be vigilant, because kids will be kids.
Make extra. Seriously, if you’re making this with kids, at least some of it will end up in mouths before it makes it to the tin. Factor this in.
The Health Bit (Such As It Is)
Right, let’s be honest: rocky road is a treat, not a health food. But if you’re going to eat chocolate (and why wouldn’t you?), making it yourself at home means you control exactly what goes in it.
The gluten free aspect is obviously crucial for anyone with coeliac disease, gluten sensitivity, or wheat allergy. But it’s worth noting that just because something is gluten free doesn’t automatically make it healthier in other ways. Gluten free biscuits often have similar (or sometimes more) sugar and fat than their wheat-containing counterparts.
That said, you CAN make some slightly better-for-you swaps:
- Use dark chocolate with a higher cocoa percentage (more antioxidants, less sugar)
- Add nuts for protein and healthy fats
- Include dried fruit for fibre and nutrients
- Use less golden syrup if you’re watching sugar intake
- Make smaller portions (though good luck with that if you’re me)
At the end of the day, though, this is a treat. And treats are part of a balanced life. Don’t stress about it too much, just enjoy it!
Gluten Free Rocky Road FAQs
Can I make this dairy free?
Absolutely! Just swap the butter for a good-quality dairy free alternative (I like Flora Plant block), and use dairy free chocolate. Bournville is accidentally vegan and works brilliantly. Note that Crunchie bars aren’t dairy free, so substitute with plain honeycomb or extra biscuits if you’re going fully dairy free.
Is this recipe suitable for vegans?
Almost! Follow the dairy free swaps above, and make sure your marshmallows are vegan. Regular marshmallows contain gelatine (from animals), but brands like Freedom Confectionery do vegan mini marshmallows that are widely available in UK supermarkets now.
Do I have to use golden syrup?
It definitely gives the best flavour and texture, but if you can’t get it, light corn syrup is the closest substitute. You could try honey or maple syrup, though this will change the flavour. In a real pinch, you could leave it out entirely and just increase the butter by about 25g, though the texture won’t be quite as good.
How long does homemade rocky road last?
At room temperature in an airtight container: 3-4 days In the fridge: up to 2 weeks In the freezer: up to 3 months
Just remember that the texture changes when it’s cold, so let it come to room temperature before serving for the best experience.
Can I use chocolate chips instead of chopped chocolate?
You can, but I find that proper chocolate (chocolate bars or callets/buttons) melts much more smoothly. Chocolate chips contain stabilizers to help them keep their shape when baked, which can make them a bit weird when you’re trying to melt them.
What size tin should I use?
I use a 20cm x 20cm (8-inch x 8-inch) square tin for this recipe, which gives you nice thick pieces of rocky road. If you want thinner pieces, use a 23cm x 23cm (9-inch x 9-inch) tin. You could also use a similar-sized rectangular tin, or even make mini rocky roads in a muffin tin lined with paper cases.
My chocolate seized up and went grainy. What did I do wrong?
This usually happens if water gets into the chocolate while melting, or if you overheat it. Always use a completely dry bowl, and heat gently. If it does seize, sometimes you can save it by adding a tablespoon of vegetable oil and stirring vigorously, but it’s not guaranteed.
Can I add alcohol to this recipe?
You definitely could! A splash of rum, whisky, or amaretto in the chocolate mixture would be gorgeous for an adults-only version. Just don’t add more than a tablespoon or two, or it’ll affect the setting.
Is there a sugar-free version?
You can make this with sugar-free chocolate, but you’ll need to be careful about which one you use as some don’t melt well. Sugar-free marshmallows are harder to find in the UK, but they do exist. Bear in mind that many sugar-free products contain sweeteners that can have digestive side effects in larger quantities.
Help! I added too many mix-ins and now it’s falling apart!
If you haven’t chilled it yet, gently melt another 50-100g of chocolate and fold it through the mixture to help bind everything together. If it’s already set, you can call it “rocky road bark” and pretend it was intentional! Presentation is everything.
Gift-Giving Ideas with Rocky Road
Rocky road makes such a lovely homemade gift, and honestly, people are always chuffed to bits when you turn up with a box of it. Here are some ideas:
For teachers: Cut into large squares and wrap individually in cellophane tied with ribbon. Add a little label saying “Thanks for being a ‘rocky’ good teacher!”
For neighbours: Make a batch at Christmas and package up in clear bags with festive ribbon. It’s much more personal than a box of shop-bought chocolates.
For new parents: This is brilliant because it’s no-bake (they can make it one-handed while holding a baby) and provides much-needed sugar and chocolate. Package it up with the recipe so they can make more when they’ve demolished your batch.
For kids’ party bags: Cut into small squares and pop into little cellophane bags. So much better than plastic tat that ends up on the floor of my car.
For bake sales: Cut into generous squares and price them higher than you think you should. Trust me, they’ll sell out. People know homemade when they see it.

Final Thoughts: Why Gluten Free Rocky Road is a Proper Kitchen Essential
Look, I might be biased because I make this at least twice a month (sometimes more if we’re having people over or if I’ve had a particularly trying week and need therapy chocolate), but I genuinely think every home baker needs a good rocky road recipe in their repertoire.
It’s that perfect combination of dead easy and absolutely delicious. It’s impressive without being faffy. It’s adaptable enough to suit anyone’s taste. And crucially for those of us in the gluten free world, it’s one of those things that nobody would ever guess wasn’t “normal” – because let’s be honest, when chocolate tastes this good, who cares about gluten?
Whether you’re making this because someone in your family is coeliac, or you’re just curious about trying it gluten free (welcome to the club!), I promise you’re in for a treat. Literally.
Now, go forth and make some rocky road. And if you do, I’d absolutely love to see it! Tag me on Instagram @lifeinvelvet or share it in the comments below. Bonus points if your kitchen ends up as chaotically chocolate-covered as mine always does.
Happy baking (or not-baking, as the case may be)!

Looking for other Gluten Free Recipes?
The Best Gluten Free American Pancakes

Becky is the voice behind Life in Velvet, an organised, intentional living blog focused on practical food, calm homes, thoughtful projects, and everyday systems that make real life feel easier. A mum of 3 living in the UK, Becky writes from lived experience, sharing what works, what doesn’t, and the decisions that make family life run more smoothly.
With a background in marketing and content writing, and over a decade of blogging experience, she brings a thoughtful, structured approach to everything from baking and home projects to routines and decision-making. Life in Velvet is where planning meets creativity, with ideas designed for real homes and real life.