
Key Takeaways
- Delia Smith offers two brilliant mince pie recipes: Traditional (classic rubbing-in method) and Easy (food processor version)
- The secret to perfect pastry is keeping everything cold and not overworking the dough
- You can make and freeze mince pies up to 3 months ahead, baking them straight from frozen
- Common issues like soggy bottoms and cracked pastry are easily fixable with simple techniques
- Delia’s recipes make 18-24 pies, perfect for sharing (or not, no judgement here!)
Why Delia Smith Mince Pies Are the Gold Standard
After moving from Boston to the UK, I’ll be honest: mince pies confused me at first. Where was the actual meat? Why were they sweet? But now, as a Mom of four who’s spent countless Christmases in Britain, I’ve become completely obsessed with them. And when it comes to mince pies, Delia Smith is basically the queen.
Delia Smith Mince Pies: What You Need to Know
Two recipes to choose from: Traditional (rubbing-in method) or Easy (food processor version)
Oven temperature: Gas Mark 6, 200C (400F)
Baking time: 20-25 minutes for Easy version, 25-30 minutes for Traditional
Yield: 18-24 mince pies depending on how thin you roll the pastry
Can you freeze them? Yes, for up to 3 months. Bake from frozen, adding 5 extra minutes
Key secret: Keep everything cold and do not overwork the pastry
I’ve tried probably a dozen different recipes over the years (yes, my family have been very patient taste-testers), and I keep coming back to Delia’s methods. Why? Because they actually work. No fancy techniques, no obscure ingredients you can’t find at your local Tesco, just solid, reliable recipes that produce mince pies so good your neighbours will be knocking on your door asking for the recipe.
Delia Smith, for those of you who might not know, is essentially Britain’s culinary national treasure. She’s been teaching people how to cook properly since before I was born, and her recipes are famous for being absolutely foolproof. Her mince pies are no exception.
Traditional vs Easy Mince Pies: Quick Comparison
Before we get into the detail, here is a side-by-side look at both Delia Smith mince pie recipes so you can decide which suits you best.
| Feature | Traditional Recipe | Easy Recipe |
| Method | Rubbing-in by hand | Food processor |
| Time needed | Longer, more hands-on | Quicker, minimal handling |
| Fat used | Butter and lard | Butter and lard |
| Baking time | 25-30 minutes | 20-25 minutes |
| Yield | 18-24 pies | About 20 pies |
| Best for | Bakers who enjoy the process | Busy parents and beginners |
| Pastry texture | Light, delicate, flaky | Tender, crumbly, still flaky |
Honestly? Both produce gorgeous mince pies. The Traditional version is wonderful if you want the full therapeutic baking experience. The Easy version is what I reach for when I have got four kids asking when Christmas is and approximately zero spare minutes.
The Two Delia Smith Mince Pie Recipes: Which One Should You Choose?
Here’s something that confused me when I first started researching: Delia actually has TWO main mince pie recipes, and they’re quite different. Let me break them down for you.
Traditional Mince Pies
This is Delia’s original family recipe, the one she grew up with. It uses the classic “rubbing-in” method where you literally rub cold butter and lard into flour with your fingertips until it looks like breadcrumbs. It’s proper old-school baking, the kind your gran probably did.
Best for: People who enjoy the meditative process of making pastry by hand, those who want the most authentic traditional flavour, and anyone who doesn’t own a food processor.
Time commitment: About 45 minutes plus chilling time
Easy Mince Pies
This is Delia’s modern take, using a food processor to make the pastry in literally 2 minutes. She developed this because even she admitted that sometimes you just want delicious mince pies without all the faff.
Best for: Busy parents (hello, that’s me!), last-minute Christmas prep, or anyone who values speed without sacrificing quality.
Time commitment: About 30 minutes plus chilling time
Honestly? I’ve made both, and the taste difference is minimal. The Easy version is slightly less flaky but still absolutely delicious. These days, with four kids running around, I almost always go for the Easy recipe. Life’s too short, you know?
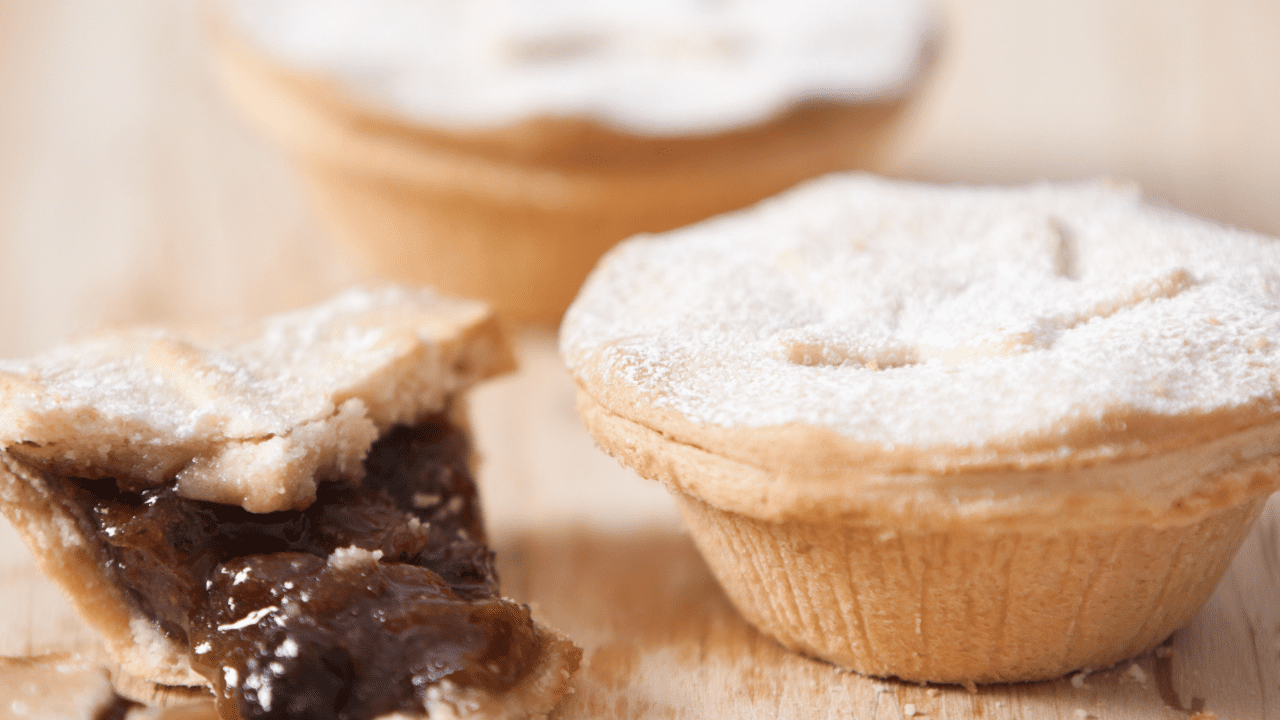
The Complete Delia Smith Mince Pies Recipe (Traditional Version)
Let me walk you through the traditional method first, because understanding this one helps you appreciate why the Easy version works so well.
Ingredients
For the Pastry:
- 350g (12½ oz / 2¾ cups) plain flour
- 175g (6 oz / ¾ cup) cold butter and lard mixed (I usually do 100g butter, 75g lard)
- Pinch of salt
- Cold water (about 2-3 tablespoons)
For the Filling:
- 560g (1¼ lb) mincemeat (shop-bought is absolutely fine, or make your own if you’re feeling ambitious)
- Milk for brushing
- Icing sugar for dusting
Equipment:
- 12-hole patty tin (or two if making the full batch)
- 7.5cm (3 inch) fluted cutter
- 6cm (2½ inch) fluted cutter
Method
Step 1: Make the Pastry
Sift your flour and salt into a large mixing bowl. Cut your cold butter and lard into small cubes and add them to the flour. This is where the magic happens: using just your fingertips (not your whole hands, which are too warm), rub the fat into the flour.
It’s quite therapeutic actually! You’re basically picking up small amounts of the mixture and rubbing your thumb against your fingers, letting it fall back into the bowl. Keep doing this until the whole mixture looks like fine breadcrumbs. This usually takes me about 5 minutes.
Step 2: Bring It Together
Add your cold water a tablespoon at a time, mixing with a knife (not your warm hands yet!) until the mixture starts to clump together. Then, and only then, use your hands to bring it into a ball. The dough should leave the bowl clean.
Pop it in a plastic bag (or wrap it in cling film) and stick it in the fridge for at least 20-30 minutes. I know it’s tempting to skip this step, but don’t! Resting the pastry makes it so much easier to roll out.
Step 3: Preheat and Prep
While the pastry is chilling, preheat your oven to 200°C (400°F / Gas Mark 6). Lightly grease your patty tins.
Step 4: Roll and Cut
On a well-floured surface, roll out half the pastry as thinly as you can without it tearing. Aim for about 3mm thickness. Use your larger cutter to cut out rounds. You should get about 12 from half the pastry, re-rolling scraps as needed.
Press these into your patty tin holes. Don’t stretch them! Just gently press them into place.
Step 5: Fill
Add a generous teaspoon of mincemeat to each pastry case. Fill them right to the top of the pastry edge, but not overflowing. (I learned this the hard way when my first batch exploded mincemeat everywhere!)
Step 6: Top
Roll out the remaining pastry and use the smaller cutter for the lids. Dampen the edges of your filled cases with a little water, then press the lids on top, sealing the edges.
Brush each pie with milk and make three little snips in the top with scissors. This lets steam escape and prevents your pies from getting soggy middles.
Step 7: Bake
Pop them near the top of your oven for 25-30 minutes until they’re light golden brown. The smell at this point is absolutely incredible.
Step 8: Cool and Dust
Transfer to a wire rack to cool, then dust generously with icing sugar. Try to resist eating them all immediately (harder than it sounds!).
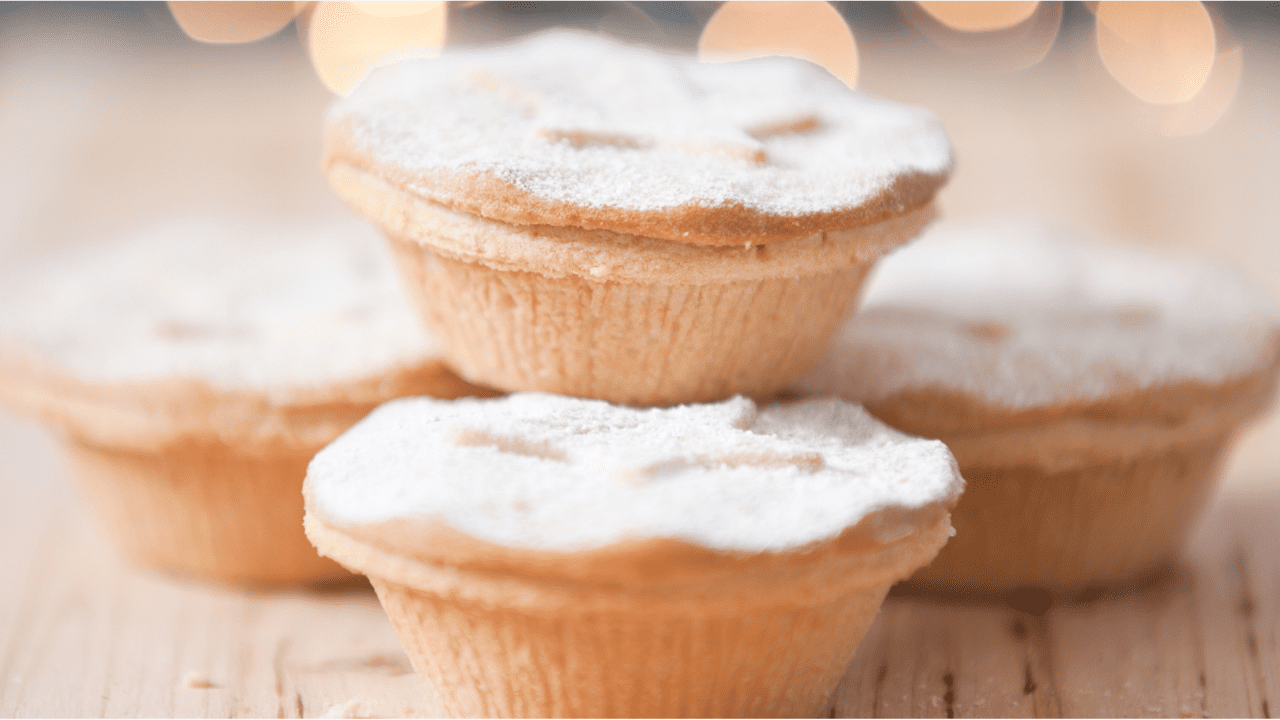
The Quick Version: Delia’s Easy Mince Pies Recipe
If you’re short on time (or just can’t be bothered with all that rubbing in), here’s Delia’s food processor version:
Ingredients
Same as traditional, but the method is completely different:
Method:
- Chuck your cold butter and lard (cut into chunks) straight into your food processor bowl
- Sift flour into a separate bowl, then tip it into the processor with the fats
- Add a pinch of salt and blitz until it looks crumbly
- Add 3 tablespoons of cold water and pulse again until it comes together
- Tip it into a bowl, bring it into a ball with your hands
- Chill for 30 minutes, then follow steps 3-8 from the traditional method above
Seriously, the pastry-making part takes about 2 minutes. It’s brilliant!
My Top Tips for Perfect Delia Smith Mince Pies (Learned the Hard Way!)
After making approximately 47 million batches over the years (okay, maybe I’m exaggerating slightly), here’s what I’ve learned:
Keep Everything Cold
This is probably the most important tip. Cold butter = flaky pastry. I actually pop my flour in the fridge for 30 minutes before starting, especially if my kitchen is warm. In fact, one Christmas I made pastry during a heatwave (don’t ask), and it was a disaster until I started chilling everything.
Don’t Overwork the Dough
The more you handle pastry, the tougher it gets. When bringing it together, do it quickly and gently. If you find yourself kneading and kneading, stop! You’re making bread, not pastry.
Roll Thin
Delia says “as thin as possible” and she means it. Thick pastry makes heavy, doughy pies. Aim for about 3mm. If you can almost see through it, you’re on the right track.
Don’t Overfill
I know it’s tempting to pile in loads of mincemeat, but resist! Too much filling and your lids won’t seal properly, or worse, the filling will bubble over and burn on your tin (nightmare to clean).
Make the Snips
Those three little scissor snips in the top aren’t just decorative. They let steam escape, which prevents soggy middles. Game changer!
Cool in the Tin
Let your pies sit in the tin for 5 minutes before transferring to a wire rack. They’re delicate when hot and will break if you rush this step. (Yes, I broke an entire batch once. Yes, I cried a little.)
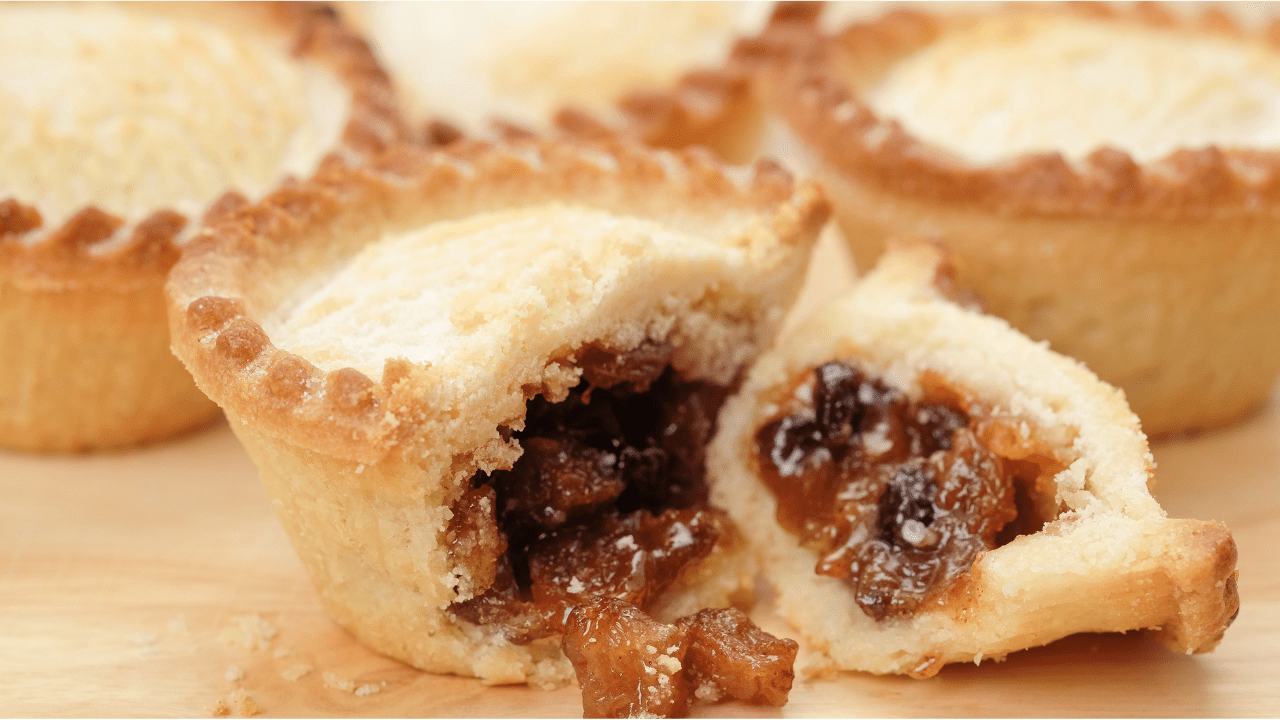
Creative Twists on Classic Delia Smith Mince Pies
Once you’ve mastered the basic recipe, it’s fun to experiment! Here are some variations my family loves:
Orange and Almond Version
Add the zest of one orange to your pastry, and place a small piece of marzipan under the mincemeat. Absolutely divine!
Spiced Rum Glaze
Mix icing sugar with a splash of dark rum instead of water and drizzle over cooled pies. Very grown-up!
Star Tops
Instead of full lids, cut out stars with a small cutter and place them on top. Looks gorgeous and lets more of that lovely mincemeat show through.
Cranberry Addition
Mix some dried cranberries into your mincemeat for extra tartness. Cuts through the sweetness beautifully.
Cheese Twist
This sounds weird, but trust me: add a tiny cube of mature cheddar to each pie before adding the lid. The sweet-savoury combo is surprisingly amazing. Very Yorkshire!
Frangipane Layer
Pipe or spoon a thin layer of frangipane (almond cream) on top of the mincemeat before adding the lid. Restaurant-quality fancy!
Make-Ahead and Freezing Guide
This is where mince pies really shine for busy people:
Freezing Unbaked
- Assemble your pies completely but don’t bake them
- Place the whole patty tin in the freezer until solid (about 2 hours)
- Pop the frozen pies out and store in freezer bags or containers
- They’ll keep for up to 3 months
- Bake straight from frozen, adding 5-7 minutes to the cooking time
This is brilliant for Christmas! I usually make a massive batch in November and just bake them fresh whenever we need them.
Freezing Baked
- Cool completely
- Layer between baking parchment in airtight containers
- Freeze for up to 3 months
- Defrost at room temperature for a few hours
- Warm through in a 180°C oven for 5-10 minutes before serving
Storing Baked Pies
If you’re not freezing them, store cooled mince pies in an airtight tin at room temperature. They’ll keep for about a week, though they’re best within the first 3-4 days.
Serving Suggestions: Beyond Just a Dusting of Icing Sugar
Traditional Ways
- Dusted with icing sugar (classic for a reason!)
- Served warm with a dollop of brandy butter
- With a generous spoonful of clotted cream
- Alongside a good cup of strong tea
American-Inspired Twists
Coming from the US, I sometimes like to serve them with:
- Vanilla ice cream (works surprisingly well!)
- Whipped cream with a hint of cinnamon
- Warm custard (very British, but I love it)
Boozy Options
- Warmed with a splash of brandy poured over
- Served with mulled wine
- Alongside Irish cream liqueur coffee
The American vs British Mince Pie Experience
Can we talk about the confusion when I first encountered these in the UK? Back in Boston, “mince pie” would absolutely contain actual minced meat. The first time someone offered me a “mince pie” at a Christmas party, I was genuinely worried!
But here’s what I’ve come to love about British mince pies: they’re these gorgeous little parcels of dried fruit, spices, and sometimes a splash of brandy, all wrapped up in buttery pastry. They’re sweet, warming, and somehow taste exactly like Christmas should taste.
For my American readers who might be trying these for the first time: think of them more like little fruit pies, with flavours reminiscent of fruit cake but way less dense and much more delicious. The “mince” refers to the finely chopped (minced) dried fruits, not meat. Though fun fact: they used to contain meat centuries ago!
Homemade vs Shop-Bought Mincemeat
Let’s address this head-on: should you make your own mincemeat or buy it?
Honestly? Shop-bought is absolutely fine. Even Delia uses it sometimes! Good quality supermarket mincemeat (look for “luxury” versions with more fruit and less gloop) works brilliantly.
That said, homemade mincemeat is absolutely delicious if you have the time. Delia has a fantastic vegetarian mincemeat recipe where you melt the suet in the oven with all the fruits and spices, then jar it up. It keeps for up to a year and makes amazing gifts.
I make a big batch in October when I’m feeling organised (rare!), use some for our Christmas pies, and give jars to friends and family. But I’ve also been known to grab a jar from Waitrose in December when life gets hectic. No shame in that!
Equipment You’ll Need
Let’s talk about what you actually need versus what’s nice to have:
Essential:
- Patty tins (Also called muffin tins or bun tins. You want the 12-hole variety with 6cm/2½ inch holes)
- Two fluted cutters (7.5cm/3 inch and 6cm/2½ inch)
- Rolling pin
- Mixing bowl
- Wire cooling rack
Nice to Have:
- Food processor (if making the Easy version)
- Pastry brush for the milk wash
- Kitchen scissors for making the steam holes
- Flour dredger for easy flouring
Most of this you probably already have in your kitchen. I managed for years with just the basics!
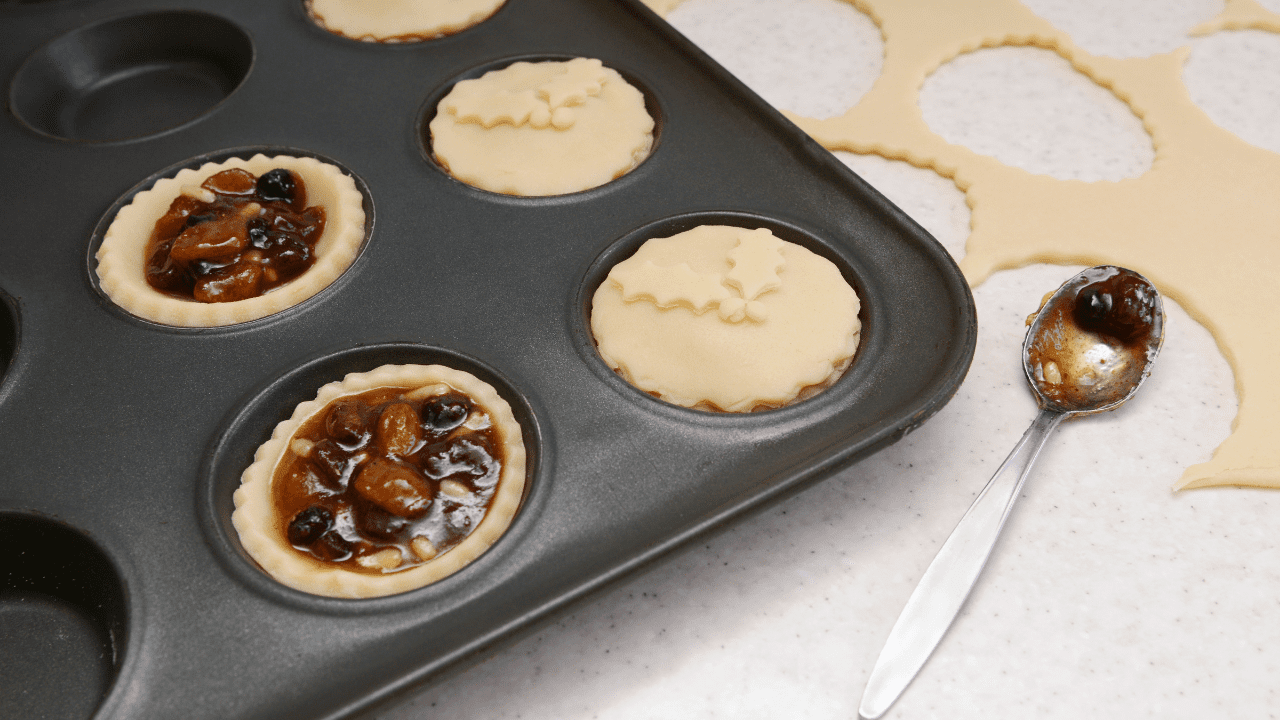
Why Delia’s Method Works: The Science Bit
Right, quick baking science lesson (I promise it’s not boring!):
The reason Delia’s pastry works so well is all about temperature and technique. When you use cold fat and then bake at high heat, the fat creates little pockets of steam in the pastry, which makes it flaky. If your fat is too warm, it mixes too thoroughly with the flour and you end up with more of a shortbread texture – nice, but not what we’re after for mince pies.
The resting time in the fridge serves two purposes: it keeps everything cold (remember, cold = flaky), and it also relaxes the gluten in the flour. When you mix flour with water, gluten forms, and that gluten can make your pastry shrink and become tough if you don’t give it time to relax.
The three little snips in the top? Pure genius. As the mincemeat heats up, it releases steam. If that steam has nowhere to go, it makes your pastry soggy. Those little holes let it escape, keeping your bottoms crisp and your tops golden.
Troubleshooting Common Mince Pie Problems
Even with Delia’s foolproof recipes, things can occasionally go a bit wrong. Here is how to fix the most common issues.
Soggy Bottoms
This is the number one complaint I hear, and it usually comes down to one of three things. First, your mincemeat might have been too wet. If you are using shop-bought mincemeat, drain off any excess liquid before filling. Second, you might have overfilled the cases. One rounded teaspoon is plenty. Third, make sure you are baking on the top shelf of the oven where it is hottest. Those three little snips in the lid? They let steam escape and keep everything crisp.
Pastry Shrinking
If your pastry cases are shrinking down the sides of the tin, the dough needed more resting time. That 20-30 minutes in the fridge is not optional. It relaxes the gluten and stops the pastry pulling back during baking. If you are really struggling, try resting it for a full hour.
Cracked or Tough Pastry
This happens when the pastry has been overworked. Whether you are rubbing in by hand or using a processor, stop as soon as it comes together. The more you handle it, the more gluten develops, and that means tough, cracked pastry rather than tender and flaky.
Lids Falling Off
Make sure you are dampening the edges of the smaller rounds with milk or water before pressing them into place. Press gently but firmly around the edges to seal. If they are still popping off, you have probably overfilled the cases and the mincemeat is pushing the lids up as it heats.
Pastry Too Pale
An egg wash or milk brush gives you that lovely golden colour. If your pies are coming out pale, try brushing them twice: once before baking and once about halfway through. And check your oven temperature. If it runs cool, your pies will take longer and may not colour properly.
Pro Tips for Perfect Delia Smith Mince Pies
After making these for more Christmases than I can count (and feeding them to four very honest children), here is what I have learned.
Make the Pastry the Day Before
Delia says 20-30 minutes in the fridge, but honestly, pastry that has rested overnight is even better. It rolls out like a dream and barely shrinks at all. Just wrap it well in cling film and take it out about 15 minutes before you want to roll it.
Freeze Them Before Christmas
These freeze brilliantly, either before or after baking. I usually make a double batch in early December and freeze them unbaked. Then I can just pop them in the oven straight from frozen when guests arrive. Add about 5 extra minutes to the baking time.
Use a Mix of Butter and Lard
I know lard sounds old-fashioned, but Delia uses it for a reason. The combination of butter (for flavour) and lard (for flakiness) gives you pastry that is both delicious and perfectly textured. If you really cannot use lard, all-butter works but the pastry will be slightly less flaky.
Do Not Skip the Snips
Those three little scissor snips in the top of each pie are not just decorative. They let steam escape so your bottoms stay crisp and your tops stay intact. Trust Delia on this one.
Warm Them Before Serving
Mince pies are good at room temperature, but they are absolutely gorgeous served warm. Pop them in a 160C oven for 5-10 minutes before serving. A blob of brandy butter or clotted cream on top is not strictly necessary, but I highly recommend it.
My Family’s Christmas Tradition
I’ll be honest: making Delia Smith mince pies has become one of my favourite Christmas traditions. Every December, usually on a rainy Saturday afternoon, I gather the kids in the kitchen (chaos ensues, obviously), and we make batch after batch.
The older two help with rolling and cutting, the younger ones “help” by eating mincemeat straight from the jar (I pretend not to notice), and inevitably we end up with flour everywhere and sticky fingerprints on everything. But the house smells incredible, we’re all together, and we end up with dozens of mince pies to enjoy, share with neighbours, and leave out for Father Christmas on Christmas Eve.
It’s become the thing my kids associate with the start of Christmas – not putting up the tree, not writing wish lists, but Mummy making mince pies. And that’s pretty special.
Frequently Asked Questions
What temperature do you cook Delia Smith mince pies?
Both Delia’s Traditional and Easy mince pie recipes call for Gas Mark 6, which is 200C or 400F. Bake on the top shelf of the oven for the crispest results.
How long do you bake Delia Smith mince pies?
The Easy version takes 20-25 minutes, while the Traditional version takes 25-30 minutes. They should be light golden brown when done. If baking from frozen, add an extra 5 minutes.
Can you freeze Delia Smith mince pies?
Yes, they freeze beautifully for up to 3 months. You can freeze them either before or after baking. If freezing unbaked, place them on a tray until solid, then transfer to freezer bags. Bake straight from frozen, adding 5 extra minutes to the cooking time.
Why does Delia use lard in her mince pie pastry?
Lard creates a flakier, lighter pastry than butter alone. The combination of butter (for flavour) and lard (for texture) gives you the best of both worlds. You can substitute vegetable shortening or use all butter if preferred, though the texture will be slightly different.
How long do homemade mince pies keep?
Stored in an airtight tin at room temperature, Delia’s mince pies will keep for about a week. For longer storage, freeze them. They also reheat beautifully from the fridge or freezer.
Final Thoughts
Making Delia Smith mince pies has become one of my favourite Christmas traditions, and I say that as someone who had never even heard of mince pies before moving to the UK. Her recipes just work. They are reliable, forgiving, and produce mince pies that genuinely taste better than anything you will find in the shops.
If you have got time to enjoy the process, go for the Traditional version. There is something wonderfully therapeutic about rubbing butter and lard into flour with your fingertips while Christmas music plays in the background. If you are short on time (and let us be honest, most of us are in December), the Easy food processor version is just as delicious and takes half the effort.
Yes, you will probably get flour everywhere. Yes, your first batch might not look perfect. Mine certainly did not, and I still remember the slightly lopsided mince pies I proudly served at my first British Christmas. But they tasted amazing, and that is what matters.
So grab your rolling pin, chill your butter, and give Delia’s mince pies a go this Christmas. Your house will smell incredible, your family will be impressed, and you will have created something genuinely homemade for the festive season. And if they do not turn out quite right? Well, there is always next year. That is the beauty of Christmas traditions.
See more of my favourite Delia Smith Recipes:
Delia Smith Pancakes
Delia Smith Pavlova
Delia Smith Scones
Delia Smith Chocolate Torte
Delia Smith Meringue
Delia Smith Lasagne
Delia Smith Plum Jam

Becky is the voice behind Life in Velvet, an organised, intentional living blog focused on practical food, calm homes, thoughtful projects, and everyday systems that make real life feel easier. A mum of 3 living in the UK, Becky writes from lived experience, sharing what works, what doesn’t, and the decisions that make family life run more smoothly.
With a background in marketing and content writing, and over a decade of blogging experience, she brings a thoughtful, structured approach to everything from baking and home projects to routines and decision-making. Life in Velvet is where planning meets creativity, with ideas designed for real homes and real life.