
KEY TAKEAWAYS
- Quick cooking: A 1kg (2.2lb) gammon joint cooks in just 70 minutes in your air fryer
- Essential technique: Wrapping in foil keeps the meat juicy and prevents drying out
- Perfect temperature: Internal temperature should reach 71-75°C (160-165°F) for safe eating
- Versatile results: Use for Sunday roasts, sandwiches, salads, or freeze for later
- Space saver: Frees up your oven for sides and other dishes – perfect for Christmas dinner
Why I’m Obsessed with Cooking Gammon in My Air Fryer
Can we talk about how cooking a gammon joint in the air fryer has genuinely changed my life? I know that sounds dramatic, but hear me out. With four kids running around and a house full of pets (seriously, our menagerie is getting out of control), I need kitchen wins that are quick, easy, and don’t leave me with a mountain of washing up.
The first time I made an air fryer gammon joint, I was honestly skeptical. Could this little countertop appliance really handle a whole joint of meat? Would it be dry? Would it even cook through properly? Spoiler alert: it was absolutely brilliant, and I haven’t gone back to the traditional oven method since.
The beauty of cooking gammon in your air fryer is that it’s genuinely foolproof. You get gorgeous, tender, juicy meat with that sticky caramelised glaze on top, and your oven stays completely free for Yorkshire puddings, roast potatoes, or whatever else you’re making. Plus, it’s so much more economical to run than heating up the whole oven – something I’m definitely mindful of with energy prices these days.
I’ve been making this recipe on repeat, whether it’s for a proper Sunday roast, quick weeknight dinners, or to have sliced ham in the fridge for sandwiches and salads throughout the week. It’s become one of those recipes I turn to again and again because it just works.
What Exactly Is Gammon? (For My Fellow Americans)
When I first moved to the UK from Boston, I’ll be honest – I had no idea what gammon was. Back home in the States, we’d just call it “ham,” but there’s actually a subtle difference that’s worth knowing about.
Gammon is the hind leg of a pig that’s been cured (usually in a salt brine) but hasn’t been cooked yet. It’s essentially raw, cured pork. Once you cook it, then it becomes ham. Think of gammon as the British equivalent of buying a raw ham joint – it needs cooking before you can eat it.
You’ll typically find it sold as:
- Smoked gammon: Has a lovely smoky flavour (my personal favourite)
- Unsmoked gammon: Milder taste, lets other flavours shine through
- Bone-in gammon: More traditional, adds extra flavour
- Boneless gammon: Easier to carve and fit in your air fryer
The curing process means gammon is quite salty, which is why it pairs so beautifully with sweet glazes. That sweet-salty combination is just chef’s kiss, honestly.

Why Air Fryer Gammon Beats Traditional Methods
I’ve cooked gammon pretty much every way you can imagine – boiled on the hob, slow-cooked, roasted in the oven – and while they all have their place, the air fryer method has become my go-to. Here’s why:
It’s ridiculously quick. A 1kg joint takes just over an hour, compared to 2-3 hours in the oven or slow cooker. When you’re juggling four kids and trying to get dinner on the table at a reasonable hour, that time saving is massive.
Your oven stays free. This is huge, especially at Christmas or when you’re doing a proper Sunday roast. I can have the gammon cooking away in the air fryer whilst the oven’s full of roasties, Yorkshire puds, and whatever else we’re having.
Lower energy costs. Air fryers use significantly less electricity than conventional ovens. With the cost of living being what it is, every little helps, right?
Consistent results. The circulating hot air means even cooking throughout. No hot spots, no dry bits, just perfectly cooked ham every single time.
Easier cleanup. One foil-lined basket versus a massive roasting tin? I know which one I’d rather wash up.
More moisture retention. Cooking the gammon wrapped in foil creates a sort of steam environment, which keeps all those lovely juices locked in. The result is incredibly tender, melt-in-your-mouth meat.
The only downside? Size limitations. Your gammon needs to fit comfortably in your air fryer basket with space around it for air circulation. But honestly, that’s a small trade-off for all the benefits.
Choosing the Perfect Gammon Joint for Your Air Fryer
Not all gammon joints are created equal, and picking the right one makes a real difference to your final result. Here’s what I’ve learned after making this recipe countless times:
Size matters (that’s what she said – sorry, couldn’t resist). The biggest factor is whether your gammon will actually fit in your air fryer. I use a large Ninja, and I can comfortably fit a 1.5kg (3.3lb) joint. For smaller air fryers (around 3-4L), stick to joints around 750g-1kg (1.65-2.2lb). The joint shouldn’t touch the sides of the basket – you need that air circulation.
Check the fat content. Look for a joint with a decent layer of fat on top. I know it might seem counterintuitive, but that fat is gold. It protects the meat as it cooks and crisps up beautifully with the glaze. Joints that are too lean can end up a bit dry. Don’t worry though – you’ll remove most of the thick rind before cooking, keeping just a thin layer of fat.
Read the label carefully. Some cheaper gammon joints are made from “selected cuts of cured pork” and contain quite a bit of added water (sometimes up to 20%). The more expensive joints are usually one solid piece of pork with less water. Both will work in this recipe, but the higher-pork-content joints tend to have better flavour and texture. That said, if you’re on a budget, the cheaper ones are absolutely fine.
Smoked vs unsmoked is completely down to personal preference. I’m team smoked all the way because I love that depth of flavour, but my husband prefers unsmoked. Try both and see which camp you’re in!
Boneless is easier. While bone-in gammon has slightly more flavour (the bone and marrow add richness), boneless joints are much easier to fit in an air fryer and carve afterwards. For air frying, I’d definitely recommend going boneless.
A note on soaking: Some gammon joints recommend soaking in water before cooking to reduce saltiness. Check your packaging – some modern gammon doesn’t need it. If yours is particularly salty, you can soak it in cold water for 30 minutes to an hour before cooking.
Essential Equipment and Ingredients
You don’t need loads of fancy kit or hard-to-find ingredients for this recipe. Here’s what I use:
Equipment You’ll Need
Air fryer (obviously!): Any model will work as long as your gammon fits comfortably. I use a basket-style air fryer, but drawer-style ones work perfectly too.
Aluminium foil: This is non-negotiable. You’ll use it to wrap the gammon during cooking to keep it moist. Make sure you have heavy-duty foil or use a double layer.
Meat thermometer: Honestly, this is a game-changer. Takes all the guesswork out of cooking. I use a digital instant-read thermometer (you can grab a decent one on Amazon for under £15/$20), and it’s brilliant for checking the internal temperature.
Sharp knife: For scoring the fat and removing the rind.
Pastry brush: For applying the glaze. A silicone one works best as it’s easier to clean.
Small mixing bowl: For making your glaze.
Core Ingredients
Gammon joint: 750g-1.5kg (1.65-3.3lb), depending on your air fryer size and how many you’re feeding. As a rough guide, allow 170-200g (6-7oz) raw weight per person.
Glaze ingredients: This is where you can get creative. The classic honey and mustard combo is absolutely brilliant, but I’ll share loads more ideas below. At minimum, you’ll want something sweet (honey, maple syrup, marmalade) and something with a bit of tang (mustard, orange juice).
That’s genuinely it for the basics. See? I told you it was straightforward.
The Perfect Air Fryer Gammon Joint Recipe
Right, let’s get to the actual recipe. I’m going to walk you through this step-by-step because I want you to nail it first time.
My Go-To Honey Mustard Glazed Gammon
Serves: 4-6 people
Prep time: 10 minutes (plus 30 minutes resting time)
Cook time: 70 minutes for a 1kg joint
Total time: About 1 hour 50 minutes
Ingredients
For the gammon:
- 1kg (2.2lb) gammon joint, boneless
- Aluminium foil
For the glaze:
- 3 tablespoons runny honey (or maple syrup)
- 2 tablespoons Dijon mustard
- 1 tablespoon wholegrain mustard
- 1 tablespoon dark brown sugar
- ½ teaspoon smoked paprika (optional, but lovely)
- Freshly ground black pepper
Instructions
Step 1: Prep your gammon
Take your gammon joint out of the fridge about 30 minutes before cooking. This is really important – starting with cold meat straight from the fridge means uneven cooking. Remove all packaging, including any string or netting, and pat the joint dry with kitchen paper.
At this stage, you can remove most of the thick outer rind (the skin) with a sharp knife if you fancy, though I usually wait until it’s partially cooked as it comes off more easily then. Either way works!
Step 2: Wrap in foil
Tear off a large piece of heavy-duty foil (or use a double layer of regular foil). You want it big enough to wrap around the entire joint with the edges sealed at the top. Place your gammon in the centre of the foil and fold it up loosely around the meat, creating a sealed parcel. Leave a little room inside for air circulation, but make sure it’s properly sealed so steam doesn’t escape.
Step 3: Air fry the first stage
Pop the wrapped gammon into your air fryer basket. Set the temperature to 170°C (340°F) and cook for 1 hour. Different air fryers can vary, so if yours runs hot, you might want to check it after 50 minutes.
Step 4: Make your glaze
While the gammon’s cooking, make your glaze. Simply mix together the honey, both mustards, brown sugar, paprika (if using), and a good grinding of black pepper in a small bowl. Give it a good stir until everything’s combined. The mixture will look quite thick and paste-like – that’s perfect.
Step 5: Score and glaze
After an hour, carefully remove the foil parcel from the air fryer (it’ll be hot and steamy, so watch yourself!). Open up the foil and let the steam escape for a minute.
Now, if you haven’t already, use a sharp knife to carefully remove the thick outer rind, leaving a thin layer of fat. Score this fat in a diamond pattern – diagonal lines one way, then diagonal lines the other way. This isn’t just for looks (though it does look gorgeous); it helps the glaze penetrate the meat and lets the fat crisp up beautifully.
Brush your glaze generously all over the scored fat, making sure to get it into all those little diamond crevices. Leave the foil pulled back and open.
Step 6: Final cook
Return the gammon to the air fryer, still sitting on the foil but with it open so the glaze can caramelise. Increase the temperature to 200°C (400°F) and cook for 10-15 minutes. Keep an eye on it – you want it gorgeously golden and sticky, not burnt. If it’s browning too quickly, cover the top loosely with foil.
Step 7: Check it’s cooked
Insert your meat thermometer into the thickest part of the joint. It should read at least 71°C (160°F), though I prefer to take mine to 75°C (167°F) for safety. If it hasn’t reached temperature yet, pop it back in for another 5-10 minutes.
Step 8: Rest and serve
This is crucial – don’t skip this step! Remove your beautiful glazed gammon from the air fryer and tent it loosely with foil. Let it rest for at least 10 minutes (15 is even better). This allows the juices to redistribute throughout the meat, making it more tender and easier to carve.
After resting, carve into thick or thin slices (your choice!) and serve up.
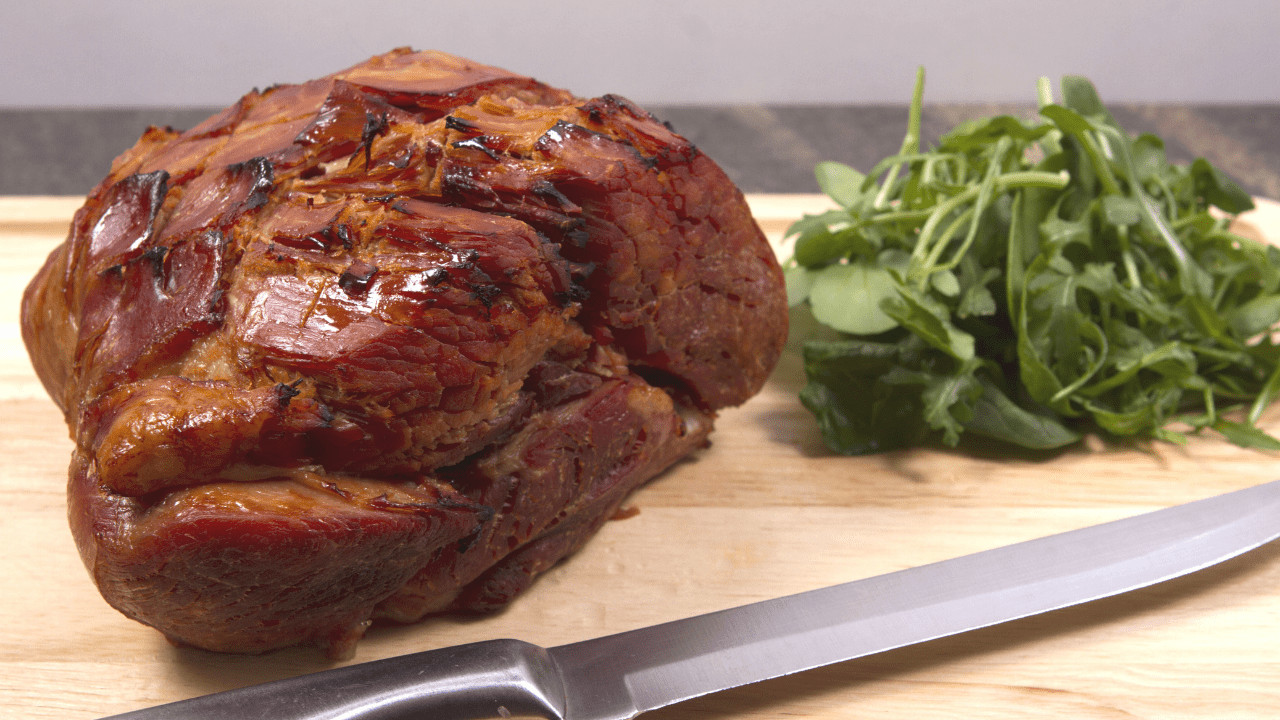
Foolproof Cooking Times for Different Sizes
Not everyone’s going to be cooking a 1kg joint, so here’s a handy table to help you work out timing. Remember, these are guidelines – always use a meat thermometer to be sure.
| Joint Weight | First Stage @ 170°C (340°F) | Glazing Stage @ 200°C (400°F) | Total Time |
|---|---|---|---|
| 500g (1.1lb) | 35 minutes | 10 minutes | 45 minutes |
| 750g (1.65lb) | 50 minutes | 10 minutes | 1 hour |
| 1kg (2.2lb) | 1 hour | 10 minutes | 1 hour 10 minutes |
| 1.25kg (2.75lb) | 1 hour 15 minutes | 10-15 minutes | 1 hour 25-30 minutes |
| 1.5kg (3.3lb) | 1 hour 20 minutes | 10-15 minutes | 1 hour 30-35 minutes |
General rule of thumb: 25 minutes per 500g (1.1lb) at 170°C (340°F), plus 20 minutes, then add 10-15 minutes for the glazing stage.
US measurements note: If you’re more comfortable with Fahrenheit, 170°C is 340°F and 200°C is 400°F. For weights, 500g equals about 1.1lb, 1kg is 2.2lb, and 1.5kg is 3.3lb.
Glaze Ideas to Make Your Air Fryer Gammon Joint Sing
The honey mustard glaze I shared above is my absolute go-to, but one of the joys of making gammon is how versatile it is with different flavours. Here are some of my other favourites:
Classic Marmalade & Honey Glaze
- 150g (5oz) orange marmalade
- 3 tablespoons runny honey
- 1 teaspoon wholegrain mustard
Mix together and brush on during the last 10 minutes. This is a proper British classic and tastes absolutely gorgeous. Even if you think you don’t like marmalade (I used to be firmly in that camp), give this a try – the combination is magic.
Sticky Maple & Bourbon Glaze
- 4 tablespoons maple syrup
- 2 tablespoons bourbon (or whisky)
- 1 tablespoon Dijon mustard
- 1 tablespoon dark brown sugar
Perfect for when you want to add a bit of grown-up sophistication. The alcohol cooks off, leaving just that lovely woody, sweet flavour.
Festive Cranberry Glaze
- 125g (4oz) cranberry sauce
- 50ml (3 tablespoons) cranberry juice
- 1 tablespoon wholegrain mustard
- 1 tablespoon honey
This one’s brilliant for Christmas dinner. The tartness of the cranberries cuts through the richness of the gammon beautifully.
Cola Glaze (Trust Me on This)
- 200ml (¾ cup) cola (not diet)
- 3 tablespoons brown sugar
- 2 tablespoons Dijon mustard
- 1 teaspoon smoked paprika
Sounds bonkers, works brilliantly. The cola reduces down into this incredible sticky glaze. My kids absolutely love this one.
Pineapple & Ginger Glaze
- 4 tablespoons pineapple juice
- 2 tablespoons honey
- 1 tablespoon fresh grated ginger
- 1 tablespoon soy sauce
For when you want something a bit tropical. The ginger gives it a lovely kick.
Simple Brown Sugar & Cloves
- 4 tablespoons dark brown sugar
- 2 tablespoons water
- Whole cloves (for studding)
Mix the sugar and water to make a paste. Score your gammon and stud each diamond with a whole clove before brushing on the glaze. Absolutely traditional and gorgeous.
For any glaze, apply it during the last 10-15 minutes of cooking at the higher temperature. The sugars will caramelise and create that gorgeous sticky coating.
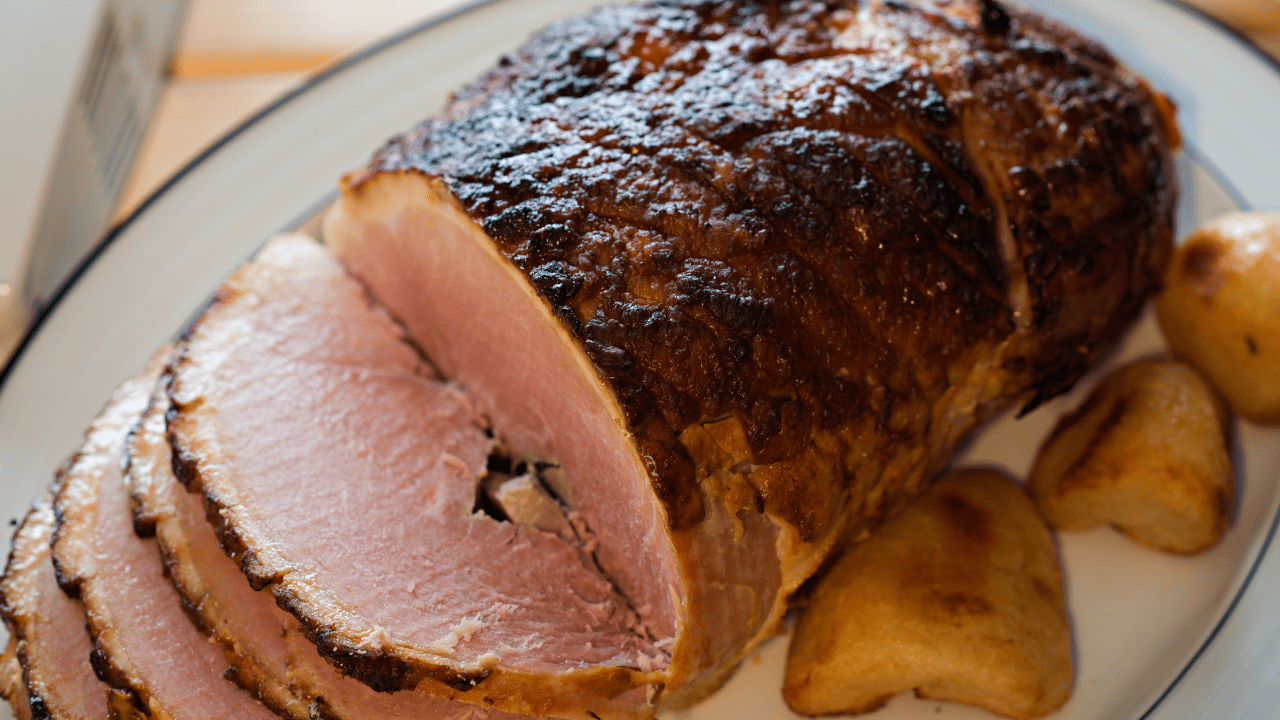
Serving Suggestions: What Goes with Air Fryer Gammon?
The beauty of gammon is how versatile it is. Here are my favourite ways to serve it:
For a Traditional Sunday Roast
Serve thick slices of your glazed gammon alongside:
- Crispy roast potatoes (duck fat is brilliant, but honestly, vegetable oil works just fine)
- Honey-roasted parsnips and carrots
- Seasonal greens (I love Tenderstem broccoli or buttered cabbage)
- Cauliflower cheese
- Yorkshire puddings (yes, even with pork!)
- Rich onion gravy
For a Quick Weeknight Dinner
Slice your gammon and serve with:
- Homemade chips (or shop-bought, no judgement)
- A fried egg on top (absolute British classic – gammon, egg, and chips)
- Grilled pineapple rings (controversial but delicious)
- Simple green salad or peas
Cold Cuts and Light Meals
Thinly sliced cold gammon is brilliant for:
- Proper doorstop sandwiches with English mustard and pickles
- Ploughman’s lunch with cheese, pickles, and crusty bread
- Chef’s salad with hard-boiled eggs and vintage cheddar
- Jacket potatoes with coleslaw
- Pasta salads
Leftover Gammon Recipe Ideas
Don’t let any go to waste! Leftover gammon is brilliant in:
- Pea and ham soup (an absolute British classic)
- Carbonara (use it instead of bacon)
- Fried rice
- Quiche or frittata
- Ham and mushroom pasta bake
- Split pea soup
- Chicken and ham pie (yes, mixing meats!)
- Breakfast hash with potatoes and eggs
I often deliberately cook a bigger joint than I need just so I have ham throughout the week for packed lunches and quick dinners.
Common Problems and How to Fix Them
Even though this recipe is pretty foolproof, sometimes things don’t go quite to plan. Here’s how to troubleshoot:
Problem: My gammon is too salty
Solution: Next time, soak your gammon in cold water for 30 minutes to 1 hour before cooking, changing the water once or twice. You can also boil it in a pan of water for 10 minutes, then drain before air frying.
When serving, pair it with sweet accompaniments like honey-roasted veg or sweet apple sauce to balance the saltiness.
Problem: The glaze is burning
Solution: Turn the temperature down to 180°C (350°F) and add a few more minutes to the cooking time instead. Some glazes (especially those with lots of sugar) can catch quickly. If you notice it browning too fast, loosely cover the top with foil.
Problem: The meat is dry
Solution: This usually means it’s overcooked. Always use a meat thermometer and remove the gammon when it hits 71-75°C (160-167°F). It will continue cooking slightly as it rests.
Make sure you’re wrapping it well in foil during the first cooking stage – this is crucial for keeping moisture in.
Problem: It’s not cooked in the middle
Solution: Different air fryers cook at different rates. If your meat thermometer shows it’s not up to temperature, simply return it to the air fryer for another 10 minutes at 170°C (340°F), re-wrapped in foil.
Problem: The fat hasn’t crisped up
Solution: Give it an extra 5 minutes at 200°C (400°F) without foil. You can even pop it under the grill for a couple of minutes if your air fryer has that function.
Problem: My gammon doesn’t fit in my air fryer
Solution: Buy a smaller joint! There’s no way around this one, I’m afraid. The gammon needs space around it for proper air circulation. Check the size before you buy.
Storage and Reheating: Making Life Easier
One of the things I love about cooking a whole gammon joint is that it keeps brilliantly, meaning you can meal prep or enjoy it throughout the week.
Storing Cooked Gammon
In the fridge: Let your gammon cool completely, then wrap it tightly in foil or cling film (I usually do both). Store in the fridge for up to 4 days. For maximum freshness, wait until it’s completely cold before slicing.
Pro tip: If you’re planning to use it for sandwiches, slice it all at once when it’s cold – you’ll get much thinner, neater slices. Layer the slices with greaseproof paper between them so you can grab what you need.
In the freezer: Gammon freezes brilliantly for up to 3 months. I like to:
- Let it cool completely
- Slice it up
- Wrap portions in cling film
- Pop them in freezer bags with the date on
- Defrost overnight in the fridge when needed
This way, you can grab just what you need rather than having to defrost the whole joint.
Reheating Gammon
In the microwave: The quickest method. Place slices on a microwave-safe plate, cover with a damp piece of kitchen paper (this stops them drying out), and heat for 30-60 seconds until piping hot.
In the air fryer: Wrap slices loosely in foil and heat at 160°C (320°F) for 3-5 minutes. Brilliant for keeping the texture nice.
On the hob: Add slices to whatever you’re cooking (pasta, fried rice, soup) and let them heat through that way.
In the oven: If you’re reheating a large amount, wrap in foil and heat in a 160°C (320°F) oven for 15-20 minutes.
Important safety note: Always reheat until piping hot throughout. Don’t reheat more than once.
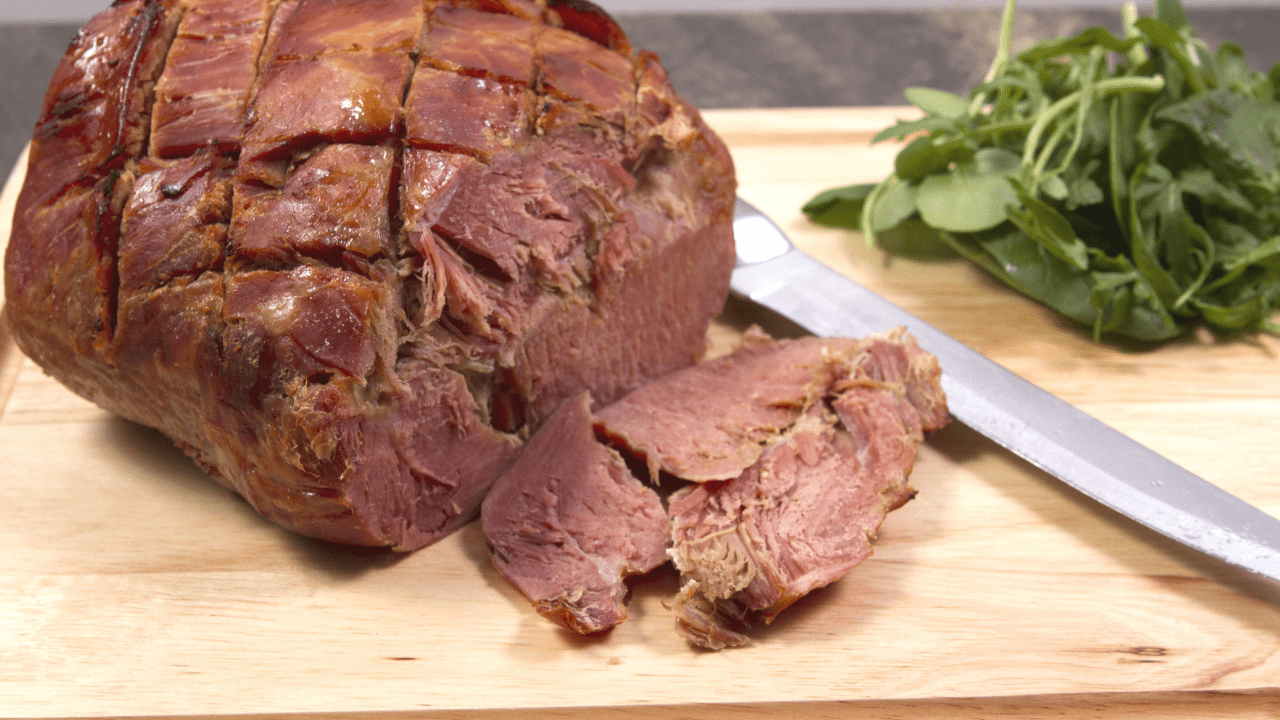
Air Fryer Gammon for Special Occasions
Whilst I absolutely love making this as a regular weeknight dinner or for meal prep, it really comes into its own for special occasions:
Christmas Dinner
This is when the air fryer gammon really shines. When your oven’s rammed full of turkey, roast potatoes, pigs in blankets, and everything else, having the gammon cooking away in the air fryer is an absolute godsend. I usually:
- Make this a day or two before Christmas
- Slice it up and serve it cold on Christmas Day alongside the turkey
- Use the oven space for all the trimmings
- Save loads of money by not buying pre-sliced deli ham for Boxing Day sandwiches
Try the cranberry glaze or the marmalade glaze for a proper festive feel.
Easter Sunday
Gammon is a traditional Easter dinner in many British households. The honey mustard or pineapple glaze works beautifully for spring. Serve it with roasted vegetables and new potatoes for a proper feast.
Sunday Roast
When you want to do something a bit different from the usual roast chicken or beef, gammon is brilliant. It’s actually cheaper than most joints of meat, feeds loads of people, and everyone loves it.
Buffets and Parties
Cold sliced gammon is perfect for buffets. Make it the day before, let it cool, slice it thinly, and arrange on a platter. Much cheaper and more impressive than buying deli meat, and your guests can help themselves.
Money-Saving Tips
Let’s be real – with the cost of living being what it is, any way to save money on the food shop is welcome. Here’s how I make this recipe as budget-friendly as possible:
1. Buy a whole joint, not pre-sliced ham. Packet ham from the supermarket costs a fortune. A whole gammon joint works out at about half the price per kilogram, and you’re getting fresh-cooked meat rather than processed stuff with loads of water added.
2. Shop around for your gammon. Prices vary massively. Check your local butcher – sometimes they’re cheaper than supermarkets, plus the quality is usually better. Supermarket own-brand gammon is absolutely fine for this recipe.
3. Make extra for leftovers. A slightly bigger joint means you’ve got ham for sandwiches, pasta, soups, and more throughout the week. No need to buy expensive lunch meat.
4. Use cheaper glazes. Honey and mustard is relatively inexpensive. If you’re really watching the pennies, even just a tablespoon of brown sugar mixed with water makes a lovely simple glaze.
5. Air fryer vs oven costs. Running an air fryer for an hour costs significantly less than running your main oven for 2-3 hours. It’s one of the reasons I switched to this method.
6. Freeze portions. If you spot gammon on offer, buy it, cook it, and freeze in portions. Future you will be very grateful!
Frequently Asked Questions
Do I need to soak gammon before cooking it in the air fryer?
Not necessarily. Check your packaging – modern gammon joints often don’t need soaking. If yours is particularly salty or the packet recommends it, soak it in cold water for 30 minutes to an hour, changing the water halfway through. I rarely bother with this step unless the gammon is very salty.
Can I cook frozen gammon in the air fryer?
I wouldn’t recommend it. The outside will overcook before the centre thaws and cooks through. Always defrost your gammon completely in the fridge before cooking (this usually takes 24 hours for a 1kg joint).
What’s the difference between gammon and ham?
Gammon is raw cured pork that needs cooking. Once you cook it, it becomes ham. So you buy gammon and eat ham!
Can I cook gammon without foil?
Technically yes, but I really don’t recommend it. The foil is crucial for keeping the meat moist during cooking. Without it, you’ll likely end up with dry gammon. If you’re concerned about using foil, you could try using a silicone basket liner, but foil really is best here.
How do I know when my gammon is cooked?
A meat thermometer is your best friend. The internal temperature should reach at least 71°C (160°F), though I prefer 75°C (167°F) for peace of mind. If you don’t have a thermometer, insert a sharp knife into the thickest part – the juices should run clear and the knife should go in easily. The meat should be a dark pink colour throughout and piping hot.
Why is my gammon tough?
This usually means it’s either undercooked or overcooked. Use a meat thermometer to check you’re hitting the right temperature. If it’s tough and chewy, it might need more time. If it’s tough and dry, it’s been overcooked.
Can I use different air fryer settings?
Some air fryers have specific settings like “roast” or “bake.” Either of these will work fine for this recipe. Just stick to the temperatures I’ve given.
Is gammon healthy?
Gammon is a good source of protein and contains various B vitamins and minerals. However, it is processed meat and quite high in salt, so it’s best enjoyed in moderation as part of a balanced diet. Pair it with loads of vegetables to make it healthier.
How long does cooked gammon last?
In the fridge, properly wrapped, it will keep for 3-4 days. In the freezer, up to 3 months. Always make sure it’s piping hot when reheating.
Can I make this dairy-free?
Yes! This recipe is naturally dairy-free as long as you use a dairy-free glaze (honey, maple syrup, mustard are all dairy-free). Just check your mustard doesn’t contain any milk products.
Why You Need This Recipe in Your Life
Look, I’m not usually one for hyperbole, but genuinely, learning to cook gammon in the air fryer has been a game-changer for me. It’s one of those recipes that looks impressive but is actually dead easy, costs less than buying pre-sliced ham, and gives you options for days.
Whether you’re cooking for a proper Sunday roast, meal-prepping for the week ahead, or looking for an alternative to turkey at Christmas, this method just works. The meat comes out tender and juicy every single time, the glaze is gorgeously sticky and caramelised, and you haven’t had to heat up your whole oven to do it.
I love that I can get this started whilst I’m helping with homework or sorting out the never-ending pile of laundry, and an hour later we’ve got a proper home-cooked meal without me having to stand over a hot stove. With four kids and all our animals (don’t even ask), anything that makes life easier gets a gold star from me.
Plus, let’s be honest, there’s something quite satisfying about slicing into a joint of meat you’ve cooked yourself, especially when it looks and tastes this good. It makes me feel like a proper domestic goddess, even though I’m usually still in my joggers at dinnertime (no shame).
Over to You!
Right, your turn! I’d absolutely love to know how you get on with this recipe. Are you team honey mustard or team marmalade? Do you prefer smoked or unsmoked gammon? Have you discovered an amazing glaze combination I haven’t tried yet?
Drop a comment below and let me know how it went. And if you’ve got any questions about the recipe, ask away – I’m always happy to help troubleshoot or offer advice.
Now go forth and make some gorgeous gammon. Your air fryer is waiting, and trust me, you’re going to be amazed at how easy this is.
Pin this recipe!

See more of my Air Fryer Recipes here!
Fish Fingers in the Air Fryer
Air Fryer Bread Pudding
Air Fryer Roast Potatoes
Easy Air Fryer Vegan Chocolate Cake
Delicious Air Fryer Pumpkin Cake

Becky is the voice behind Life in Velvet, an organised, intentional living blog focused on practical food, calm homes, thoughtful projects, and everyday systems that make real life feel easier. A mum of 3 living in the UK, Becky writes from lived experience, sharing what works, what doesn’t, and the decisions that make family life run more smoothly.
With a background in marketing and content writing, and over a decade of blogging experience, she brings a thoughtful, structured approach to everything from baking and home projects to routines and decision-making. Life in Velvet is where planning meets creativity, with ideas designed for real homes and real life.