Key Takeaways
- Most shop-bought ice lollies contain 15-20g of sugar per lolly; homemade versions can reduce this to 2-5g whilst still tasting good
- Frozen fruit purees work better than juice for texture and nutrition, and you don’t need added sugar if the fruit is ripe enough
- Yoghurt-based lollies hold their shape better than pure fruit ones and feel more substantial to children
- Making lollies in batches and storing them properly means you can have a week’s worth ready in about 20 minutes of active time
- The best moulds are simple, dishwasher-safe ones with sturdy sticks that don’t pull out when children grab them
Introduction
If you’ve ever stood in the freezer aisle reading ice lolly labels, you’ll know that most “fruit” lollies are mostly sugar and water with a splash of juice somewhere down the ingredients list. Even the ones marketed at children often contain more sugar per serving than a small chocolate bar (eek!)
This is the blog for you if you’d like to offer your children something cold and treat-like on warm days, without the sugar spike and subsequent crash that comes with most shop-bought options. It’s also great if you want genuinely simple recipes that don’t require specialist ingredients, or equipment beyond a basic lolly mould (as let’s face it, none of us like extra stress when it comes to making snacks for our kids!).
Here, I’m not about creating Instagram-perfect rainbow layers or sneaking vegetables into every snack. This is about making ice lollies that taste good enough for children to actually want them, contain significantly less sugar than the alternatives, and fit into normal family routines without adding stress.
What makes this guide useful is that it’s based on several summers of actually making these lollies (my eldest is now nearly 15 so I’m a pro), and learning which combinations children genuinely enjoy rather than tolerate, plus working out systems that don’t create chaos in the kitchen every time you want to refill the mould.
Why Bother Making Your Own Ice Lollies?
The average shop-bought fruit ice lolly contains around 15-20g of sugar. For context, the NHS recommends children aged 4-6 have no more than 19g of free sugars per day, and ages 7-10 no more than 24g. One lolly can therefore represent most of a child’s daily sugar allowance.
Homemade versions using whole fruit typically contain 2-5g of naturally occurring sugars per lolly, depending on the fruit used and portion size. You’re also getting actual fruit fibre, vitamins, and none of the additives or colourings that make shop versions unnaturally bright.
The other benefit is control. You know exactly what’s in them, you can adjust sweetness to suit your children’s palates, and you can make them more or less substantial depending on whether they’re a small snack or a proper pudding replacement.
It does require a small upfront time investment, but once you’ve got a system, making a batch of lollies takes about the same time as loading the dishwasher!
What You Actually Need
Moulds
You can spend anywhere from £5 to £30 on ice lolly moulds. The expensive ones aren’t necessarily better.
Look for:
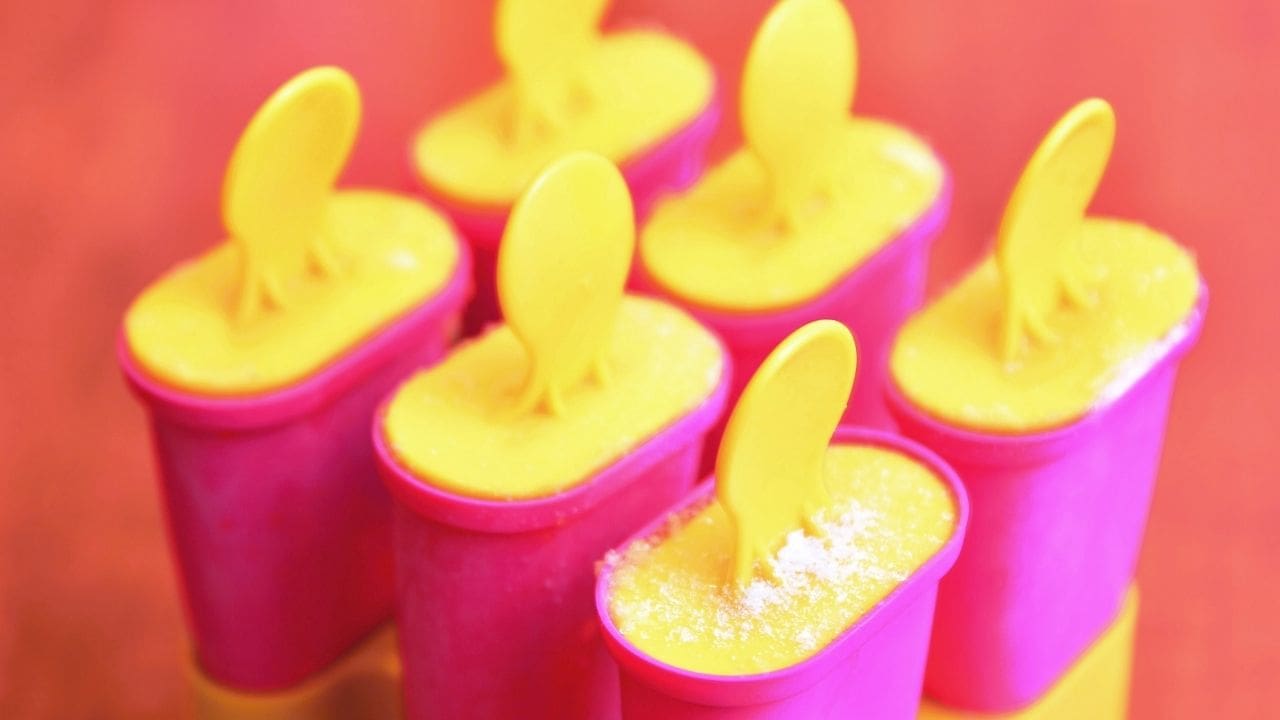
- Simple, one-piece moulds with integrated sticks or very sturdy separate sticks
- Dishwasher-safe materials
- Capacity around 60-80ml per lolly (a good portion size for children without being wasteful)
- Moulds that sit flat in the freezer rather than needing special storage
Avoid moulds with fiddly parts, moulds where the stick pulls out too easily, or anything that can’t go in the dishwasher. You’ll be washing these regularly and you don’t want it to feel like a chore.
Blender
Any blender that can handle frozen fruit will work. You don’t need a high-powered one. A basic stick blender is often sufficient for soft fruits, whilst a jug blender makes larger batches easier.
Everything Else
You likely already have what you need: measuring jugs, a funnel (makes filling moulds much tidier), and freezer space. That’s genuinely it.
The Basic Method That Works for Most Recipes
- Blend your ingredients until completely smooth. Any lumps will create icy patches.
- Taste before freezing. If it doesn’t taste good now, freezing won’t improve it. Adjust sweetness if needed.
- Fill moulds, leaving about 1cm space at the top as liquid expands when frozen.
- Freeze for at least 4 hours, ideally overnight.
- Run under warm water for 10 seconds to unmould easily without yanking the stick.
The most common mistake is not blending thoroughly enough. Smooth purees freeze into proper lollies; chunky ones freeze into icy, unpleasant textures.
Fruit Puree Lollies (The Foundation)
These are the simplest and often the most popular with children.
Basic Berry Lollies
Ingredients (makes 6 lollies):
- 300g frozen mixed berries (150g / 1.25 cups)
- 100ml water (3.5 fl oz / scant ½ cup)
- Optional: 1-2 tsp honey or maple syrup if the fruit isn’t sweet enough
Method: Blend everything until completely smooth. Taste and add a tiny bit of sweetener only if necessary. Pour into moulds and freeze.
Why this works: Frozen berries are often sweeter than fresh ones and they’re available year-round at reasonable prices. The natural pectin in berries also helps the texture.
Variations that children actually like:
- Strawberry and banana (half berries, half banana)
- Mango and raspberry (creates a naturally sweet, slightly tart lolly)
- Blueberry and apple (use 200ml / ¾ cup unsweetened apple juice instead of water)
Melon Lollies
Ingredients (makes 6 lollies):
- 400g ripe watermelon, deseeded (14 oz / about 2.5 cups cubed)
- Squeeze of lime juice
Blend and freeze. Genuinely that simple. Ripe watermelon is sweet enough on its own and freezes beautifully.
The lime juice isn’t essential but it stops the colour from going dull pink and adds a bit of brightness that children seem to enjoy.
Yoghurt-Based Lollies (More Substantial)
These feel more like a proper treat and tend to be more satisfying for children who want something more ice-cream-like.
Strawberry Yoghurt Lollies
Ingredients (makes 6 lollies):
- 250g strawberries, fresh or frozen (9 oz / about 2 cups)
- 150g natural yoghurt (5 oz / ⅔ cup)
- 1 tsp vanilla extract
- Optional: 1 tsp honey if strawberries are particularly tart
Blend until smooth, pour, freeze.
Why yoghurt works well: The fat content helps create a creamier texture that’s less icy than pure fruit. Natural yoghurt also adds protein without much sugar. Greek yoghurt works but can be quite tangy for some children.
Good combinations:
- Mango and coconut yoghurt
- Raspberry and natural yoghurt with a tiny bit of vanilla
- Peach and yoghurt (use tinned peaches in juice, drained)

Smoothie Lollies
If your children already enjoy smoothies, turning them into lollies is straightforward.
Basic template:
- 1 banana
- 150g yoghurt (5 oz / ⅔ cup)
- 100g frozen fruit of choice (3.5 oz / ¾ cup)
- Splash of milk if needed to blend
This creates a thick, creamy lolly that’s filling enough to count as a snack rather than just something cold.
Practical Systems for Actually Making These Regularly
Batch Production
The most efficient approach is to make a full batch of one flavour rather than trying to create variety every time. Six lollies disappear quickly with multiple children, so having a system where you’re making them every few days rather than daily makes more sense.
I tend to make a batch on Sunday evening whilst tidying the kitchen after dinner. By Monday afternoon, they’re ready. By Thursday, they’re gone and I make another batch.
Rotation Strategy
Rather than offering endless choice, having two flavours available at any time works better. Too much choice leads to indecision and complaints. “Berry or mango?” is a manageable question.
Storage
Once fully frozen, you can pop the lollies out of the moulds and store them in a freezer bag or container. This frees up the moulds for the next batch and stops you needing multiple sets of moulds.
Label the bag with the flavour and date. They’ll keep for about 2-3 months, though they rarely last that long.
Common Problems and Actual Solutions
| Problem | Why It Happens | Fix |
|---|---|---|
| Too icy and hard | Too much water, not enough fruit solids or fat | Use less liquid, add yoghurt or banana for creaminess |
| Won’t come out of mould | Frozen too solidly to mould edges | Run under warm (not hot) water for 10-15 seconds |
| Stick pulls out | Mould not filled enough or stick not secure | Fill closer to top, ensure stick reaches bottom of mould |
| Tastes bland | Fruit not ripe or sweet enough | Taste before freezing, add tiny bit of honey or use riper fruit |
| Separates into layers | Ingredients have different densities | Blend more thoroughly, or embrace it as a feature |
The separation issue isn’t actually a problem unless it bothers you. Some children quite like the layered effect. It’s simply fruit solids settling whilst freezing.
What About “Hidden Vegetables”?
You can add spinach to berry lollies and the colour will hide it. You can blend in courgette with mango. The question is whether you should.
My honest view: if you want to add vegetables, add them to meals where they belong and where children learn to recognise and accept them. Ice lollies can just be ice lollies.
That said, if your child genuinely won’t eat vegetables any other way and a spinach-berry lolly helps, then do what works for your family. Just be aware that it’s treating symptoms rather than solving the underlying issue of vegetable acceptance.
Store-Bought Alternatives That Aren’t Terrible
Sometimes you need the convenience of shop-bought. If you’re looking for better options:
Look for:
- Lollies listing fruit puree or juice as the first ingredient
- Total sugar content under 10g per lolly
- Minimal ingredients list (fruit, water, maybe a stabiliser)
Worth considering:
- Frozen smoothie lollies (several UK brands now make these)
- Pure fruit ice lollies from health food sections
- Making your own using shop-bought smoothies poured into moulds
These won’t be as low in sugar as homemade versions, but they’re significantly better than standard ice lollies.

Frequently Asked Questions
How long do homemade ice lollies last in the freezer?
About 2-3 months if stored properly in a sealed container or freezer bag. The texture may become slightly icier over time as ice crystals form, but they remain safe to eat. In practice, they rarely last more than a week in most households.
Can I use fresh fruit instead of frozen?
Yes, though frozen fruit often produces a better texture because it’s typically picked at peak ripeness and freezes more smoothly. Fresh fruit works perfectly well but may need slightly less liquid in the recipe as it contains more water.
Do I need to add sugar at all?
Not usually. Ripe fruit contains enough natural sweetness for most children’s palates. Taste your mixture before freezing – if it tastes good at room temperature, it’ll taste good frozen. You can always add a tiny amount of honey or maple syrup if needed, but start without and add only if genuinely necessary.
What if my child only likes the really sweet shop lollies?
Start with naturally sweeter fruits like mango, strawberries, or watermelon. You can gradually reduce any added sweetener over several batches as their palate adjusts. It’s also fine to make lollies slightly sweeter at first and dial it back over time. The transition doesn’t need to be immediate.
Can I make these without a blender?
For some fruits, yes. Very ripe bananas can be mashed with a fork. Watermelon can be crushed. But for berries and most other fruits, you’ll need at least a basic stick blender to achieve a smooth texture. Chunky fruit freezes into an unpleasant icy texture that most children won’t enjoy.
Are these suitable for toddlers?
Yoghurt-based lollies work well for children over 12 months. Pure fruit lollies are fine too, though very young children may need supervision as they can be slippery to hold. Consider making smaller portions in smaller moulds for toddlers, and always supervise to prevent choking.
Making It Even Simpler
If the idea of making ice lollies still feels like too much effort, consider this: pour a shop-bought smoothie into lolly moulds and freeze it. It’s not quite as economical as making your own from scratch, but it’s still better than most shop lollies and takes about 90 seconds.
You could also freeze diluted fruit juice (one part juice to two parts water) for a simple option that’s much lower in sugar than undiluted juice lollies.
The point isn’t perfection. It’s having options that feel manageable for your household whilst being genuinely better than the standard alternatives.
My Final Thoughts
Homemade ice lollies don’t need to be complicated or time-consuming. A basic fruit puree lolly takes about five minutes of active time to prepare, and the payoff is having something genuinely useful in the freezer for warm afternoons or post-dinner treats.
The recipes in this guide work reliably, taste good to actual children, and contain a fraction of the sugar found in shop-bought versions. They’re not about being the perfect parent or creating impressive Instagram content. They’re about having a practical system for offering something cold and sweet that you feel comfortable giving regularly.
Start with one simple recipe, see how it goes, and build from there if it works for your family. If it doesn’t, that’s fine too. There are plenty of ways to manage sugar intake, and ice lollies are just one small part of it.
See more of my sweet treats posts here
More about Making Healthy Ice Lollies:
Healthy Ice Lollies for Toddlers: What Actually Works (and What Doesn’t)
No Added Sugar Ice Lollies: Shop-Bought and Homemade Options That Actually Work
Yoghurt Ice Lollies

Becky is the voice behind Life in Velvet, an organised, intentional living blog focused on practical food, calm homes, thoughtful projects, and everyday systems that make real life feel easier. A mum of 3 living in the UK, Becky writes from lived experience, sharing what works, what doesn’t, and the decisions that make family life run more smoothly.
With a background in marketing and content writing, and over a decade of blogging experience, she brings a thoughtful, structured approach to everything from baking and home projects to routines and decision-making. Life in Velvet is where planning meets creativity, with ideas designed for real homes and real life.