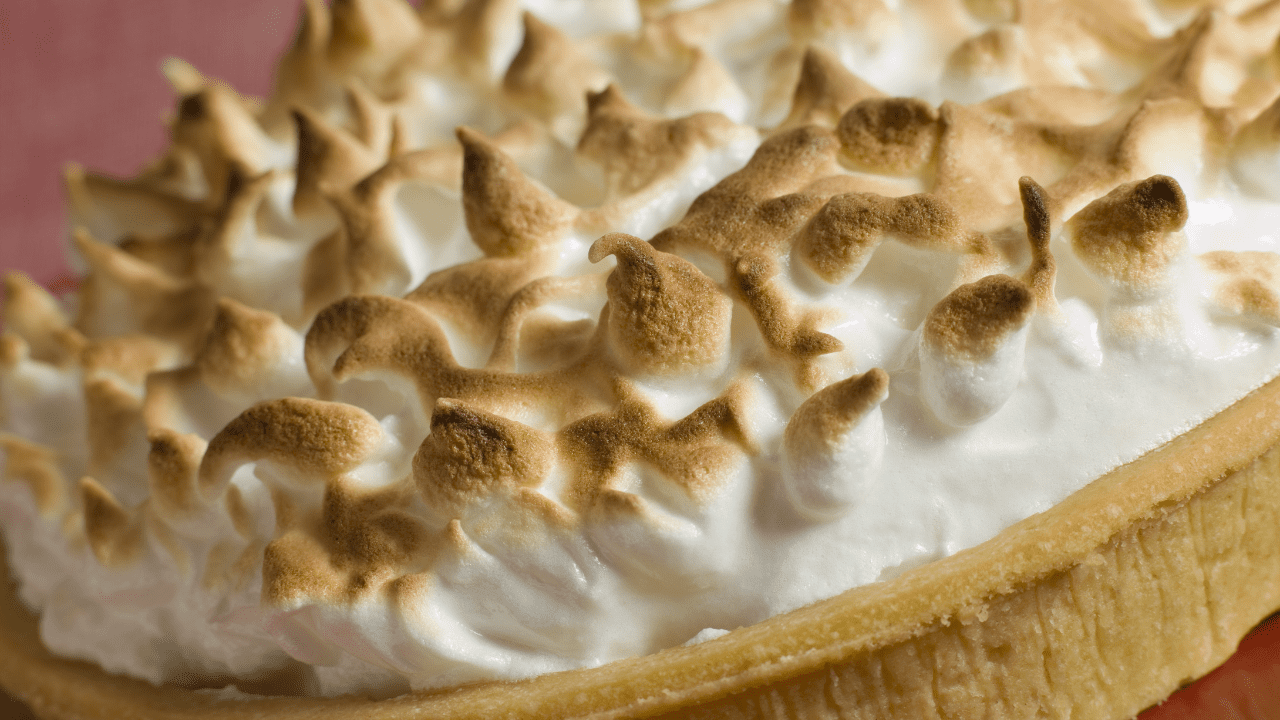

Queen of Puddings at a Glance
Origin: Traditional British pudding, dating back to the 17th century
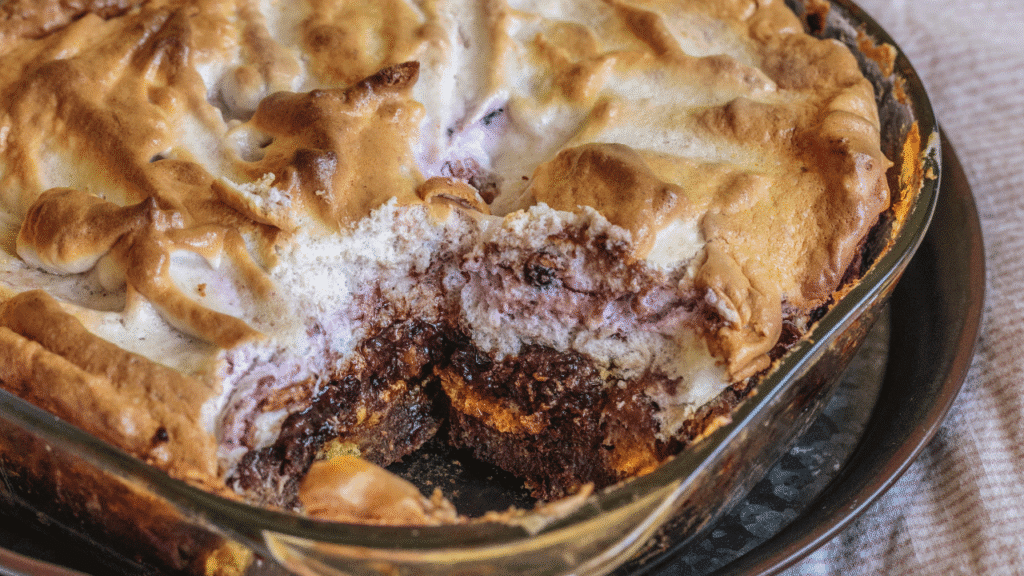
Key Layers: Breadcrumb custard base, raspberry jam middle, fluffy meringue topping
Difficulty Level: Moderate – requires patience but simple techniques
Best For: Sunday lunch, dinner parties, making use of day-old bread
Prep Time: 20 minutes
Bake Time: 45-50 minutes total
Serves: 6-8 people
American Equivalent: Similar to bread pudding meets lemon meringue pie
You know when you try something completely by chance… and it ends up being the star of your trip?
That’s exactly what happened when I first tried Queen of Puddings. It wasn’t in a cosy British tearoom (as you might expect), oh no. I was actually on a cruise, somewhere between two sun-drenched ports, when this humble-looking dessert appeared on the menu.
I wasn’t expecting much, if I’m honest, but the waiter said, “Oh, you must try the Queen of Puddings.” And because I’m easily swayed by the promise of a good dessert, I gave it a go.
One spoonful later and I was sold!
Sweet, creamy, jammy, meringue-y perfection. It was like a cross between a bread pudding and a pavlova… with a hint of Victoria sponge vibes. Every bite was warm and comforting, yet light enough that you don’t feel like you’ve eaten a brick.
When I got home, I knew I had to recreate it, and now, after some trial and error (and plenty of taste testing, purely for research purposes, of course), I’m sharing the ultimate Queen of Puddings recipe with you.
If you’ve never made it before, don’t worry, it’s not as fancy or complicated as it sounds. In fact, it’s a brilliant old-fashioned British dessert recipe to keep up your sleeve, especially if you have stale bread lying around. It’s budget-friendly, easy to make ahead, and looks far more impressive than the effort it takes.
Why This Queen of Puddings Recipe Works
I’ve made this pudding more times than I can count since moving to the UK, and I’ve learned exactly what makes it brilliant. The magic is in the three distinct layers working together. The breadcrumb base soaks up the custard beautifully, creating this soft, custardy texture that’s nothing like dry bread pudding. The sharp raspberry jam cuts through the sweetness perfectly, and that golden meringue topping adds the lightest, airiest contrast.
What I love most is that this is proper thrifty British cooking at its best. You’re using up day-old bread, a handful of basic ingredients, and creating something that looks absolutely stunning on the table. My American friends always assume it’s complicated when they see it, but honestly, if you can separate an egg and whisk, you can make this.
The key is patience. You need to let each layer set properly before adding the next one. Rush it and you’ll end up with jammy meringue and a soggy base. But follow the timings and you’ll get those perfect, distinct layers that make this pudding so special.
What is Queen of Puddings?
Queen of Puddings is a classic British dessert that’s been around since the 17th century, though it became more widely popular during the Victorian era. At its heart, it’s made from:
-
A custardy base (made with milk, breadcrumbs, eggs, and sugar)
-
A layer of sweet jam (traditionally raspberry or strawberry)
-
A fluffy meringue topping, baked until golden.
Some people like to think of it as a posh bread pudding. But instead of being heavy and stodgy, Queen of Puddings is more light, airy, and elegant.
It’s thought to have been created as a way to use up leftover bread, something we could all do with more of in these days of food waste awareness.
Good Reasons to try this Queen of Puddings Recipe
-
It’s perfect for using up stale bread – No waste, and it turns into something magical.
-
It’s budget-friendly – Most ingredients are probably already in your kitchen.
-
It feels fancy without the faff – It’s the kind of dessert you can serve at a dinner party or for Sunday lunch.
-
It’s pure nostalgia – A proper old-school pudding that takes you back to simpler times.
What You’ll Need
Before we get into the exact ingredients, here are the basic kitchen bits you’ll need to make this pudding:
-
An ovenproof dish (around 1.5 litres capacity works well)
-
A saucepan (for heating the milk)
-
A whisk (electric is quicker for meringue, but hand-whisking works too)
-
A mixing bowl
-
A spatula or spoon
-
Measuring cups or scales (I’ve given measurements in grams for precision)
Ingredients for Queen of Puddings
For the custard base:
-
300ml (½ pint) full-fat milk
-
25g unsalted butter
-
75g fresh white breadcrumbs (stale bread works brilliantly here)
-
50g caster sugar
-
2 large eggs (separated)
-
1 tsp vanilla extract
For the jam layer:
-
100g raspberry jam (or strawberry, if you prefer)
For the meringue topping:
-
2 egg whites (from the separated eggs above)
-
75g caster sugar
Optional for serving:
-
Fresh raspberries or strawberries
-
A dusting of icing sugar
How to Make Queen of Puddings – Step-by-Step
This dessert has three layers, but don’t panic — they’re simple to put together. Here’s exactly how to make it:
Step 1: Preheat & Prepare
Preheat your oven to 170°C (fan 150°C) / 340°F / Gas Mark 3. Lightly grease your ovenproof dish with butter.
Step 2: Make the Custard Base
-
Heat the milk and butter in a saucepan until the butter melts — don’t let it boil.
-
Stir in the breadcrumbs and vanilla extract, then take the pan off the heat.
-
Let it sit for a few minutes so the breadcrumbs soak up the milk.
-
Separate your eggs — whites in one bowl, yolks in another. Beat the egg yolks with the sugar until pale and slightly thickened.
-
Stir the egg yolk mixture into the breadcrumb mixture until smooth.
Step 3: Bake the Base
Pour the custard mixture into your greased dish. Bake for 20–25 minutes until just set — it should have a slight wobble but not be liquid in the middle.
Step 4: Add the Jam Layer
Once baked, spread the raspberry jam evenly over the warm custard base.
Step 5: Whip Up the Meringue
-
Using an electric whisk, beat the egg whites until they form soft peaks.
-
Gradually add the sugar, whisking until glossy stiff peaks form.
Step 6: Add the Meringue & Bake Again
Spoon or pipe the meringue over the jam layer. Return the dish to the oven for 15 minutes until the meringue is golden brown.
Step 7: Serve & Enjoy
Serve warm straight from the oven, or let it cool and enjoy it at room temperature. It’s wonderful on its own, but a dollop of cream never hurts!
Common Mistakes When Making Queen of Puddings (And How I Learned to Avoid Them)
Right, I’m going to be honest with you. The first time I made this at home after that cruise, it was a bit of a disaster. The meringue wept all over the place, and the base was more like soup than custard. But after a few attempts (and some very patient taste-testers in the form of my family), I figured out exactly where people go wrong. Here’s what to watch out for:
Using Fresh Bread Instead of Stale
This is the biggest mistake I see people make. Fresh bread creates a gummy, heavy base that just doesn’t work. You want bread that’s gone a bit dry and stale – it soaks up the custard mixture beautifully and creates that lovely light texture. If your bread is fresh, leave the slices out overnight, or pop the breadcrumbs in a low oven for 10 minutes to dry them out. I actually keep a bag in the freezer specifically for puddings like this.
Overbaking the Custard Base
The custard should be just set with a slight wobble in the middle when you take it out. If you bake it until it’s completely firm, it’ll be rubbery and dry. Trust the wobble! It will continue to set as it cools, and you want that soft, creamy texture.
Adding the Jam Too Soon
I learned this one the hard way. If you spread the jam on before the custard base has baked and set, it just sinks straight through and you lose that gorgeous distinct layer. Be patient, let the base bake fully, then add your jam.
Not Whisking the Egg Whites Enough (Or Too Much)
Your meringue needs to be at the stiff peak stage – when you lift the whisk, the peaks should stand up straight and not flop over. But if you overbeat it, it becomes grainy and dry. Stop as soon as those peaks hold their shape. I once got distracted by one of the kids mid-whisk and came back to find what was basically crunchy foam. Not good.
Baking the Meringue at Too High a Temperature
A hot oven will give you a beautifully browned top and a raw, weepy middle. Keep it at the temperature I’ve given (170°C fan) and watch it carefully in the last few minutes. You want golden peaks, not brown ones.
Storing It in the Fridge
This makes the meringue go soft and weepy. If you have leftovers (which is rare in our house), keep them covered at room temperature and eat within a day. It’s really best enjoyed fresh from the oven or within a few hours of baking.
My Top Tips for the Perfect Queen of Puddings
Use fresh breadcrumbs – Blitz your stale bread in a food processor rather than buying ready-made breadcrumbs. They’re fluffier and absorb the custard better. Plus, it’s one less thing to buy.
Full-fat milk is non-negotiable – I’ve tried this with semi-skimmed to save calories (who am I kidding?), and it just doesn’t have the same richness. Full-fat gives you that lovely creamy base.
Don’t overbake the custard layer – You want it just set with a slight wobble in the centre. It’ll firm up as it cools, and you want that soft, springy texture, not rubbery custard.
Warm jam makes spreading easier – If your jam is too thick or cold, warm it gently in the microwave for 10-15 seconds. It’ll spread much more easily without disturbing the custard base underneath.
Pipe the meringue for a fancy finish – If you want to impress dinner guests, pipe the meringue in swirls using a star nozzle. It looks properly professional and takes no extra time.
Add a splash of cream to the milk – This is my secret indulgent tweak. Replace 50ml of the milk with double cream for an even richer custard base. It’s not traditional, but it’s absolutely gorgeous.
Make it in individual ramekins – Perfect for dinner parties. Just adjust the baking time down to 15-20 minutes for the base, then add jam and meringue as normal. Everyone gets their own perfect portion.
Variations You Can Try
One of the lovely things about Queen of Puddings is that it’s adaptable. You could:
-
Use different jams – blackcurrant gives a lovely tart contrast.
-
Add a sprinkle of lemon zest to the custard for brightness.
-
Mix a little shredded coconut into the meringue for texture.
-
Turn it into mini puddings in ramekins for individual servings.
How to Serve Queen of Puddings
This pudding is lovely served warm or at room temperature. I actually prefer it slightly warm – about 20 minutes out of the oven – when the meringue is still a bit soft and the custard base is at its most comforting.
A jug of cold pouring cream is traditional, and the contrast of cold cream against warm pudding is absolutely gorgeous. Vanilla custard works beautifully too, though it’s quite rich. For something lighter, a dollop of creme fraiche cuts through the sweetness nicely.
Variations Worth Trying
Different Jams: While raspberry is traditional, I’ve had lovely results with blackcurrant jam, strawberry, or even a sharp marmalade. Apricot jam is gorgeous if you want something a bit different. Just avoid anything too sweet or artificial tasting.
Lemon Version: Add the zest of one lemon to the milk when you’re heating it, then strain it out before mixing with the breadcrumbs. It adds a subtle citrus note that works beautifully with the raspberry jam.
Chocolate Twist: Swap the jam for a thin layer of good quality chocolate spread. Not traditional at all, but the kids absolutely love it.
Individual Portions: Make these in ramekins for dinner parties. Adjust the baking time down to about 20-25 minutes for the base, then add jam and meringue as normal.
Frequently Asked Questions
Can I make Queen of Puddings ahead of time?
You can make the custard base up to a day ahead. Let it cool completely, cover it tightly with cling film, and keep it in the fridge. Bring it back to room temperature before adding the jam and meringue. The meringue is best made and baked on the day you’re serving though, as it can weep and go soggy if left too long.
What type of bread works best for Queen of Puddings?
Plain white bread is traditional and works perfectly. I use whatever sliced white bread we have hanging about, even the value brands work fine. Avoid anything with seeds, strong flavours, or heavy textures. You want something that will break down into soft crumbs and soak up the custard nicely.
Why is my meringue weeping or going watery?
This usually happens if the base wasn’t hot enough when you added the meringue, or if you’ve stored the finished pudding in the fridge. Make sure the custard base is freshly baked and still warm when you spread the jam and add the meringue. Also check you’ve added enough sugar to the egg whites – skimping on sugar makes unstable meringue.
Can I freeze Queen of Puddings?
I wouldn’t recommend it. The meringue doesn’t freeze well at all and goes soft and weepy when thawed. The custard base might survive freezing on its own, but honestly this pudding is best made fresh. It only takes about an hour total, so there’s not much benefit to freezing it.
Is Queen of Puddings the same as bread and butter pudding?
Not quite. While both use bread and custard, bread and butter pudding has buttered bread cubes throughout and no meringue topping. Queen of Puddings has a smooth breadcrumb base, a layer of jam, and that distinctive meringue top. They’re cousins, but definitely different puddings.
What’s the difference between Queen of Puddings and bread and butter pudding?
They’re similar but definitely different puddings. Bread and butter pudding has chunks of buttered bread throughout and no meringue topping – it’s more like a custardy bake. Queen of Puddings has a smooth breadcrumb custard base, a layer of jam, and that signature fluffy meringue on top. They’re cousins, but Queen of Puddings is definitely the fancier one.
How do you stop the meringue from weeping?
The main trick is making sure your custard base is still warm when you add the meringue. If the base is cold, the bottom of the meringue stays raw and releases liquid. Also, make sure you’ve added enough sugar to the egg whites – the ratio should be about 25g sugar per egg white. Skimping on sugar makes unstable meringue that weeps.
Can you make Queen of Puddings with other types of bread?
Stick with plain white bread for the best results. I’ve seen people try brioche or wholemeal, but they change the flavour and texture too much. You want something neutral that lets the vanilla custard and jam shine through. Even cheap value white bread works perfectly – it’s all about using stale bread, not fancy bread.
Final Thoughts on This Classic British Pudding
There’s something really lovely about making traditional puddings like this, isn’t there? In a world of fancy desserts with seventeen ingredients and complicated techniques, Queen of Puddings is refreshingly simple. It’s the sort of pudding your gran probably made, and that your gran’s gran probably made too.
What I love most is how it bridges my two worlds – it’s got that comforting, homey quality of American desserts I grew up with in Boston, but it’s distinctly British in every way. And honestly, after that first magical taste on the cruise, I’m so glad I learned to make it properly. It’s become one of those recipes I turn to when I want something that feels special without being stressful.
The beauty of this pudding is that it looks far more impressive than the effort required. Yes, you’ve got three layers and a bit of waiting around, but none of the actual techniques are difficult. If you can whisk eggs and spread jam, you can make this. Plus, you’ll finally have a use for all that bread that’s gone a bit stale.
Give it a go this weekend, especially if you’re having people round for Sunday lunch. Serve it warm with a jug of cold cream, and watch everyone’s faces light up. It’s proper comfort food that happens to look restaurant-worthy.
If you make this recipe, I’d absolutely love to know how you get on. Do you stick with raspberry jam or have you found another flavour that works brilliantly? Drop a comment below and let me know – I always love hearing your twists on classic recipes!
See more of my classic British Desserts and Puddings here!
Chocolate Toothpaste Dessert
Spotted Dick Recipe
Manchester Tart
10 of the Best British Desserts of all time!

Becky is the voice behind Life in Velvet, an organised, intentional living blog focused on practical food, calm homes, thoughtful projects, and everyday systems that make real life feel easier. A mum of 3 living in the UK, Becky writes from lived experience, sharing what works, what doesn’t, and the decisions that make family life run more smoothly.
With a background in marketing and content writing, and over a decade of blogging experience, she brings a thoughtful, structured approach to everything from baking and home projects to routines and decision-making. Life in Velvet is where planning meets creativity, with ideas designed for real homes and real life.