Key Takeaways
- Delia Smith’s all-in-one Victoria sponge method is genuinely easier than traditional creaming – perfect for busy weeknights or spontaneous afternoon teas
- The secret to avoiding that dreaded sunken middle? Soft butter at room temperature and resisting the urge to peek in the oven before 25 minutes
- Traditional filling uses jam and whipped cream, but Delia’s mascarpone twist elevates this classic to something rather special
- Common mistakes like overmixing or using cold ingredients can turn your sponge dense and disappointing – but they’re all fixable
- This cake costs roughly £3-4 to make (significantly less than buying one from a bakery) and stores beautifully for 2-3 days when done properly
Delia Smith Victoria Sponge at a Glance
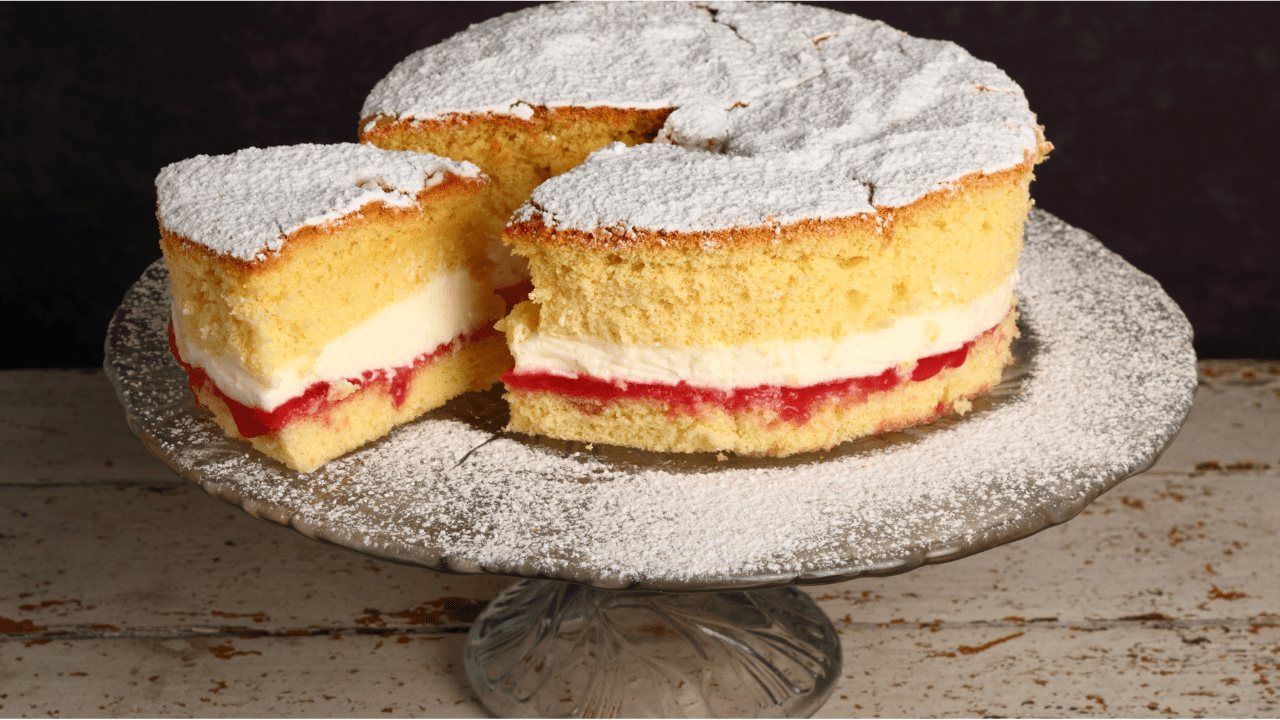
What is it? A classic British sponge cake with two light, buttery layers sandwiched with jam and cream, finished with icing sugar. The all-in-one method makes it surprisingly simple.
Difficulty: Easy (perfect for beginners once you know the tricks)
Total time: 50 minutes (10 minutes prep, 25-30 minutes baking, plus cooling time)
Serves: 8 to 10 slices
Key to success: Room temperature ingredients (especially butter), resist opening the oven door before 25 minutes, and don’t overmix the batter.
Best for: Afternoon tea, school bake sales, Sunday family gatherings, birthday celebrations, showing off to your British in-laws
Dietary notes: Contains gluten, dairy, and eggs. Can be made with dairy-free spread and plant-based cream for dairy-free version.

Why I Trust Delia Smith With My Victoria Sponge (And You Should Too)
Right, let’s talk about Delia Smith for a minute. When I first moved to the UK from Boston, I had absolutely no idea who this woman was. My British mother-in-law looked at me like I’d sprouted a second head when I admitted I didn’t own any Delia cookbooks. “How do you expect to bake anything?” she asked, genuinely concerned.
Seven years, four kids, and countless kitchen disasters later, I get it. Delia’s Victoria sponge recipe has literally saved my dignity at more school bake sales and neighbourhood gatherings than I can count. There’s a reason every British baker has this recipe memorised – it actually works.
This post is specifically for anyone who wants to master the quintessentially British Victoria sponge using Delia Smith’s trusted recipe. Whether you’re a complete beginner (like I was), an American trying to crack British baking (hello, kindred spirit), or you’ve had one too many sunken disasters, you’re in the right place. If you’re after fancy French patisserie or elaborate layer cakes, this probably isn’t for you. But if you want a reliable, crowd-pleasing classic that tastes like proper afternoon tea should? Keep reading.
What makes this guide different from all the other Victoria sponge recipes floating about online? Honest experience. I’ve made every single mistake you can possibly make with this cake. The sunken middles. The dense, greasy disasters. The time I somehow created something with the texture of a kitchen sponge (not the good kind). I’ll share what actually works, what Delia doesn’t tell you in her recipe, and the little tricks I’ve learned that make the difference between “that’s nice” and “can I have the recipe?”
What Actually Is a Victoria Sponge? (And Why It’s Not Quite Like American Layer Cake)
The Victoria sponge – also called a Victoria sandwich – is one of those quintessentially British things that seems simple until you actually try making one. Named after Queen Victoria (who apparently enjoyed a slice with her afternoon tea), it’s essentially two light sponge cakes sandwiched together with jam and cream, finished with a dusting of icing sugar. That’s it. No fancy frosting, no elaborate decorations, just proper British restraint.
Here’s where it gets interesting for us Americans: this is nothing like the layer cakes we grew up with. American cakes tend to be richer, denser, loaded with frosting. A Victoria sponge is delicate, light, and the filling is almost minimal by comparison. The first time I made one, I thought “this needs more cream!” My husband gently explained that was rather missing the point.
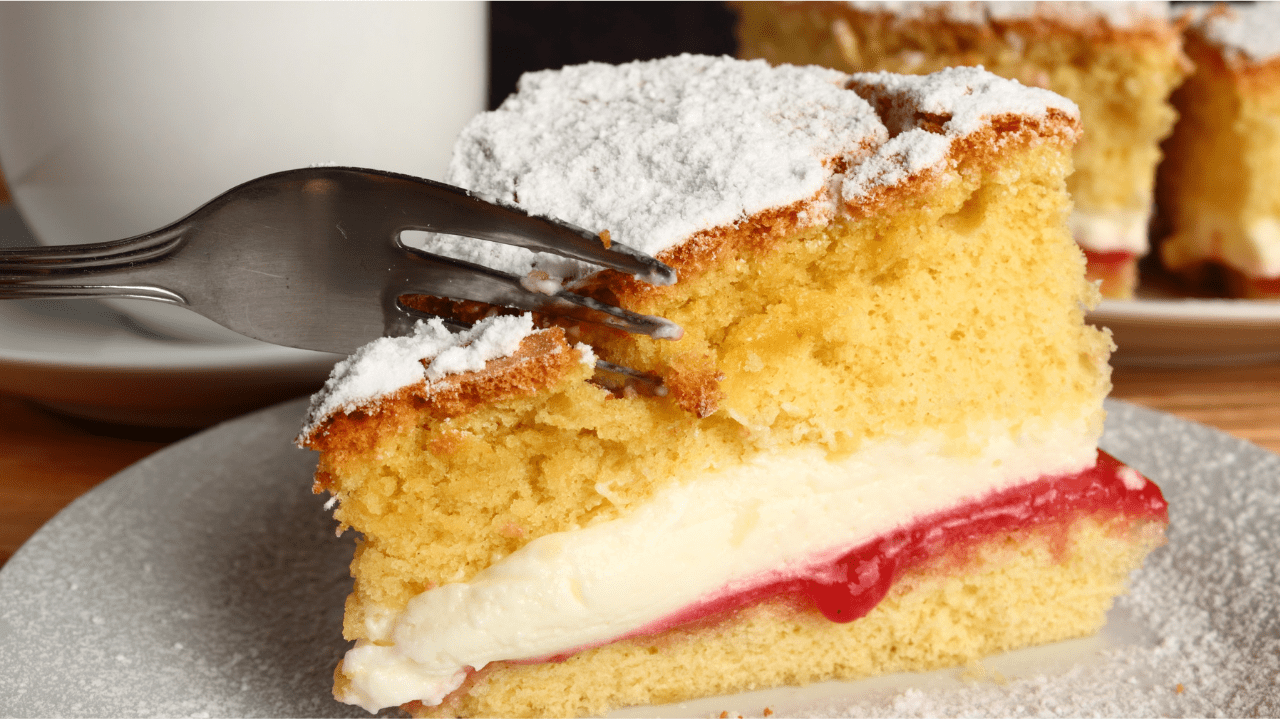
The sponge itself should be fine-crumbed and tender, with just enough sweetness to balance the tart jam. It’s designed to be eaten at room temperature with a cup of tea (never coffee, apparently – my coffee-loving American heart still struggles with this). The genius is in the simplicity, which is also why when it goes wrong, there’s nowhere to hide.
Delia’s particular approach uses the “all-in-one” method, which revolutionised British baking back in the day. Instead of the traditional creaming method (beating butter and sugar first, then adding eggs), you literally chuck everything in the bowl together and whisk it up. Sounds too good to be true, right? That’s what I thought. Turns out, when you do it properly, it works brilliantly.
The Complete Delia Smith Victoria Sponge Recipe
Ingredients You’ll Need
For the Sponge (makes 2 x 20cm/8-inch layers):
- 225g (8 oz / 1 cup) very soft butter or baking spread, plus extra for greasing
- 225g (8 oz / 1 cup plus 2 tablespoons) golden caster sugar
- 4 large eggs, at room temperature
- 225g (8 oz / 1¾ cups) self-raising flour
- 2 teaspoons baking powder
- 2 teaspoons vanilla extract
For the Traditional Filling:
- 4 tablespoons good quality raspberry or strawberry jam
- 300ml (10 fl oz / 1¼ cups) double cream, whipped
- Icing sugar for dusting
For Delia’s Mascarpone Filling (Optional Upgrade):
- 250g (9 oz / 1 cup) mascarpone
- 200g (7 oz / ¾ cup plus 2 tablespoons) fromage frais
- 3 tablespoons icing sugar
- 1 teaspoon vanilla extract
- Fresh raspberries (about 150g / 5 oz / 1 cup)
- 4-5 tablespoons raspberry jam
Equipment:
- 2 x 20cm (8-inch) round sandwich tins
- Baking parchment
- Electric hand whisk or stand mixer (honestly, don’t attempt this with a wooden spoon)
- Large mixing bowl
- Wire cooling rack
- Sieve (for dusting)
Step-by-Step Method (The Way That Actually Works)
Step 1: Prep Your Tins Properly
Preheat your oven to 180°C (350°F / Gas Mark 4), or 160°C (320°F) for fan ovens. This bit is crucial – I once forgot to turn on the oven and stood there wondering why my perfectly mixed batter was just sitting there. Not my finest moment.
Grease your tins with butter and line the bases with baking parchment. Don’t skip the parchment – I’ve tried, and you’ll end up with half your cake stuck to the tin, crying into your tea about your Victoria sponge that’s now more of a Victoria crumble.
Step 2: The All-In-One Magic
This is where Delia’s method shines. Sift the flour and baking powder into your large mixing bowl. Hold the sieve quite high – Delia says this aerates the flour and she’s right. Then add the soft butter, sugar, eggs, and vanilla extract all at once.
Now here’s the critical bit: your butter needs to be properly soft. Not melted, not straight from the fridge, but soft enough that you can easily make an indent with your finger. If it’s too hard, your mixture won’t combine properly and you’ll get a dense cake. If it’s too soft (melted), the structure won’t be right. Room temperature butter that’s been sitting out for about 30 minutes is perfect.
Step 3: Whisking (Don’t Get Carried Away)
Using your electric whisk, beat everything together for about 1 minute until you have a smooth, creamy consistency. The mixture should be pale and slightly fluffy. If it seems a bit stiff and won’t drop easily from a spoon, add a tablespoon or two of warm water and mix again briefly.
Here’s where I went wrong for ages: I thought more mixing = better cake. Wrong! Overmixing knocks out all the air and creates a tough texture. About 60-90 seconds is genuinely enough. You want everything just combined and smooth, not beaten within an inch of its life.
Step 4: Into the Tins
Divide the mixture evenly between your two prepared tins. I use kitchen scales to weigh the tins with the batter in them – sounds fussy, but it ensures both layers are identical. Level the surface with the back of a spoon.
A little trick I learned: tap each tin gently on the counter a couple of times. This releases any large air bubbles that might create holes in your sponge.
Step 5: The Hardest Part – Don’t Open That Oven Door
Bake for 25-30 minutes on the middle shelf. I’m serious about not opening the oven door. I know it’s tempting. I know you want to check. But opening the door before about 25 minutes can cause the temperature to drop suddenly and your beautiful rising cake will sink faster than the Titanic.
How do you know they’re done? The cakes should be golden brown and spring back when you press the centre gently with your finger. A skewer inserted into the middle should come out clean.
Step 6: The Cooling Trick That Changes Everything
Leave the cakes in their tins for about 30 seconds, then run a palette knife around the edges. Turn them out onto a wire rack. Here’s a brilliant tip I picked up from a friend: if you want perfectly flat layers, immediately flip one of the cakes over so it’s cooling rounded-side down. This flattens that dome naturally as it cools, giving you one flat surface for stacking.
Let them cool completely before filling. I know waiting is rubbish, but trying to fill warm cakes will give you melted cream and jam sliding everywhere. Trust me on this.

Filling and Assembling Your Victoria Sponge
Traditional Method:
Place one sponge layer on your serving plate (flat side up if you’ve used my flipping trick). Spread with 3-4 tablespoons of good jam – don’t go mad, you want enough flavour but not so much it squelches out the sides. Whip your double cream to soft peaks and spread over the jam. Top with the second sponge and dust generously with icing sugar.
Delia’s Mascarpone Filling (This Is Gorgeous):
Whisk together the mascarpone, fromage frais, icing sugar, and vanilla until smooth. Spread jam over one sponge, then half the cream mixture. Scatter fresh raspberries over the cream (this is where it gets posh), then add the rest of the cream mixture and a bit more jam drizzled over. Top with the second sponge and dust with icing sugar.
The mascarpone filling is more sophisticated and less sickly-sweet than just whipped cream. My kids prefer the traditional version, but adults absolutely love the mascarpone twist. It’s what I make when I’m trying to impress.
Why Your Victoria Sponge Might Have Gone Wrong (And How to Fix It)
Let me tell you about my first attempt at Delia’s Victoria sponge. I was so confident. I’d followed the recipe exactly (or so I thought). What came out of the oven looked like the Grand Canyon had formed in the middle of my cake. Dense. Sunken. Disappointing.
After making this cake approximately 50 times (not an exaggeration – I’ve got four kids and there are a lot of school events), I’ve learned what causes the most common disasters and how to avoid them.
The Sunken Middle Disaster
What it looks like: Your cake rises beautifully, then collapses in the middle, creating a sad crater effect.
What probably happened:
- You opened the oven door too early (before 25 minutes). The temperature drop causes the structure to collapse before it’s set. I did this constantly when I first started because I’m naturally impatient.
- Your oven temperature is too high. If the outside sets before the inside is cooked, the middle sinks as it tries to continue rising.
- Old or poor-quality baking powder. Baking powder loses effectiveness over time. I now write the date on mine with a Sharpie when I open it.
- Too much baking powder. More isn’t better – it causes a dramatic rise followed by collapse.
How to prevent it: Check your baking powder is in date by mixing a teaspoon in hot water – it should bubble immediately. Don’t peek in the oven. Invest in an oven thermometer (they’re about £5 and worth every penny) because home ovens are notoriously unreliable.
The Dense, Heavy Texture Problem
What it looks like: Your cake has the texture of a doorstop. It’s heavy, stodgy, and definitely not the light, fluffy sponge you were promised.
What probably happened:
- Your butter was too cold. This is the number one culprit. Cold butter doesn’t incorporate properly with the other ingredients, resulting in a dense batter.
- You overmixed the batter. Once everything’s combined, stop whisking! Overmixing develops too much gluten in the flour, making your cake tough.
- Your eggs weren’t at room temperature. Cold eggs don’t emulsify properly with the butter and create a curdled mixture that won’t rise well.
- You forgot the baking powder or didn’t sift it properly, creating pockets of raising agent.
How to prevent it: Take your butter and eggs out of the fridge at least 30 minutes before you start. If you forget (we all do), you can soften butter by cutting it into small cubes and microwaving it for 10-second bursts. For eggs, put them in a bowl of warm (not hot) water for 5 minutes. Mix until just combined – about 60-90 seconds is plenty.
The Greasy, Wet Texture Issue
What it looks like: Your cake feels oily or wet, almost like it’s not properly cooked even though it’s been in the oven for ages.
What probably happened:
- You over-greased your tins. A light coating is all you need – too much grease gets absorbed into the cake.
- Your batter was too warm when it went into the oven, causing the butter to separate.
- You underbaked it. Sometimes what looks golden on top is still raw in the middle.
How to prevent it: Use just enough butter or oil to lightly coat your tins – don’t go mad. Make sure your batter is at room temperature, not warm. Test for doneness with a skewer in the centre – it should come out completely clean.
The Cracked Top Problem
What it looks like: Deep cracks across the surface of your cake, like a dried riverbed.
What probably happened:
- Your oven was too hot, causing the top to set and crack before the inside finished rising.
- You overfilled your tins – the batter needs room to expand.
How to prevent it: Fill your tins no more than two-thirds full. If you’ve got leftover batter, make cupcakes rather than overfilling. Check your oven temperature is accurate.
The Uneven Layers Nightmare
What it looks like: One cake is wonky, creating a leaning tower of sponge situation.
What probably happened:
- Your oven has hot spots and baked one side faster than the other.
- Your tins weren’t level in the oven.
- You didn’t spread the batter evenly in the tins.
How to prevent it: Rotate your tins halfway through baking if your oven has hot spots (but only after 20 minutes when the structure has set). Use a spirit level to check your oven shelf is actually level (mine wasn’t, explained a lot). Spread batter evenly and tap tins to level.
The Cost Breakdown (Because We’re All Watching Our Pennies)
One of the reasons I love this recipe is it’s genuinely economical. Shop own-brand ingredients work perfectly – you don’t need fancy stuff.
Approximate costs (UK supermarket own-brand prices, January 2026):
- Butter or baking spread (225g): £0.80
- Caster sugar (225g): £0.20
- Self-raising flour (225g): £0.15
- Eggs (4 large): £1.00
- Baking powder: £0.05
- Vanilla extract: £0.30
- Jam (100g used): £0.40
- Double cream (300ml): £1.20
Total: roughly £4.10 for a cake that serves 8-10 people
Compare that to buying a Victoria sponge from a bakery (usually £8-12) or supermarket (£4-6 for a mediocre one), and you’re saving money while getting something infinitely better. Plus, you can make it with your kids, which they absolutely love even if they do get flour everywhere.
If you use the mascarpone filling, add about £2 more for the mascarpone and fresh raspberries. Still cheaper than buying, and tastes restaurant-quality.
Storage, Freezing, and Make-Ahead Tips
Room Temperature Storage: An assembled Victoria sponge keeps for 2-3 days in an airtight container at room temperature. The cream filling means it’s technically best eaten within 24 hours, but I’ve kept them for 2 days with no issues. Don’t refrigerate unless you absolutely must (hot weather) – it dries out the sponge.
Freezing: The unfilled sponges freeze brilliantly for up to 3 months. Wrap them individually in cling film, then foil. Defrost at room temperature for 2-3 hours before filling. I often make a batch of sponges and freeze them – instant cake whenever someone announces we need to bring something to a gathering (which happens approximately weekly with four kids).
You can freeze assembled cakes with jam filling, but not cream. I’ve never tried freezing the mascarpone version so I can’t advise on that.
Make-Ahead Strategy: Bake the sponges the day before, keep them wrapped in cling film at room temperature, and assemble on the day you need it. This actually works better than assembling early because the jam doesn’t have time to soak into the sponge.
Variations My Family Actually Eat
Coffee Walnut: Replace 2 tablespoons of flour with instant coffee powder mixed with a tablespoon of hot water. Add 75g chopped walnuts to the batter. Fill with coffee buttercream.
Chocolate: Replace 25g of flour with cocoa powder. Fill with chocolate buttercream instead of jam and cream. My youngest is obsessed with this version.
Lemon: Add the zest of 2 lemons to the batter. Fill with lemon curd and cream. Absolutely gorgeous in summer.
Seasonal Berry: Use whatever berries are in season instead of raspberries – strawberries in summer, blackberries in autumn. British berries have so much more flavour than the imported stuff.
Essential Equipment (What You Actually Need)
Non-negotiable:
- Electric hand whisk or stand mixer (£15-20 for a decent hand whisk) – the all-in-one method requires proper whisking power
- 2 x 20cm sandwich tins (£8-15 for a decent set) – I use Kitchen Craft non-stick tins
- Kitchen scales (digital ones are £10-15) – this isn’t American baking where you can use cups; British baking requires precision
- Cooling rack (£5-8)
Worth having:
- Oven thermometer (£5-8) – seriously, this solved 90% of my baking problems
- Palette knife for smoothing and turning out cakes
- Sieve for dusting icing sugar

Frequently Asked Questions
Can I use margarine instead of butter?
Yes! Delia’s original recipe actually calls for soft baking spread. I use Stork or Flora, which work brilliantly and are cheaper than butter. The key is that it must be the spreadable, soft kind – not the hard block margarine which won’t work with the all-in-one method. Taste-wise, butter gives a slightly richer flavour, but baking spread creates an equally light texture.
Why did my cake sink in the middle even though I followed the recipe exactly?
The most likely culprit is opening the oven door too early. Even if you followed every other step perfectly, that temperature drop will sink your cake. Other common causes: out-of-date baking powder, oven temperature too high or too low (get a thermometer!), or cold ingredients that didn’t combine properly. I sank about six cakes before I figured out it was my dodgy oven running too hot.
Can I make this without an electric whisk?
Technically yes, but I really wouldn’t recommend it. The all-in-one method relies on vigorous whisking to incorporate air quickly. With a wooden spoon, you won’t get enough air in and your cake will be dense. If you don’t have an electric whisk, use the traditional creaming method instead – cream the butter and sugar by hand first (takes ages but works), then gradually add beaten eggs and fold in the flour.
How do I know when it’s properly cooked?
The cake should be golden brown and spring back when you press the centre gently with your finger. Insert a skewer or cocktail stick into the deepest part – it should come out completely clean with no wet batter. If there are a few dry crumbs, that’s fine, but any wet mixture means it needs longer. The cake should also be starting to shrink slightly from the edges of the tin.
Can I halve this recipe for smaller cakes?
Absolutely! Halve all ingredients and use one 20cm tin or two smaller tins. Adjust baking time to 20-25 minutes for one larger cake, 15-20 minutes for smaller ones. I do this quite often when we only need a small cake for family tea. The recipe scales really well.
What’s the difference between Delia’s recipe and Mary Berry’s?
Both use variations of the all-in-one method, but there are subtle differences. Delia’s tends to be slightly lighter because of the baking powder quantity, while Mary Berry’s sometimes includes a splash of milk. Mary often uses the traditional creaming method in her older recipes. Honestly, both are excellent – it comes down to personal preference. I use Delia’s because it’s what I learned first and it’s completely reliable.
Final Thoughts: Why This Cake Is Worth Mastering
There’s something deeply satisfying about pulling a perfect Victoria sponge out of the oven. It’s not flashy. It won’t get you thousands of Instagram likes. But it’s a proper skill that British bakers have been perfecting for generations, and being able to make one well feels like you’ve been initiated into a club.
I’ve brought this cake to countless gatherings over the years. School fetes, neighbours’ coffee mornings, family celebrations. Every single time, someone asks for the recipe. Every single time, I tell them: “It’s just Delia’s, but follow these tips…” And then I watch them make the same mistakes I did until they finally get it right.
The beautiful thing about Delia Smith’s Victoria sponge is that it’s forgiving once you understand what it needs. Room temperature ingredients. Soft butter. Don’t overmix. Don’t peek. Those four rules will sort out 90% of problems.
Is it the fanciest cake in the world? Absolutely not. But on a Sunday afternoon with a proper cup of tea, watching your kids demolish slices while arguing over who gets the bigger piece, there’s honestly nothing better. Even my coffee-drinking American heart has learned to appreciate that.
See more Baking Posts
See more of my favourite Delia Smith Recipes:
Delia Smith Pancakes
Delia Smith Pavlova
Delia Smith Scones
Delia Smith Chocolate Torte
Delia Smith Meringue
Delia Smith Red Cabbage
Delia Smith Lasagne
Delia Smith Plum Jam
Delia Smith Dundee Cake
Delia Smith Trifle

Becky is the voice behind Life in Velvet, an organised, intentional living blog focused on practical food, calm homes, thoughtful projects, and everyday systems that make real life feel easier. A mum of 3 living in the UK, Becky writes from lived experience, sharing what works, what doesn’t, and the decisions that make family life run more smoothly.
With a background in marketing and content writing, and over a decade of blogging experience, she brings a thoughtful, structured approach to everything from baking and home projects to routines and decision-making. Life in Velvet is where planning meets creativity, with ideas designed for real homes and real life.