

Ah, the humble Dutch braid. So pretty. So sleek. So infuriating the first dozen times you try it on your own head. But I promise, once you’ve cracked it, Dutch braiding becomes second nature, and honestly, kind of addictive. Whether you’re looking to add flair to your everyday hair or trying to master a look for a festival, wedding, or your next gym session (hello, secure gym-head style!), my guide will hopefully help!
Grab your brush, a mirror – you’re about to learn how to Dutch braid like a pro.
A Bit of Background: What Is a Dutch Braid?
Let’s start at the beginning. A Dutch braid is basically a reverse French braid. Instead of crossing the hair over the middle section like you would in a French braid, you cross it under. That’s what gives the Dutch braid its signature 3D, raised look. It sort of “pops out” from the head, rather than blending in like a French braid.
So if you’ve ever wondered about Dutch braid vs French braid, that’s the main difference. Dutch = under. French = over.
Also, can we just admit that the Dutch vs French braid debate is kind of like the hair world’s version of tea vs coffee? Some days you want sleek and subtle, other days you want bold and textured.
What You’ll Need
Before we get into the juicy part (a.k.a. the Dutch braid tutorial), here’s what you’ll want to have ready:
Essentials:
-
A brush or wide-tooth comb (tangle-free hair = happy braiding)
-
A fine-tooth comb (optional, but great for sectioning)
-
Hair elastics (clear or ones that match your hair)
-
A mirror – and ideally a hand mirror or two if you’re attempting the back of your head
-
Hairspray or texturizing spray (optional, but helpful if your hair is slippery)
-
Clips to section off your hair (again, optional but makes life easier)
Bonus points if you’ve got a friend to practice on first—then try it on yourself once you get the hang of it.
How to Dutch Braid: Step-by-Step
Alright, let’s get into the nitty-gritty. If you’re a beginner, don’t worry, this Dutch braid tutorial is broken down into simple, manageable steps.
Step 1: Prep Your Hair
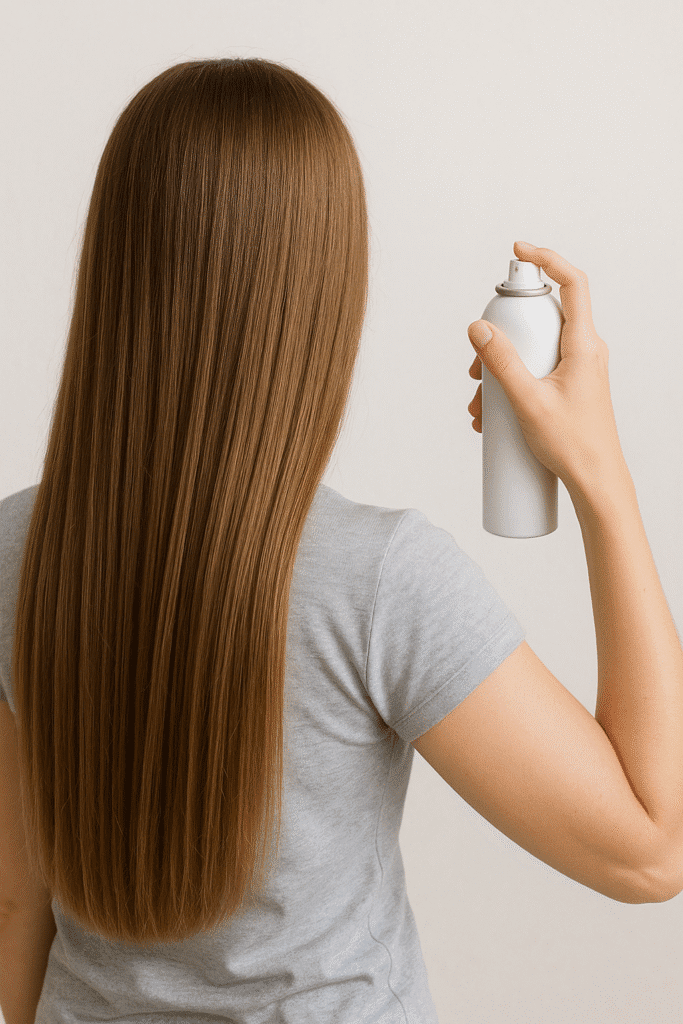
Start with dry, brushed hair. If it’s super clean and silky, a bit of dry shampoo or texturizing spray can help give it some grip (so it doesn’t just slip through your fingers like a rogue spaghetti noodle).
Step 2: Section It Out
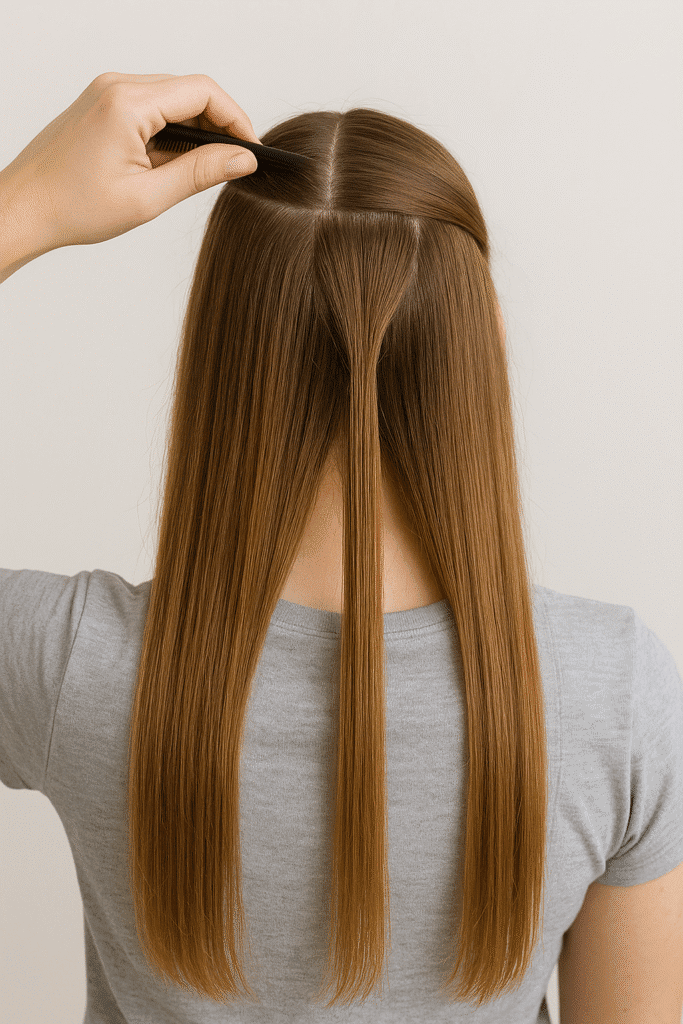
Use your comb to take a section of hair from the top of your head, roughly from temple to temple. This is your “starter section.”
Divide this section into three equal parts.
Step 3: Start Braiding
Here’s the magic part.
-
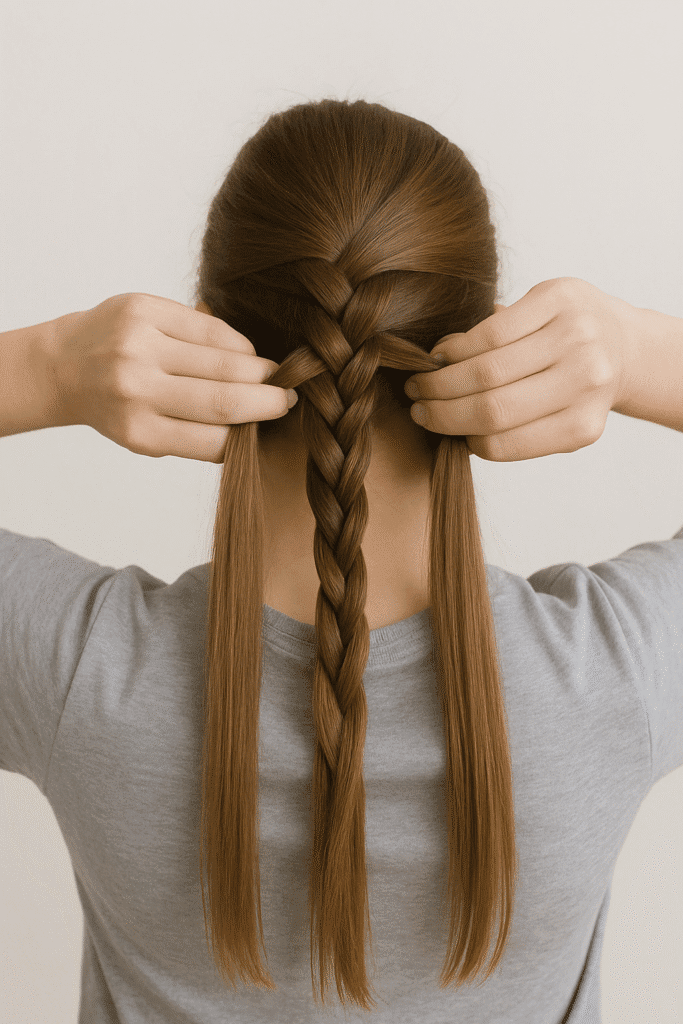
Take the right strand and cross it under the middle one.
-
Then take the left strand and cross it under the new middle one.
This is your base braid. It’s the same idea as a regular braid, but you’re always crossing under, not over. That’s the key to creating the Dutch braid’s raised look.
Step 4: Add More Hair (This Is Where It Gets Dutch-y)
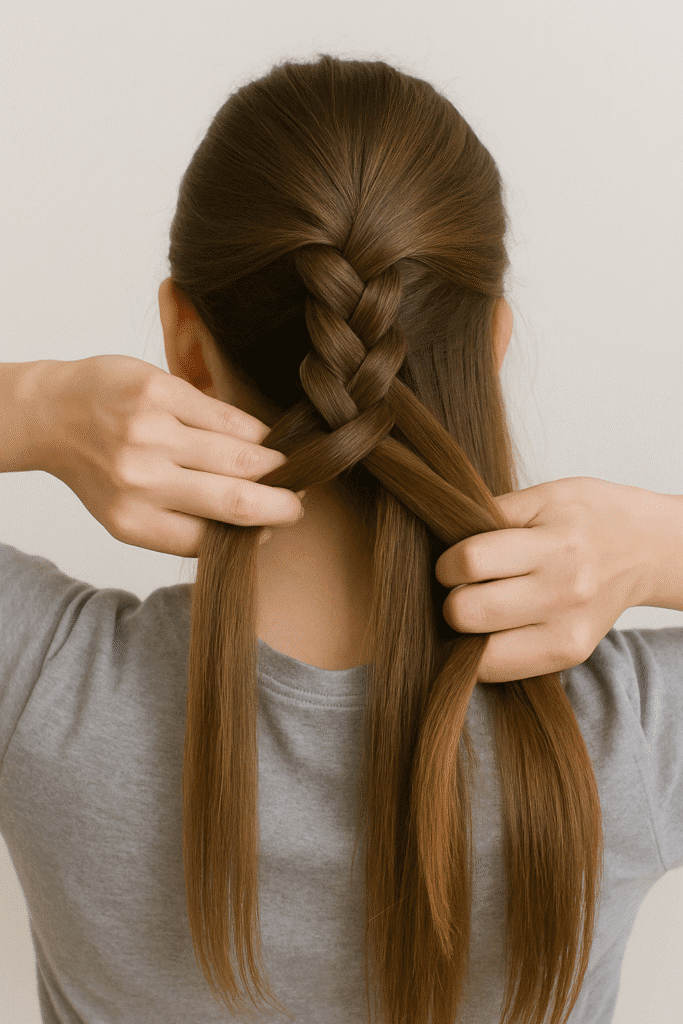
Now, every time you move a section under the middle, add a small bit of hair to it from that side of the head.
-
So when it’s the right strand’s turn, add hair from the right side of your head before crossing it under.
-
Then when it’s the left strand’s turn, do the same on the left side.
Keep your grip firm but not too tight, you want the braid snug, but not headache-inducing.
Step 5: Keep Going!
Continue this process all the way down your head, adding hair each time before crossing under. Once you reach the nape of your neck and run out of hair to add, just finish it off with a regular three-strand braid and secure with a hair tie.
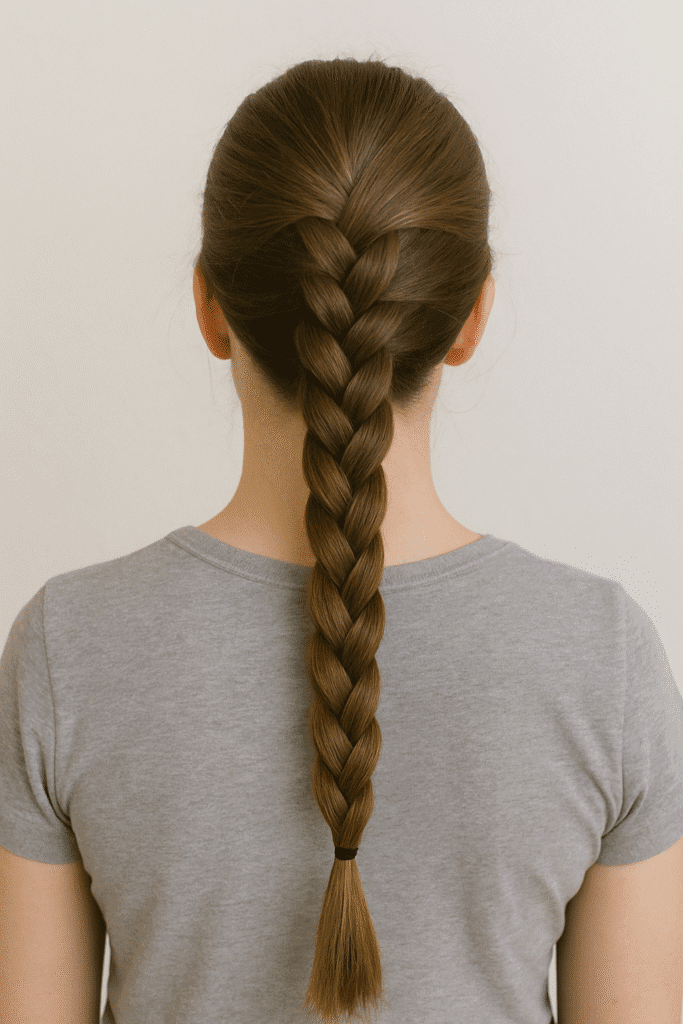
Step 6: Pancake It (Optional, But Cute)
If you like the soft, boho vibe, gently pull at the loops of the braid to “pancake” it and make it look thicker and more voluminous. Be gentle, especially if your braid is on the tighter side.
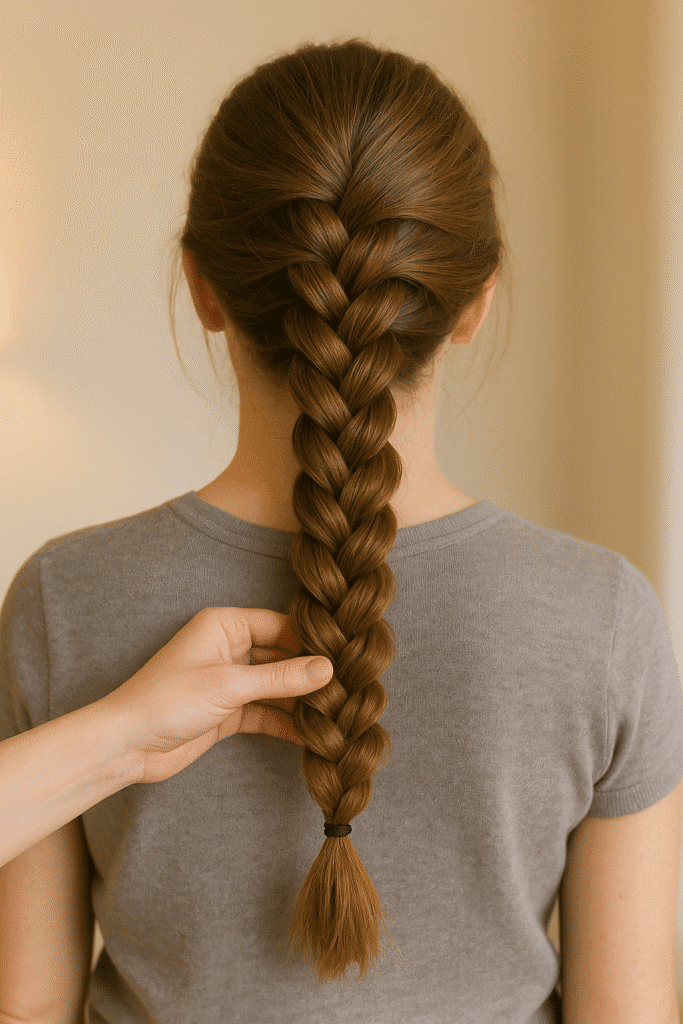
How to Dutch Braid Your Own Hair (Yes, You Can!)
Okay, so doing a Dutch braid on someone else? Easy-peasy once you’ve practiced a few times.
Doing a Dutch braid on your own head? That’s where things get tricky—but not impossible!
Here are my top tips for mastering how to Dutch braid your own hair:
-
Start with one side: Try doing just one side (like a half-up style) before going for full-on double Dutch braid pigtails.
-
Use two mirrors: A mirror behind and in front helps massively.
-
Go slow: Don’t rush. The more methodical you are, the more your hands will get used to the motion.
-
Practice makes perfect: Your first one might look like a confused twisty mess. That’s okay. Keep going.
And once you’ve mastered the single braid? It’s time for double Dutch braid time!
Dutch Braid Hairstyles to Try
Once you’ve nailed the basics, Dutch braids open up a whole world of cute hairstyles. Here are some of my faves:
1. Double Dutch Braid Pigtails
A classic, and perfect for the gym, festivals, or when you want to look effortlessly cool. Bonus: looks great under a beanie.
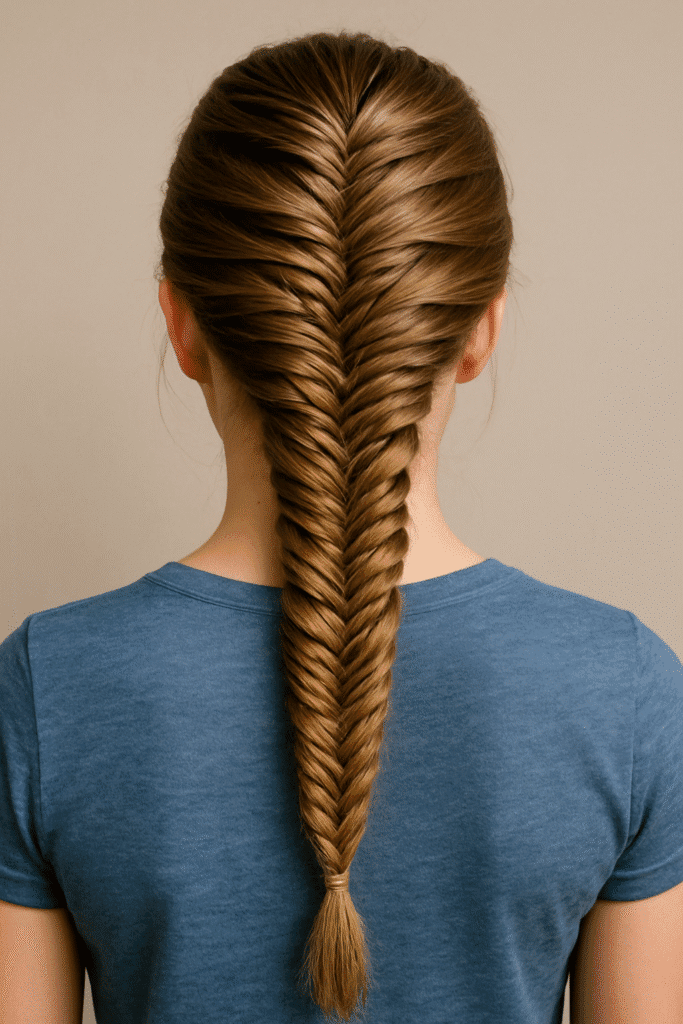
2. Dutch Fishtail Braid
Combine the Dutch braid technique with a fishtail finish for something a little fancy. It takes longer but looks so impressive.
3. Dutch Braid into a Bun
Braid your hair down into a low or high bun. Great for weddings or formal events, or honestly, just a Monday where you want to feel put-together.
4. Crown Dutch Braid
Wrap a Dutch braid around your head like a halo. It’s romantic, it’s whimsical, it’s giving milkmaid-meets-fairy-princess energy. My friend does this one all the time and I love it.
5. Half-Up Dutch Braid
Start with two small Dutch braids at the front and secure them at the back of your head. Instant Pinterest hair.
All Your Dutch Braid Questions Answered
Is a Dutch braid the same as a French braid?
Nope! A Dutch braid vs French braid comes down to the direction you cross the hair. Dutch = under, French = over. Dutch braids sit on top of the hair, while French braids look like they’re woven into the scalp.
How do I do a Dutch braid on myself?
It takes practice, but you can definitely learn how to Dutch braid your own hair with time. Use mirrors, start with one side, and go slow. Watch videos and try following along.
What’s the difference between a Dutch braid and a Dutch fishtail braid?
A Dutch braid uses three strands and crosses them under, while a Dutch fishtail braid uses two strands and takes small pieces from the outside and crosses them under as well. The result is more intricate and delicate-looking.
How long does it take to Dutch braid your hair?
Honestly? Depends on your skill level and hair length. A beginner might take 15–30 minutes. Once you’re confident, you can whip up a braid in 5–10 mins, especially if you’re going for double Dutch braid pigtails.
Does a Dutch braid stay in all day?
Yes, especially if it’s tight and secure. That’s why these hairstyles are so popular for sports, school runs, hikes, and basically any time you don’t want to deal with your hair for hours.
Learning how to Dutch braid can feel a bit like learning to ride a bike. Confusing at first, then suddenly- bam! You’ve got it. Once it clicks, you’ll be braiding everything. Your hair. Your friend’s hair. Your dog’s tail (okay maybe not, but you get the point).
Whether you’re team Dutch, team French, or loving both (no need to choose sides in the Dutch vs French braid world!), mastering this skill opens up so many cute hairstyle options. So keep practicing, keep braiding, and don’t forget to take a selfie when you finally nail it.
See more hair, fashion and beauty posts here!

Becky is the voice behind Life in Velvet, an organised, intentional living blog focused on practical food, calm homes, thoughtful projects, and everyday systems that make real life feel easier. A mum of 3 living in the UK, Becky writes from lived experience, sharing what works, what doesn’t, and the decisions that make family life run more smoothly.
With a background in marketing and content writing, and over a decade of blogging experience, she brings a thoughtful, structured approach to everything from baking and home projects to routines and decision-making. Life in Velvet is where planning meets creativity, with ideas designed for real homes and real life.