
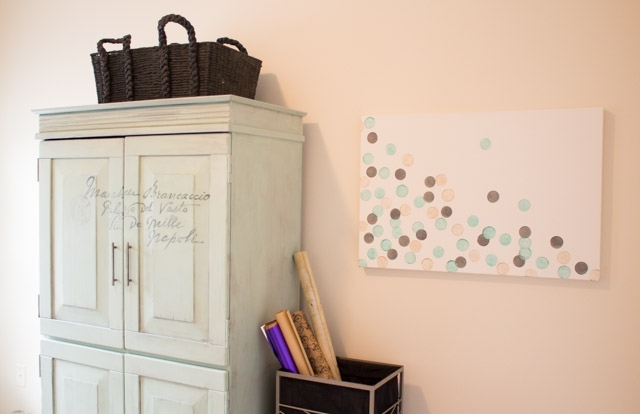
This is the simplest project ever. I created this fun piece of canvas art for my craft room in under 20 minutes.
You will need for the Glitter Dot Canvas Art:
- Canvas (I used a 24 x 36 gallery wrapped canvas…I think the thick sides add a little bit of a professional touch to DIY projects.)
- Assorted colours of craft paint (I used DecoArt Glamour Dust Glitter Paint in Aqua, Champagne and Black Ice, available here.)
- Large foam pouncer
- Nail polish remover and cotton balls (for cleaning pouncer between colours)
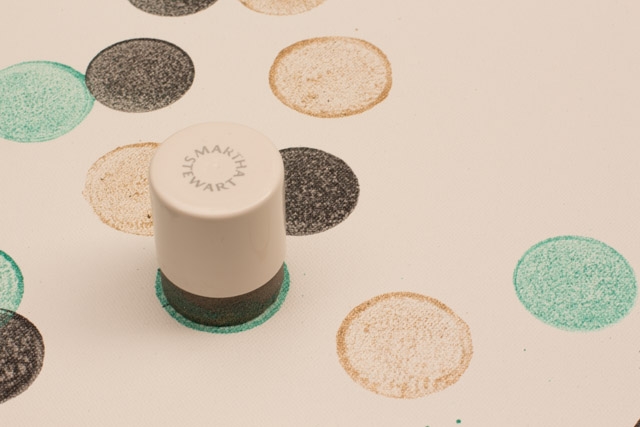
Dip your sponge in paint and practice a few dots on scratch paper. A little trick for perfect circles is to finish each dot with a twist of your sponge. Lightly clean your pouncer between colours with a cotton ball and nail polish remover.
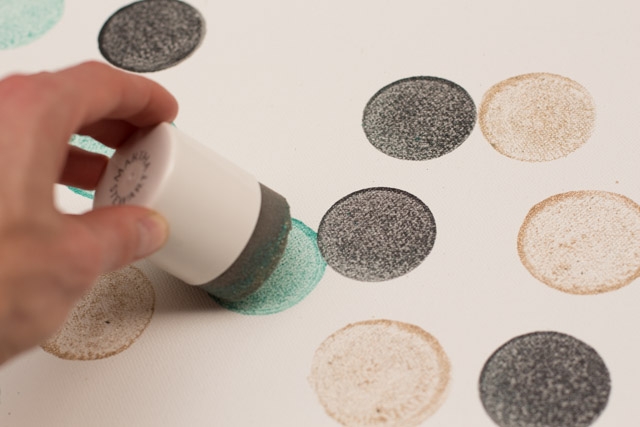
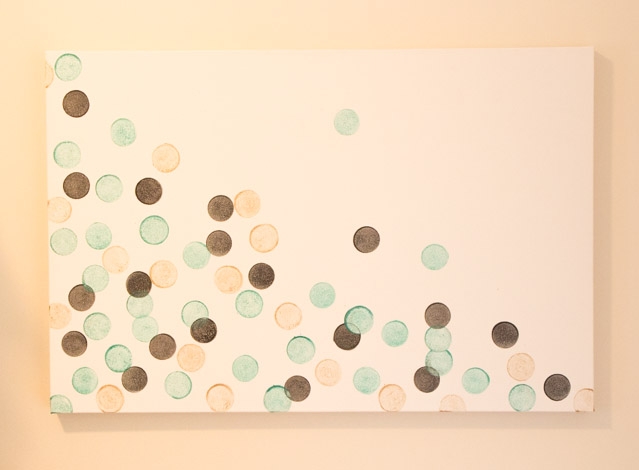
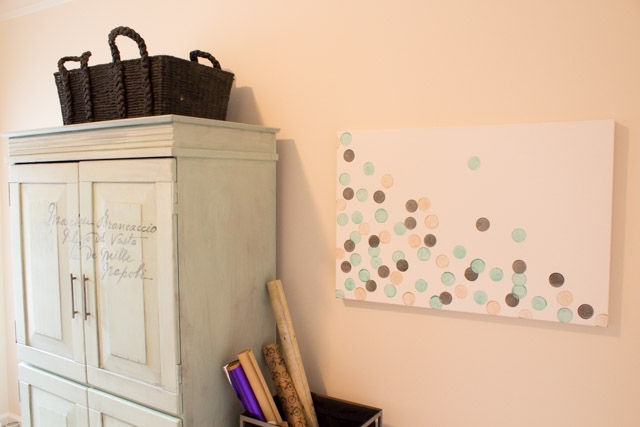
Fill the canvas with dots in any pattern you like. I chose a pattern concentrated in the lower corner, but you can also keep them in rows of fill the entire canvas.
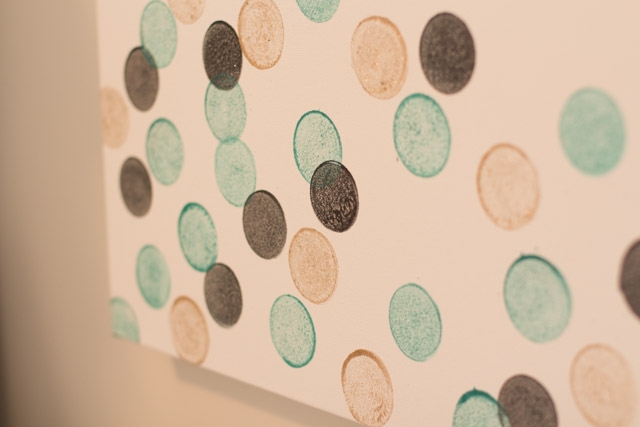
Allow the dots to dry completely.
Ta-dah! One cool glitter dot canvas art print for your home!
Tips for DIY Glitter Dot Canvas Art Project:
-
Choose the Right Canvas Size:
Select a canvas size that fits your desired design and where you plan to display it. Smaller canvases are perfect for simple patterns, while larger canvases give you more space to play with intricate designs. -
Use High-Quality Glitter:
To ensure your glitter dots are vibrant and last, opt for high-quality glitter. Fine glitter works well for detailed dots, while chunky glitter adds texture and dimension. Consider mixing different glitter sizes for an added effect. -
Prepare the Canvas:
Before starting, make sure your canvas is clean and free of dust. If desired, you can paint the canvas background with acrylic paint to create a complementary color for your glitter dots. -
Use Mod Podge or Glitter Glue:
For best results, use Mod Podge, glitter glue, or a clear-drying craft glue as your adhesive. Apply a thin layer of glue to the areas where you want your glitter dots. Be mindful to not use too much glue, as it could cause the glitter to clump together. -
Create a Pattern or Freehand It:
Decide whether you want a structured design or a more spontaneous look. You can use a stencil or draw your design lightly with a pencil before applying the glitter. If you’re going for a freehand design, make sure to leave space between your dots for a clean, polished look. -
Apply the Glitter Carefully:
For each dot, carefully sprinkle glitter over the glued area. It’s best to do this in small sections at a time to prevent the glue from drying too quickly. You can use a small spoon, a glitter shaker, or your fingers to apply the glitter. -
Tap Off Excess Glitter:
Once the glitter is applied, gently tap the canvas to remove excess glitter. You can also hold the canvas upside down over a piece of paper to catch any stray glitter and reuse it. -
Layering for Depth:
To add depth and dimension to your artwork, layer different sizes or colors of glitter dots. Start with a base layer of fine glitter, then add a second layer of chunky glitter on top to create a more textured, multidimensional effect. -
Let It Dry Completely:
After applying your glitter dots, let the canvas dry completely. Depending on the glue you’re using, this could take a few hours. Make sure everything is securely set before moving or hanging your canvas. -
Seal the Glitter:
To keep your glitter dots in place and prevent them from shedding, apply a thin coat of Mod Podge or clear acrylic sealer over the entire canvas. This will lock the glitter in place while giving your artwork a glossy finish. Make sure the sealer is fully dry before handling the canvas. -
Frame or Hang Your Artwork:
Once your glitter dots are fully dry and sealed, frame your canvas or hang it as is. Glitter dot art can be a striking focal point, especially when displayed in the right lighting, which will highlight the sparkle and shine of the glitter.
See more of my DIY posts here

Becky is the voice behind Life in Velvet, an organised, intentional living blog focused on practical food, calm homes, thoughtful projects, and everyday systems that make real life feel easier. A mum of 3 living in the UK, Becky writes from lived experience, sharing what works, what doesn’t, and the decisions that make family life run more smoothly.
With a background in marketing and content writing, and over a decade of blogging experience, she brings a thoughtful, structured approach to everything from baking and home projects to routines and decision-making. Life in Velvet is where planning meets creativity, with ideas designed for real homes and real life.