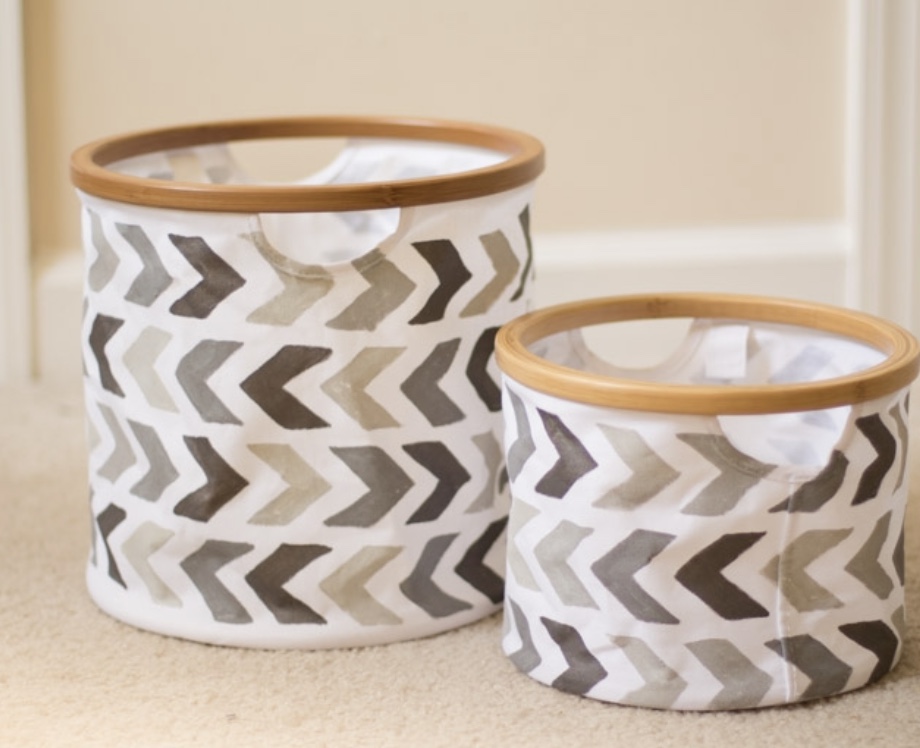
If you want to add some personality to your home storage without spending a fortune, stencilling plain canvas baskets is one of the most satisfying craft projects you can do on a quiet afternoon. You end up with something that looks genuinely considered, the kind of thing you’d spot in an Anthropologie homeware section and then talk yourself out of, and it costs a fraction of what you’d pay for the actual thing.
I’ve been making these for years, and the version I’m sharing here is the one I’ve settled on after a fair bit of trial and error. The technique is slightly different from stencilling a flat tote bag, because you’re working on a round, flexible surface that doesn’t play by the same rules. Once you understand that, the whole thing becomes much more manageable.
What makes these canvas storage baskets worth the effort
These aren’t just decorative. A good canvas storage basket holds a surprising amount, folds flat when you don’t need it, and looks far nicer on a shelf than a cardboard box. I’ve used mine in the home office, in the kids’ rooms, and on the living room shelves. They work anywhere you need contained clutter without the visual noise.
The Anthropologie version of this kind of thing, patterned and slightly hand-painted looking, retails for considerably more than a plain basket costs. The gap between the two is just a stencil and an afternoon, which is exactly the kind of project I find genuinely enjoyable.
What you’ll need to make stencilled canvas baskets
You don’t need a huge amount for this project, and most of it is available at Hobbycraft or on Amazon UK.
Plain canvas storage baskets. I used reversible canvas organisers, and there are very similar ones available here (https://www.workwearexpress.com/westford-mill-reversible-3-l-canvas-organiser). Look for ones with a tighter weave if possible. A looser weave will soak up more paint and make even coverage harder to achieve.
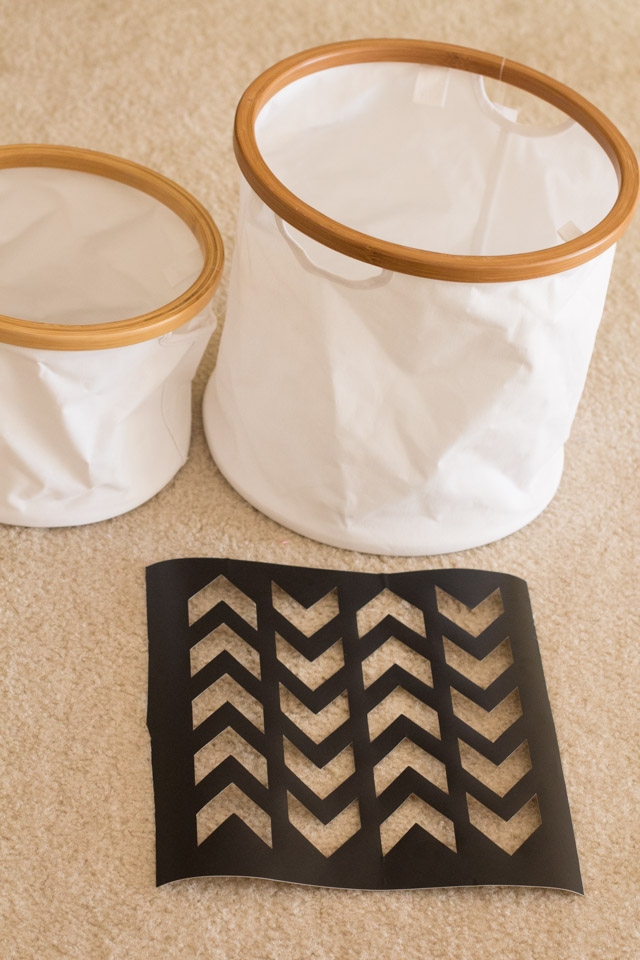
Adhesive vinyl sheet or a ready-made stencil. I used a 30cm x 30cm (12″ x 12″) adhesive vinyl sheet cut on my Cricut. More on that below.
A pen for tracing. This is the step that makes curved-surface stencilling actually work, and I’ll explain why in a moment.
Fabric paint in your chosen colours. I mixed my own palette of dark charcoal and warm cream, with the mid-tones blended in between. Any fabric-specific paint will do. Pebeo Setacolor and Daler Rowney System 3 Fabric are both good options available in the UK, and you can mix colours freely across both ranges.
A small, stiff-bristled paintbrush. Not a soft watercolour brush. You want something that lets you dab the paint on with control rather than drag it across the surface.
Optional: repositionable stencil adhesive spray. If you’re using a pre-cut stencil rather than adhesive vinyl, a stencil spray will help it stay put on the curved basket surface.
Making your stencil with a Cricut (or without one)
My Cricut was a birthday gift from my parents, and this was one of the first proper projects I used it for. I cut the stencil from an adhesive vinyl sheet, which has a sticky back that you peel off and press directly onto the surface you’re working on. It’s clean, it’s reusable if you’re careful, and it lets you cut whatever design you like.
If you don’t have a cutting machine, you don’t need one. A ready-made stencil from Hobbycraft with repositionable stencil adhesive spray on the back does exactly the same job. The spray adhesive is the functional equivalent of the vinyl’s sticky backing: it keeps the stencil from shifting while you work, which is particularly important on a curved surface.
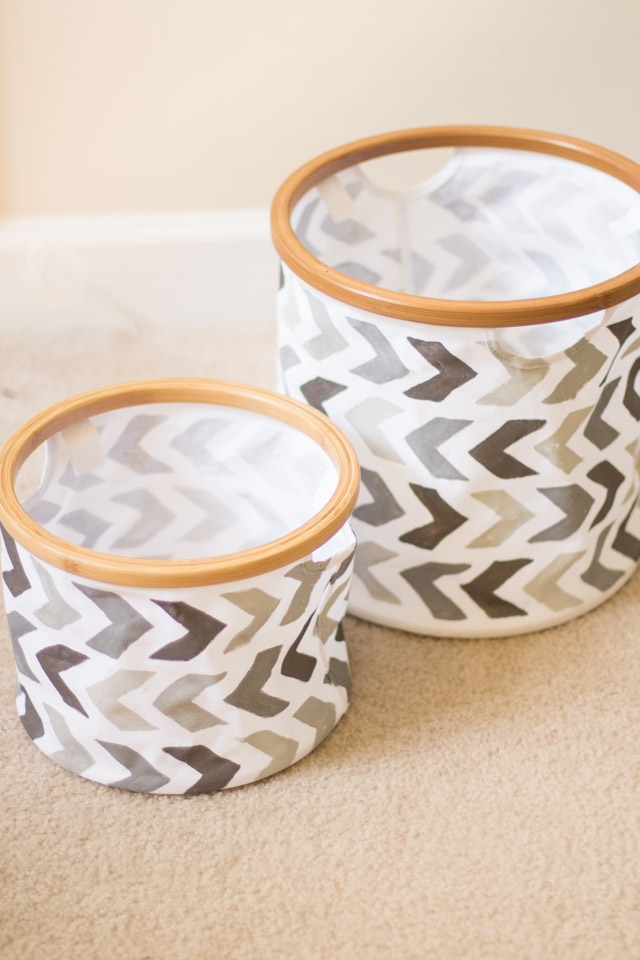
For the design, I went with a repeating arrow pattern. It’s geometric enough to look intentional, but not so precisely regular that any small variation stands out. That’s a useful rule of thumb for any stencil on a rounded surface: geometric patterns with some natural variation built in are far more forgiving than anything that relies on perfectly straight lines.
The technique that makes stencilling a round basket actually work
This is the bit most tutorials miss, because most tutorials are written for flat tote bags or flat canvases. A canvas storage basket is round and flexible, which creates a problem: the stencil lifts away from the surface at the curves, paint seeps underneath, and you end up with blurry edges instead of crisp lines.
Here’s what I do instead, and it works considerably better.
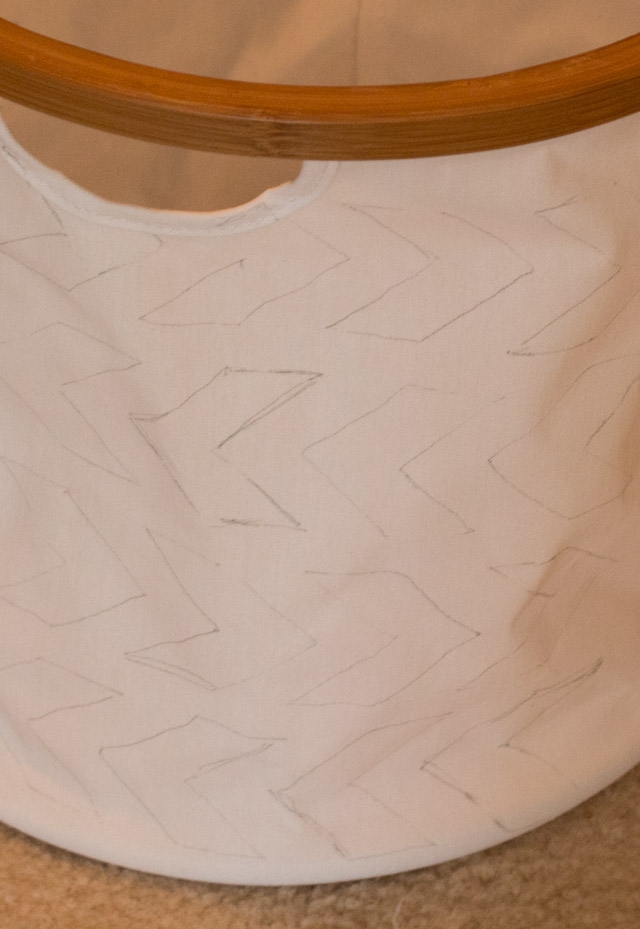
Apply the vinyl stencil (or adhesive-backed stencil) to the basket surface and smooth it down as much as you can. It won’t lie completely flat because of the curve, and that’s fine. Rather than painting directly through the stencil openings, trace the inside of the shapes onto the basket with a pen first, then remove the stencil and paint within your traced lines.
This means the stencil never gets paint on it, so you can reuse the same piece across all four sides of both baskets without the shapes getting clogged. I used one vinyl cut for two full baskets, all four sides each, and it was still clean at the end.
If you do want to paint directly through the stencil, press the edges down firmly with your fingers as you go, and use very little paint on the brush at a time. Load the brush, dab most of it off onto a piece of kitchen roll, and then work. This dry brush approach gives much crisper edges than loading the brush fully and hoping for the best.
Mixing your paint colours
This is where I went wrong on my first attempt. I mixed what I thought was a generous amount of paint, ran out halfway through the second basket, and could not replicate the colour again. Matching a mixed shade after the fact is essentially impossible, particularly when you’ve been blending between several tones.
Mix considerably more than you think you’ll need. Canvas is thirsty. It absorbs paint quickly, so you’ll use more per coat than you’d expect on a less porous surface, and you’ll almost certainly need two coats for solid coverage.
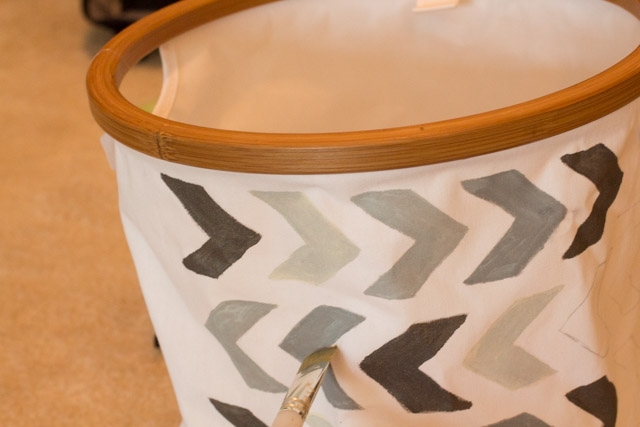
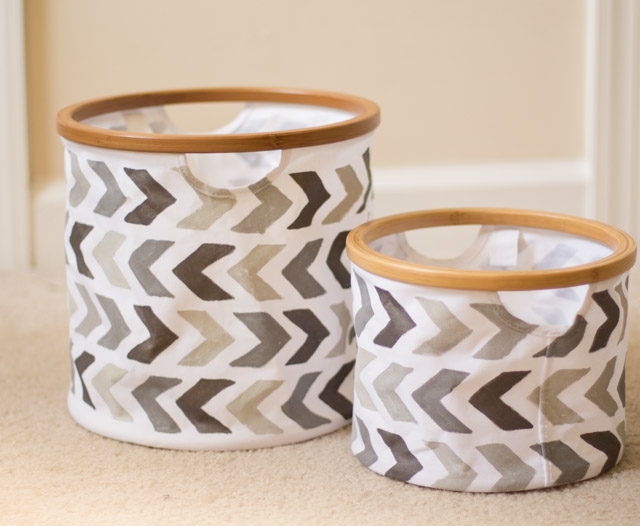
For my palette, I used a dark charcoal at one end and a warm cream at the other, then mixed a mid-tone and a lighter mid-tone between them. Painting each arrow shape in a slightly different shade from that range gave the finished baskets some tonal depth, rather than a flat single-colour result. It looks much more hand-crafted that way, which is rather the point.
If you’re using ready-made fabric paint rather than mixing, buy an extra bottle of any colour you’re relying on heavily. Running out midway is genuinely frustrating.
Painting the baskets
Work on one side of the basket at a time, letting it rest between rotations so you’re always painting on a stable surface.
If you’ve traced your design, you’re simply filling in the shapes with your brush. If you’re painting directly through the stencil, keep that dry brush technique going throughout. It takes more patience but the result is worth it.
The canvas texture will make your paint look a little uneven at first. Hold the basket up to a window between coats and the light coming through will show you immediately where you’ve got thin patches. I had to go back into a few of the arrow points where the paint had gone thin at the edges, and that window check saved me from missing them.
Two coats is enough for good coverage in most cases. Let each coat dry completely before adding the next. Fabric paint dries to the touch quickly, but rushing the second coat over a still-damp first coat will lift the paint and make coverage patchy.
The pace of this project suits an evening in front of something good on television. I knocked out most of two baskets over a couple of episodes, which felt like exactly the right balance of productive and relaxing.
Finishing and heat-setting
Once you’re happy with the coverage, leave the baskets to dry for at least 24 hours before handling them heavily.
If you’ve used fabric paint, it’s worth heat-setting it once it’s fully dry. Set an iron to medium with no steam, place a pressing cloth or a clean piece of cotton fabric over the painted area, and press gently for around 30 seconds per section. This helps bond the paint to the canvas fibres and makes it more durable over time.
Canvas storage baskets aren’t usually washed the way clothing or tote bags are, so heat-setting is less critical here. But if there’s any chance of yours getting damp or needing a wipe-down, that 10 minutes of ironing is worth it.
Where to use your finished baskets
The ones I made live in the home office, holding all the small things that otherwise end up loose and annoying: cables, notepads, pens, stationery that doesn’t have a better home. They hold a lot, they look good on a shelf, and because they’re canvas they fold flat if you need to reclaim the space.
Beyond the home office, they work well on bedroom shelves for smaller accessories or craft supplies, in a bathroom cupboard for toiletries, or on a playroom shelf to contain the specific category of small toys that multiplies without warning. On a kitchen worktop, they’re good for batteries, rubber bands, and all the miscellaneous drawer items that never quite find a permanent home.
They pair nicely alongside my vintage storage boxes, if you’re going for a cohesive shelf look. The two projects use a similar aesthetic and work well together on the same shelving unit.
Frequently asked questions
Can I stencil canvas baskets without a Cricut?
Absolutely. A Cricut or similar cutting machine makes it straightforward to cut intricate designs from vinyl, but you don’t need one for this project. Ready-made stencils in a wide range of designs are available at Hobbycraft, The Range, and on Amazon UK. Use a repositionable stencil adhesive spray on the back to help them stay in place on the curved surface of the basket, and try the tracing method above if painting directly through the stencil is giving you blurry edges.
What paint should I use on canvas storage baskets?
Fabric paint is the best choice for anything that might need wiping down or occasional cleaning. Pebeo Setacolor and Daler Rowney System 3 Fabric are both readily available in the UK through Hobbycraft and Amazon UK. If you want to use regular craft acrylic paint instead, mix in a fabric medium before you start. Fabric medium keeps the paint flexible once dry and helps it adhere properly to the fibres. Without it, craft acrylic on fabric can go stiff and crack with handling over time.
How do I stop paint bleeding under the stencil on a curved surface?
Two things help most. First, use very little paint on your brush at a time. Dab most of it off onto a piece of kitchen roll before you touch the basket, so you’re working with a near-dry brush. Second, if direct stencilling is still giving you bleed, switch to the tracing method: apply the stencil, trace the shapes with a pen, remove the stencil, and paint within the lines. It completely eliminates the bleed problem because the stencil isn’t acting as a barrier at all, just as a guide.
Do I need to heat-set fabric paint on a canvas basket?
For storage baskets that won’t be washed regularly, heat-setting is optional but recommended for longevity. Use a dry iron on a medium setting (no steam), place a pressing cloth over the painted area, and press for about 30 seconds per section. Do this once the paint is completely dry, after at least 24 hours. It makes a noticeable difference to how well the paint holds up over time.
Where can I buy plain canvas storage baskets in the UK?
Good options include the IKEA KNIPSA range, Dunelm, The Range, and Amazon UK. Look for ones described as canvas or natural cotton rather than jute. Jute has a rougher, more open texture that’s harder to paint on evenly and doesn’t take a stencil cleanly. The Westford Mill reversible canvas organisers linked in the supplies section above are a solid choice if you want something foldable with a clean surface for painting.
See more posts you might like here:
Home Organisation
Craft Projects you may enjoy!

Becky is the voice behind Life in Velvet, an organised, intentional living blog focused on practical food, calm homes, thoughtful projects, and everyday systems that make real life feel easier. A mum of 3 living in the UK, Becky writes from lived experience, sharing what works, what doesn’t, and the decisions that make family life run more smoothly.
With a background in marketing and content writing, and over a decade of blogging experience, she brings a thoughtful, structured approach to everything from baking and home projects to routines and decision-making. Life in Velvet is where planning meets creativity, with ideas designed for real homes and real life.