
Today I’m going to talk about demin, and those many, many pairs of jeans that I have in my wardrobe and under my bed that I have but just don’t wear anymore. You know those jeans that no longer fit quite right (hello, 3 kids later!), or that aren’t the ‘in’ style at the moment, yet I hang onto them ‘just in case’? Well, don’t throw them out—turn them into something useful for the summer instead: a DIY denim tote bag!
I’ve always loved a bit of upcycling. There’s something really satisfying about giving old items a new lease of life, and denim is one of the best materials for it. It’s sturdy, it looks great even when it’s a bit worn, and we all have a pair or two knocking about that are ready to move on from leg-duty.
So, whether you’re a seasoned sewing wizard or just about managing to thread a needle, this is the perfect ‘softy softly’ project to dip your toes into the world of DIY fashion. It’s budget-friendly, sustainable, and at the end of it, you’ll have a fab new tote to show off. Find out how make a tote bag from old jeans, with this denim tote bag tutorial!
What You’ll Need for your DIY Denim Tote Bag
First things first, gather your materials. Most of this you’ll probably already have lying around:
-
1 pair of old denim jeans (adult size is best)
-
A seam ripper (optional but handy)
-
Pins or fabric clips
-
Needle and strong thread or a sewing machine
-
Lining fabric (optional, but adds a nice touch)
-
Measuring tape
-
Iron (trust me on this one)
-
Chalk or a fabric marker
If you fancy adding a pop of personality, think about extras like:
-
Patches (I teach you how to sew a patch on a bag here)
-
Embroidery thread
-
Fabric paint or iron-on transfers
-
An old belt or webbing for straps (if you don’t want to make denim ones)
Step-by-Step: Denim Tote Bag Tutorial
1. Deconstruct the Jeans
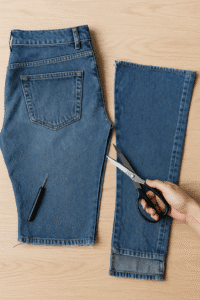
This is where the magic begins. Lay your jeans flat and start by cutting off the legs. The area just under the crotch is usually the widest and most usable. Don’t worry about frayed edges—embrace the rustic charm or trim neatly for a cleaner look.
Open up the leg seams using scissors or a seam ripper. Flatten them out into rectangles. These will become the front and back panels of your tote bag.
Pro tip: If your jeans have fun pockets or embroidery, try to include those in your DIY denim tote bag design!
2. Measure & Cut
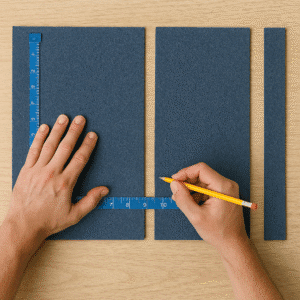
Decide how big you want your bag. A good standard size is around 35cm wide by 40cm tall, but you can go bigger or smaller depending on what you’ll be using it for. Mark out your dimensions with chalk and cut two identical pieces from the denim.
If you’re adding a lining, cut two pieces of your chosen fabric in the same size.
Now’s also a good time to cut out two straps. You can either:
-
Cut long strips from the leftover denim (about 60cm long and 6-8cm wide, depending on how thick you want them), fold them inwards lengthways, and stitch them.
-
Or use an old belt, scarf, or thick ribbon for a more eclectic look.
3. Add Pockets or Decoration (Optional but Fun)
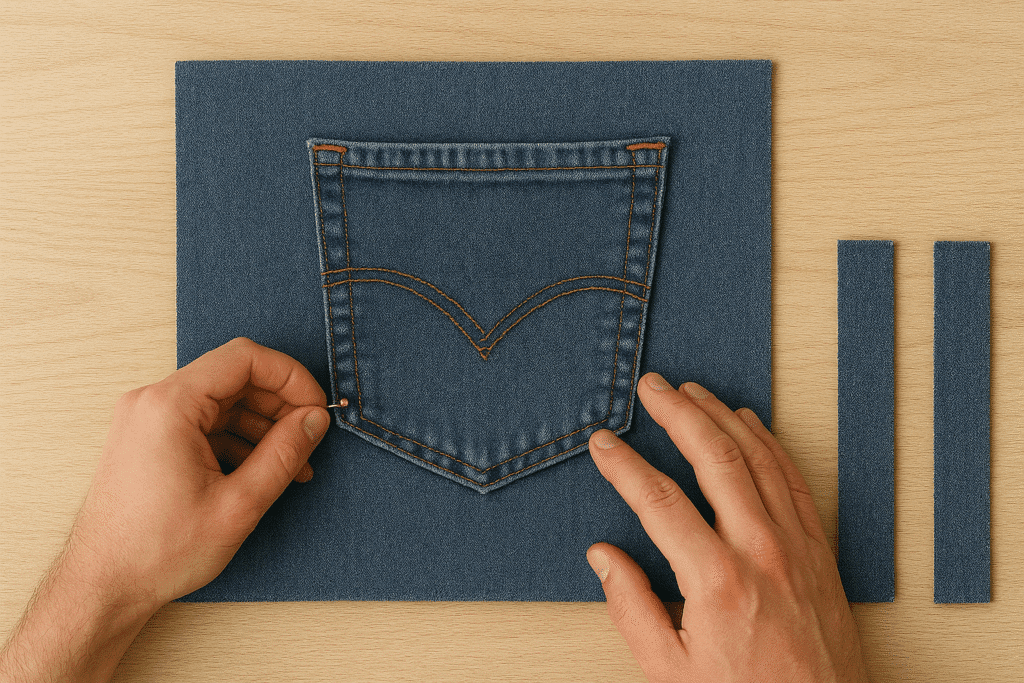
This is your chance to personalise your tote bag. Want a pocket? Use the back pocket from the jeans and stitch it onto one of your panels. Fancy a flower or your initials? Add embroidery or patches before sewing everything together—it’s much easier that way.
4. Sew the Panels

Put the two denim panels right sides together (the sides you want showing should be facing in), pin or clip them in place, and sew around three sides—both long sides and the bottom—using a straight stitch and about a 1cm seam allowance.
If you’re using a sewing machine, a denim needle is helpful here, but if you’re hand-sewing, take your time and use a strong backstitch. Denim is tough, but not invincible.
Optional: For a more structured base, you can box the corners by folding each bottom corner so the seams meet and stitching across about 5cm in from the tip. Then trim the corners.
5. Add the Lining (Optional)
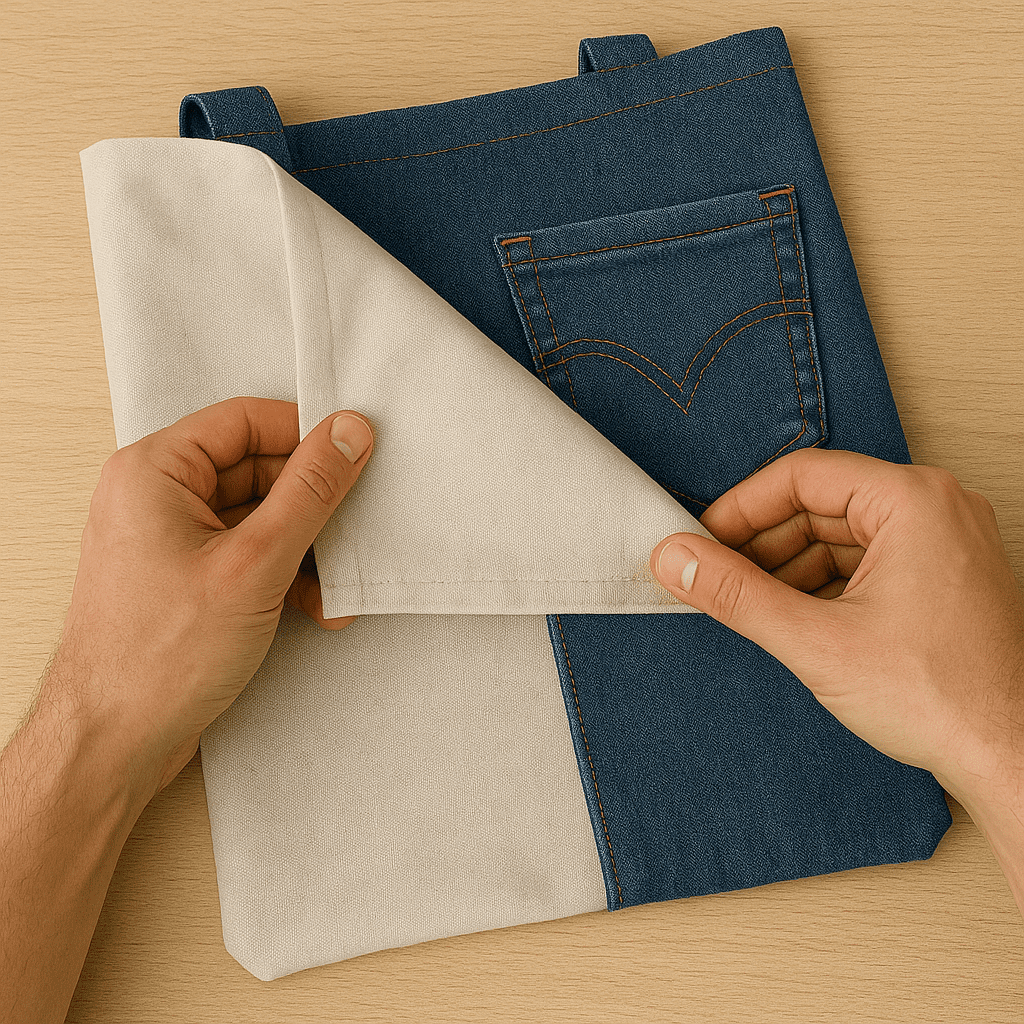
If you’re going for a more finished look, lining your tote bag is a lovely touch. Sew the lining pieces together the same way you did the outer denim, but leave a small gap (about 7–10cm) in the bottom seam. You’ll need this to turn the bag right side out later.
Then, with your denim bag still inside out and your lining right side out, slip the lining inside the denim, so the right sides are facing each other. Pin around the top and sew all the way around the top edge.
Now, carefully turn the bag inside out by pulling it through the hole you left in the lining. Sew that hole closed, tuck the lining inside the bag, and press it neatly with an iron.
6. Attach the Straps
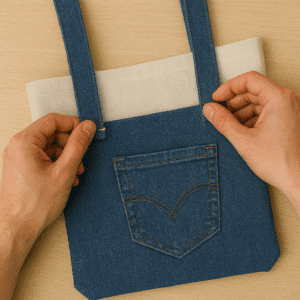
Position your straps evenly on each side of the bag (usually about 8–10cm in from each side edge). Pin them in place and sew them on securely. Go over the stitching a few times—those handles will need to take some weight!
If you’re using denim strips, sew them closed before attaching. If you’re using a belt or something thicker, test it first to make sure your machine can handle it—or sew it by hand using a strong needle and thimble.
And Voila – One Denim Tote Bag, Ready to Go!
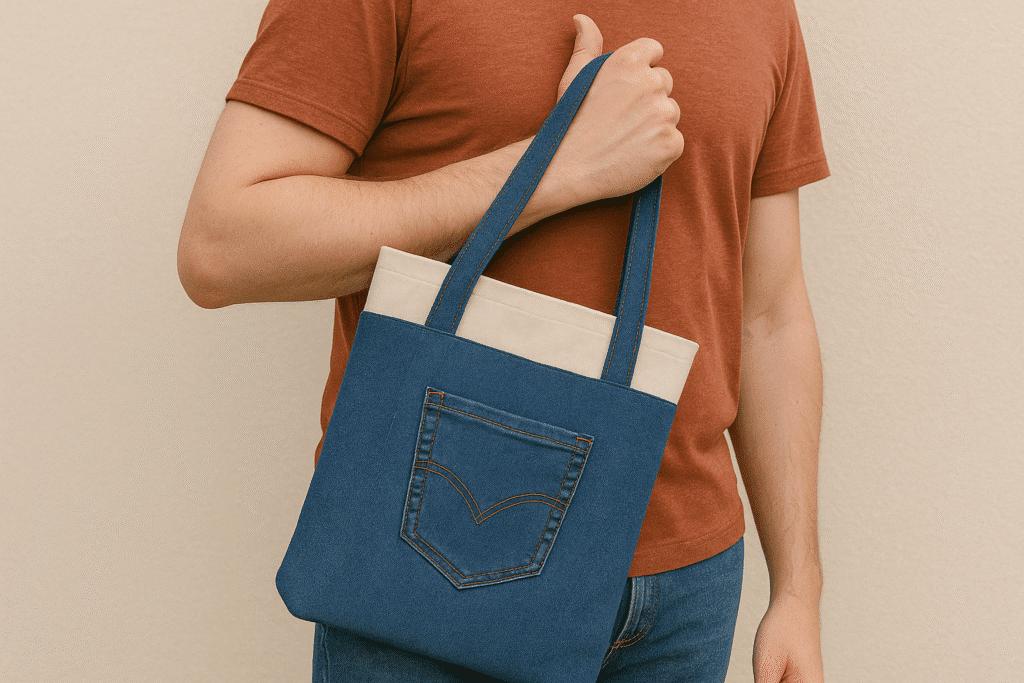
Give your bag a good press with the iron, and you’re done! Your new denim tote is perfect for shopping, days out, books, kids’ stuff, or even as a stylish eco-friendly gift bag.
I love that each one turns out differently, depending on the jeans, the stitching, the little embellishments. They’ve got character and a story to tell, which you just don’t get from a mass-produced bag.
FAQs – Denim Tote Bag Tutorial
Q: Can I make this without a sewing machine?
Absolutely! You can hand-sew everything with a sturdy needle and strong thread. Just allow more time and use a backstitch for durability.
Q: What if I don’t have lining fabric?
No problem. Lining is optional—it just makes the inside look a bit neater and adds extra strength. You can also use an old pillowcase, a tea towel, or any spare cotton fabric you have.
Q: Can kids help with this project?
Definitely. Older children (10+) can help cut, pin, and decorate the panels, and even have a go at simple stitching with supervision. It’s a brilliant way to introduce them to sewing and sustainable fashion.
Q: Do I need a special needle for denim?
If you’re using a sewing machine for denim, a denim or jeans needle works best as it’s stronger. For hand-sewing, just make sure your needle is sharp and robust enough to get through multiple layers.
Q: My bag looks a bit floppy – how can I make it more structured?
You can add interfacing (iron-on fabric stiffener) between the denim and the lining, or box out the corners at the base to give it more shape.
Q: Can I wash the DIY denim tote bag?
Yes—pop it in the machine on a gentle cycle. If you’ve added any decorations, check they’re machine-safe first.
I think the best DIY projects are the ones that are useful, creative, and just a little bit scrappy in the best way. A denim tote bag ticks all those boxes and more. It’s a great way to do your bit for sustainable living too, and once you’ve made one, don’t be surprised if you find yourself eyeing up everyone’s old jeans for your next creation.
So next time you go to clear out your wardrobe, pause before you bin that battered old denim. With a little imagination you could turn it into your new favourite bag!
See more of my sewing posts here

Becky is the voice behind Life in Velvet, an organised, intentional living blog focused on practical food, calm homes, thoughtful projects, and everyday systems that make real life feel easier. A mum of 3 living in the UK, Becky writes from lived experience, sharing what works, what doesn’t, and the decisions that make family life run more smoothly.
With a background in marketing and content writing, and over a decade of blogging experience, she brings a thoughtful, structured approach to everything from baking and home projects to routines and decision-making. Life in Velvet is where planning meets creativity, with ideas designed for real homes and real life.